Home
Products
Downloads
Support
Contact Support
SNAP Support
SPS v9 series Support
DAV Support
Pager Troubleshooting
Manuals & Guides
Technical Documentation
Technical Drawings
Archive
News
Contact Us
☎ 972-479-1702
Home
Products
Downloads
Support
Contact Support
SNAP Support
SPS v9 series Support
DAV Support
Pager Troubleshooting
Manuals & Guides
Technical Documentation
Technical Drawings
Archive
News
Contact Us
☎ 972-479-1702
Support
Contact Support
SNAP Support
SPS v9 series Support
DAV Support
Pager Troubleshooting
Manuals & Guides
Technical Documentation
Technical Drawings
Archive
Technical Drawings
Schematics and diagrams for setup and troubleshooting
View fullsize
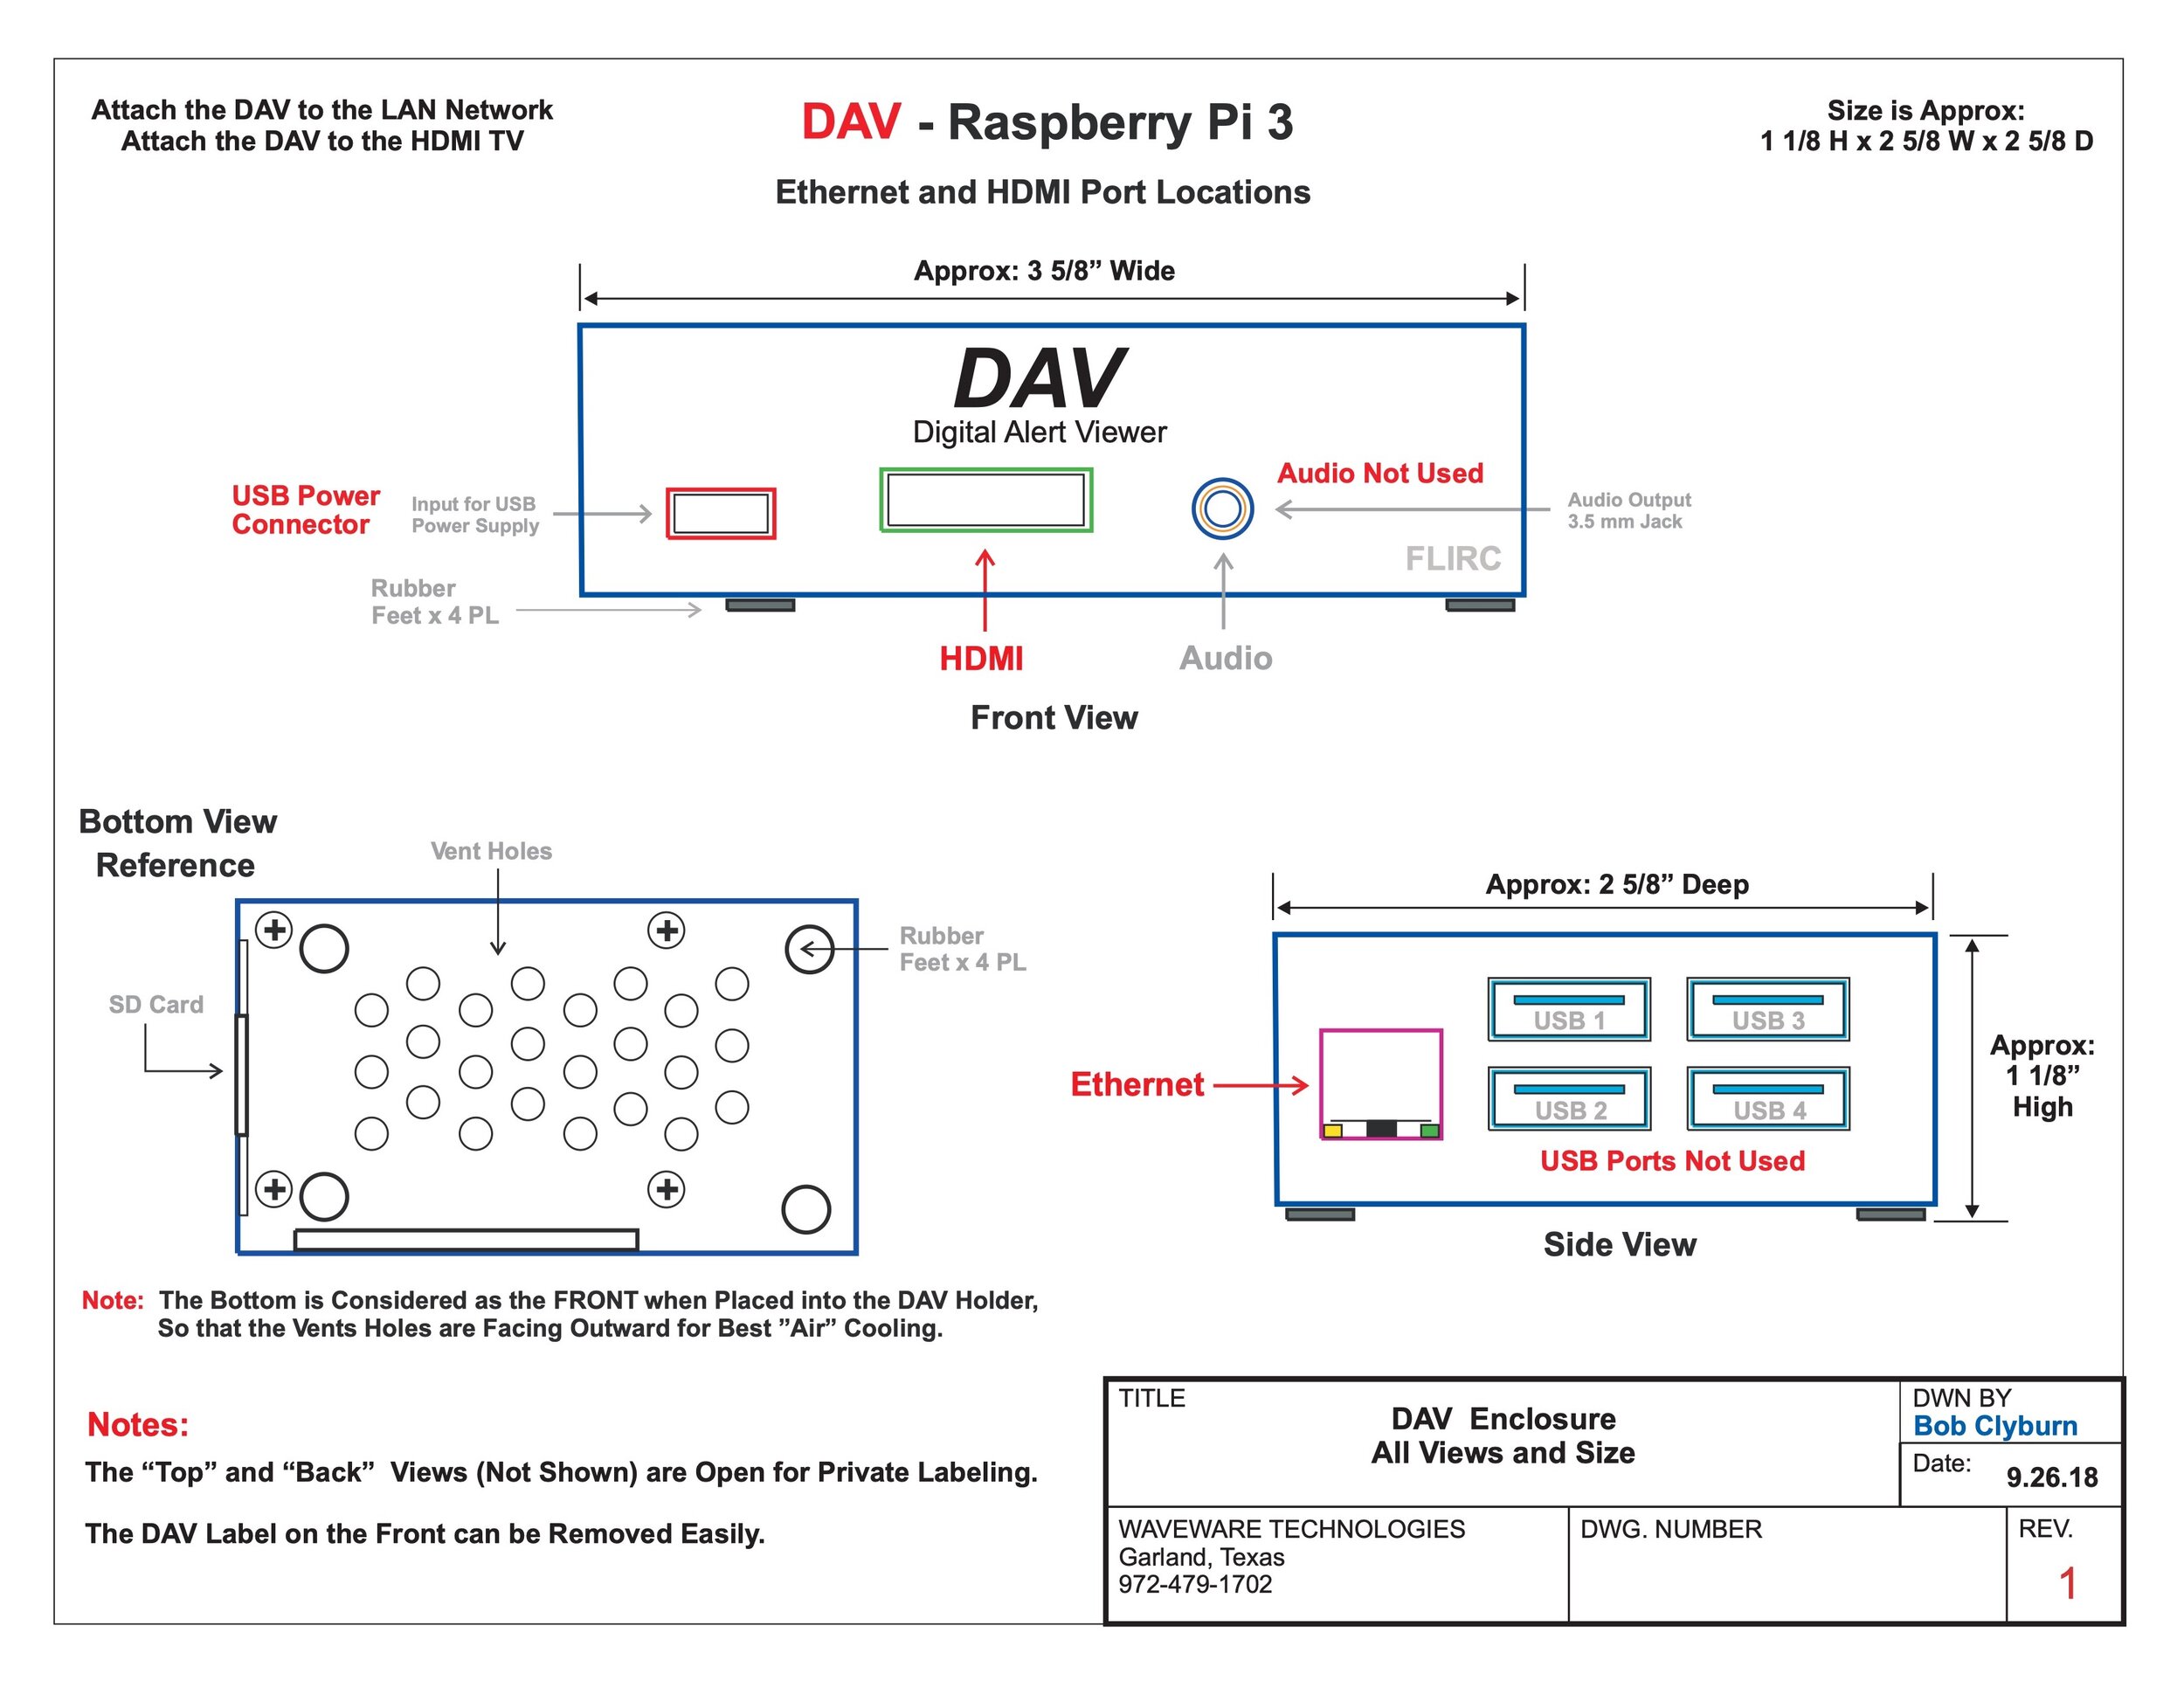
DAV Ports
View fullsize
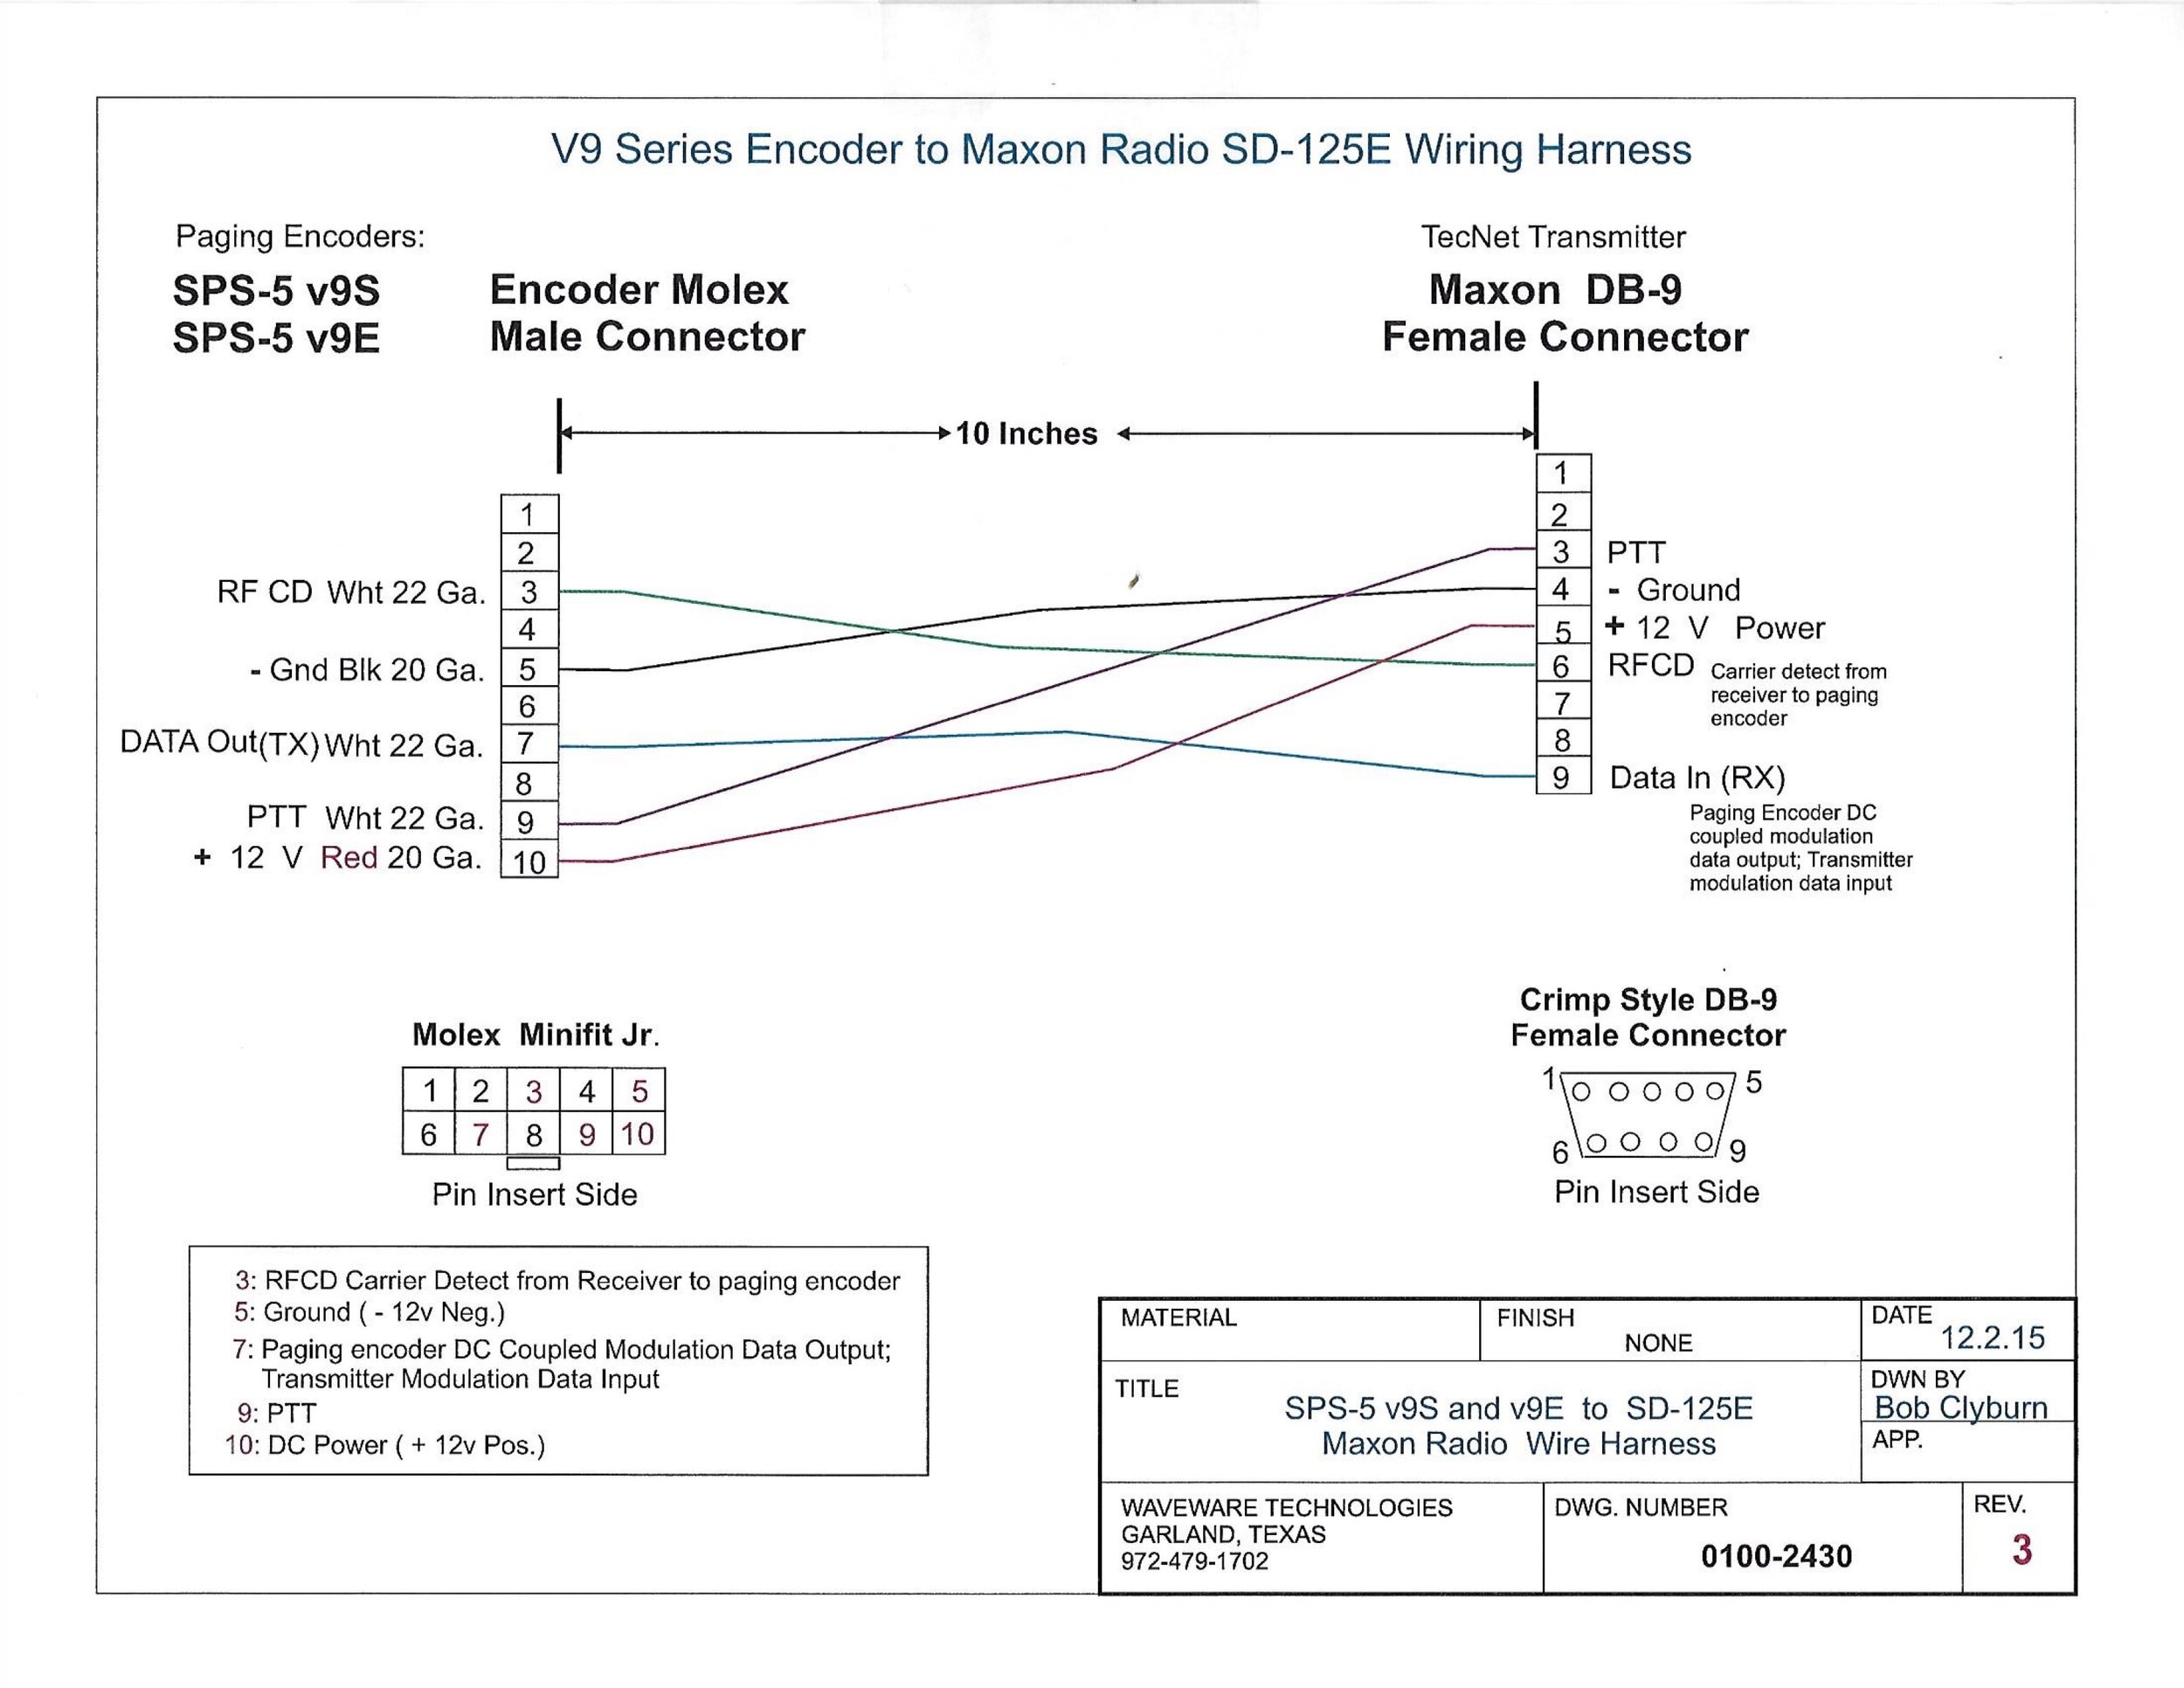
V9 Series Encoder to Maxon Radio SD-125E Wiring Harness
View fullsize
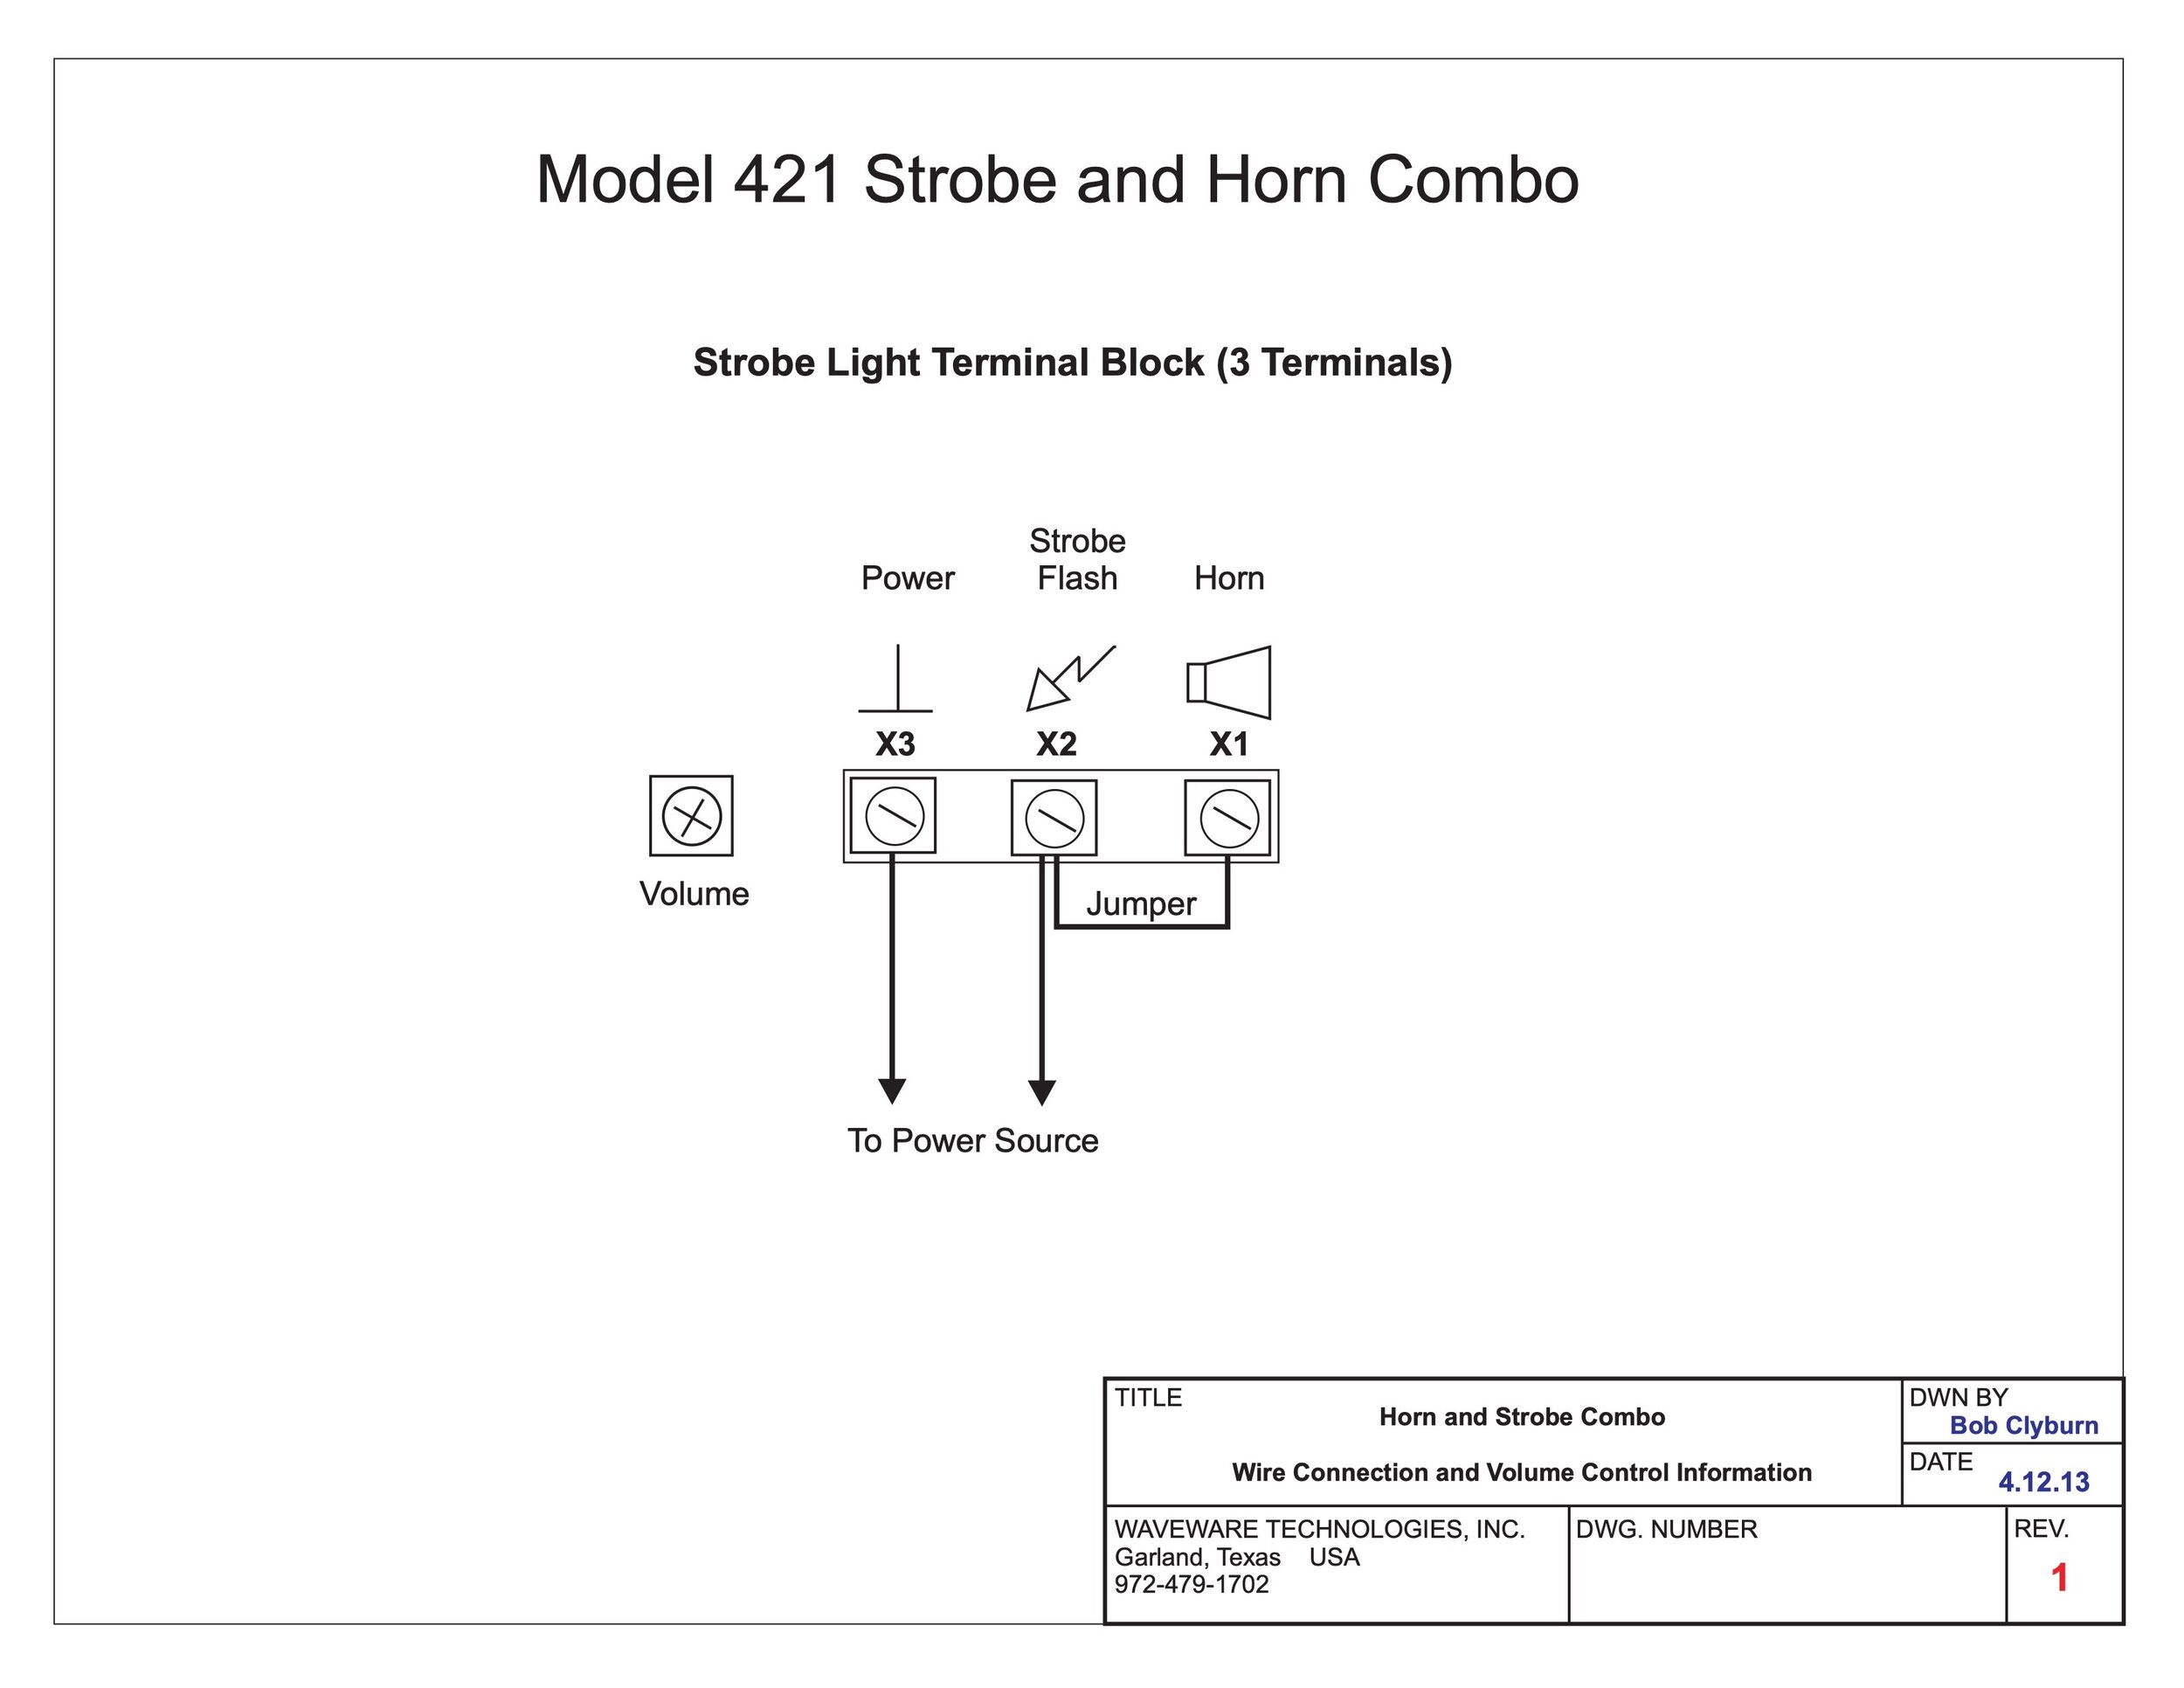
Model 421 Horn/Strobe Wire Connections
View fullsize
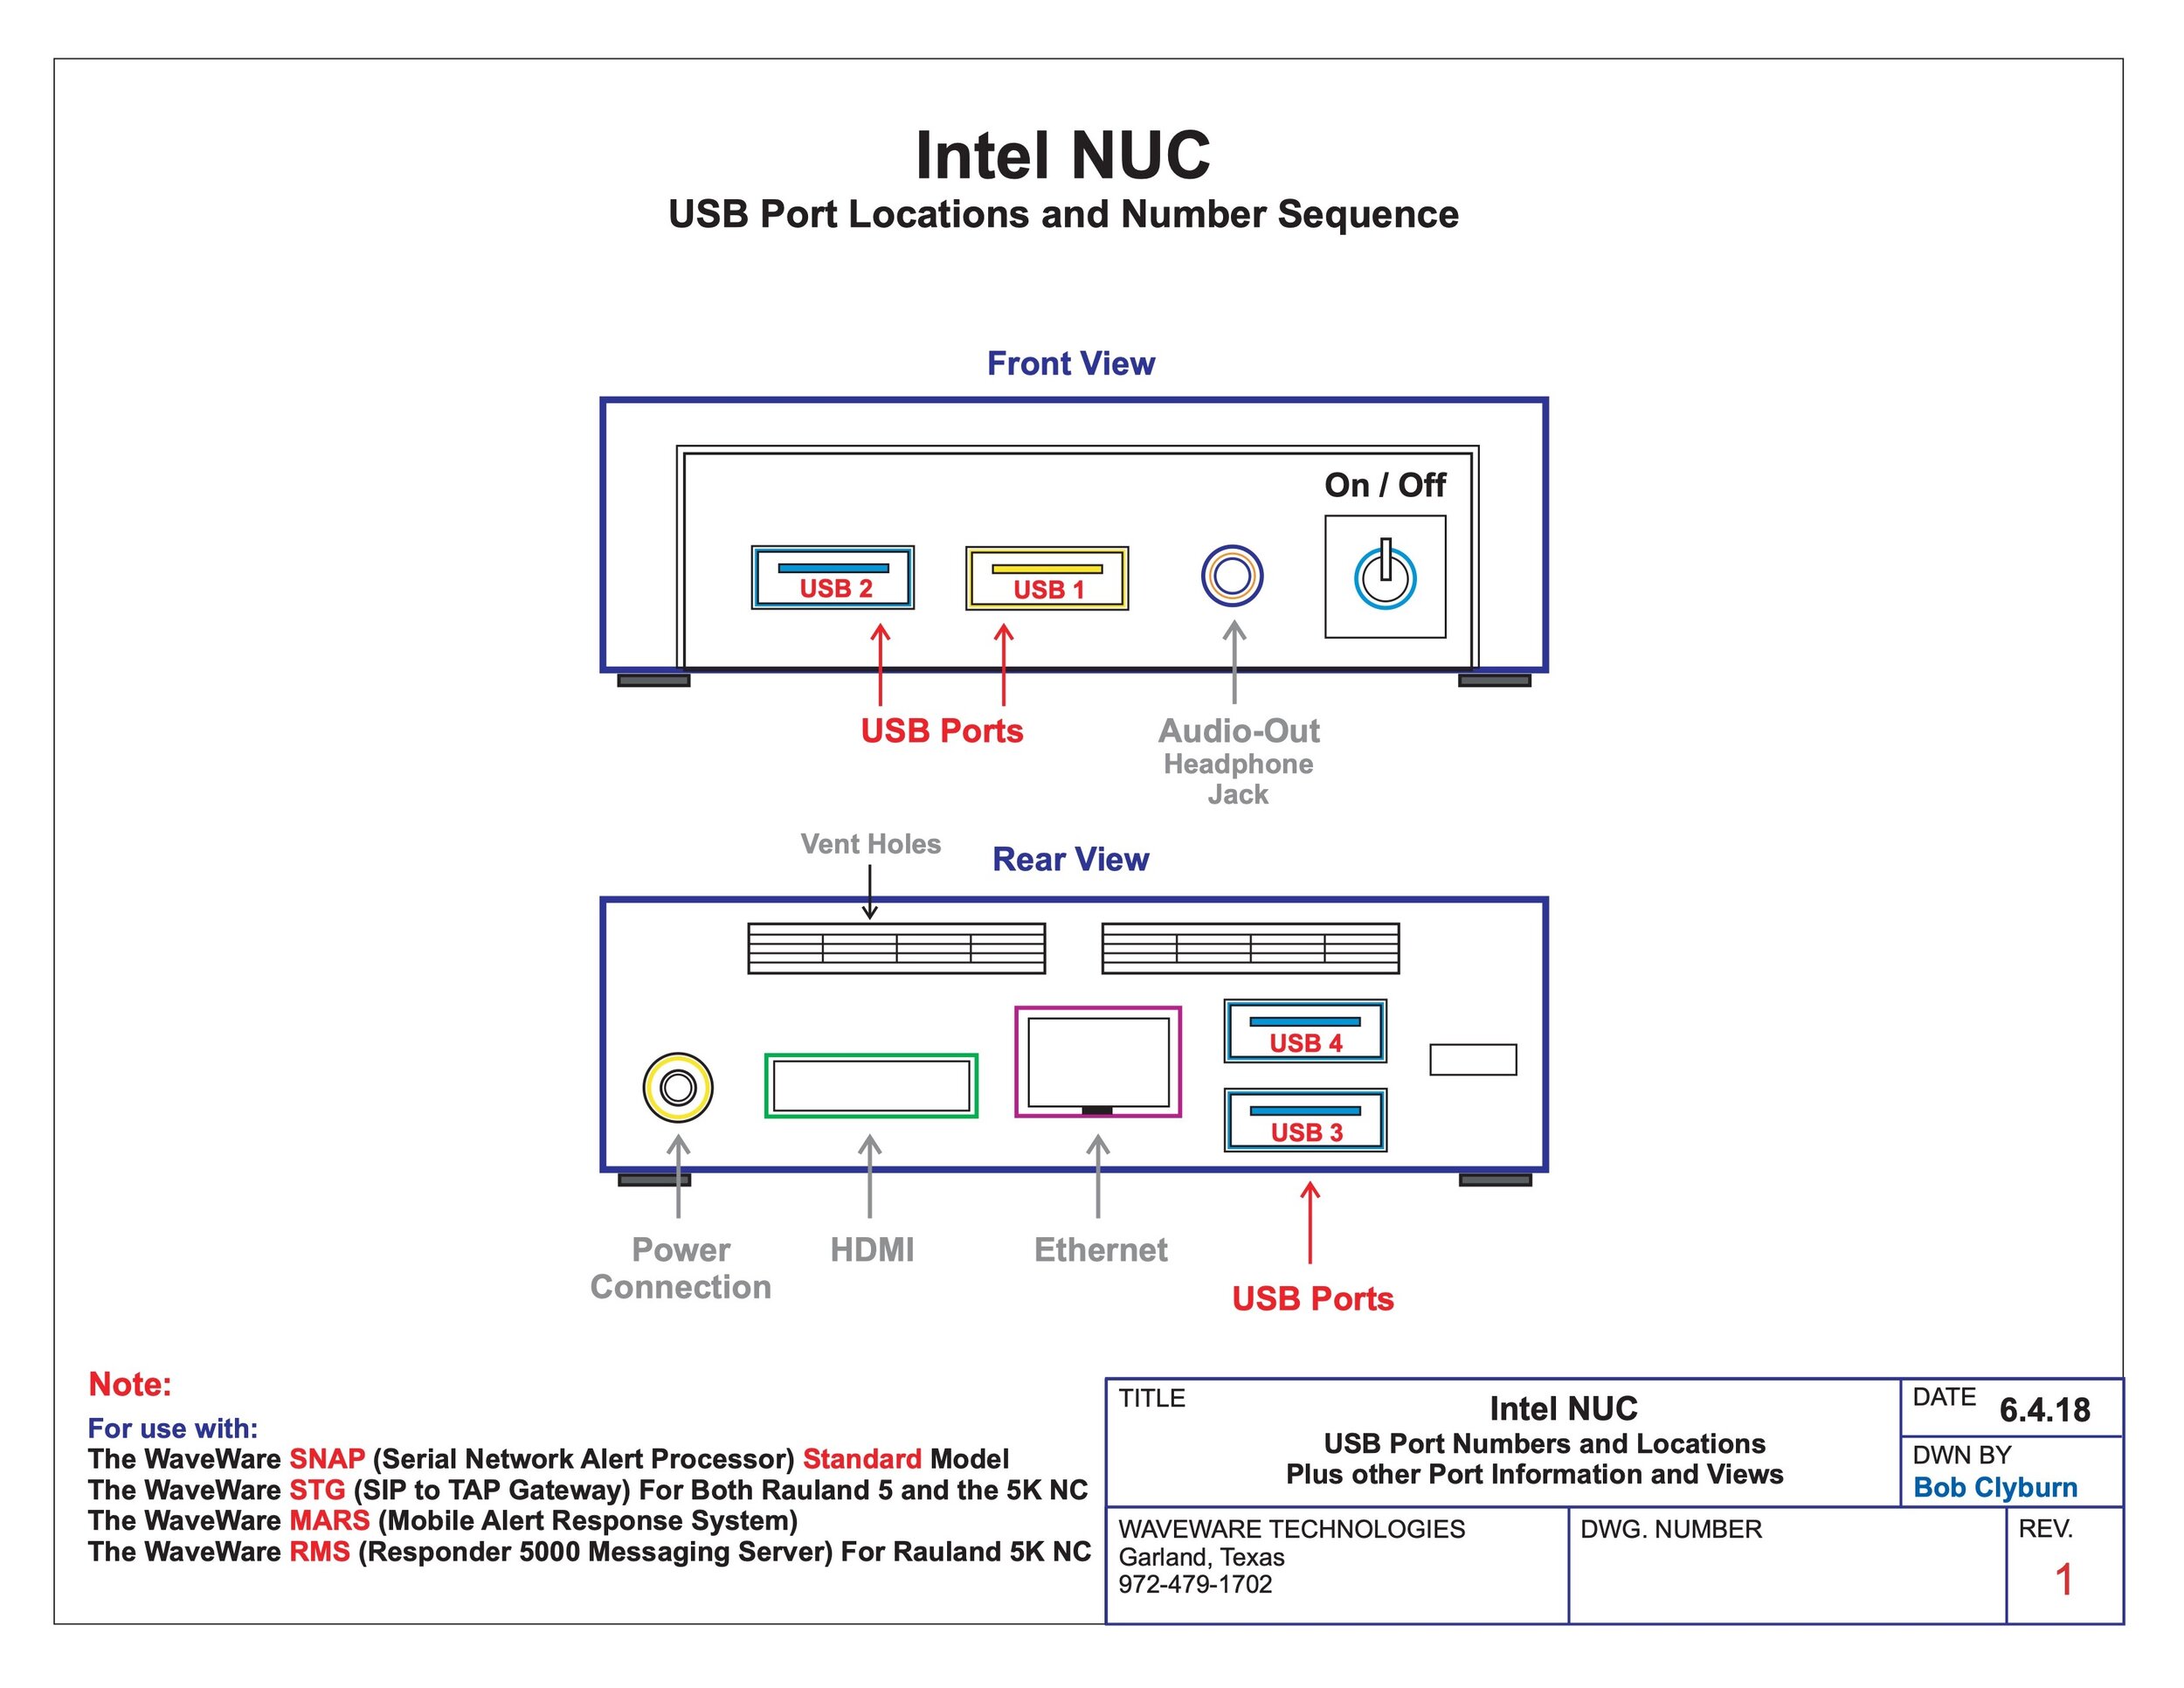
Intel NUC USB Port Locations and Number Sequence
View fullsize
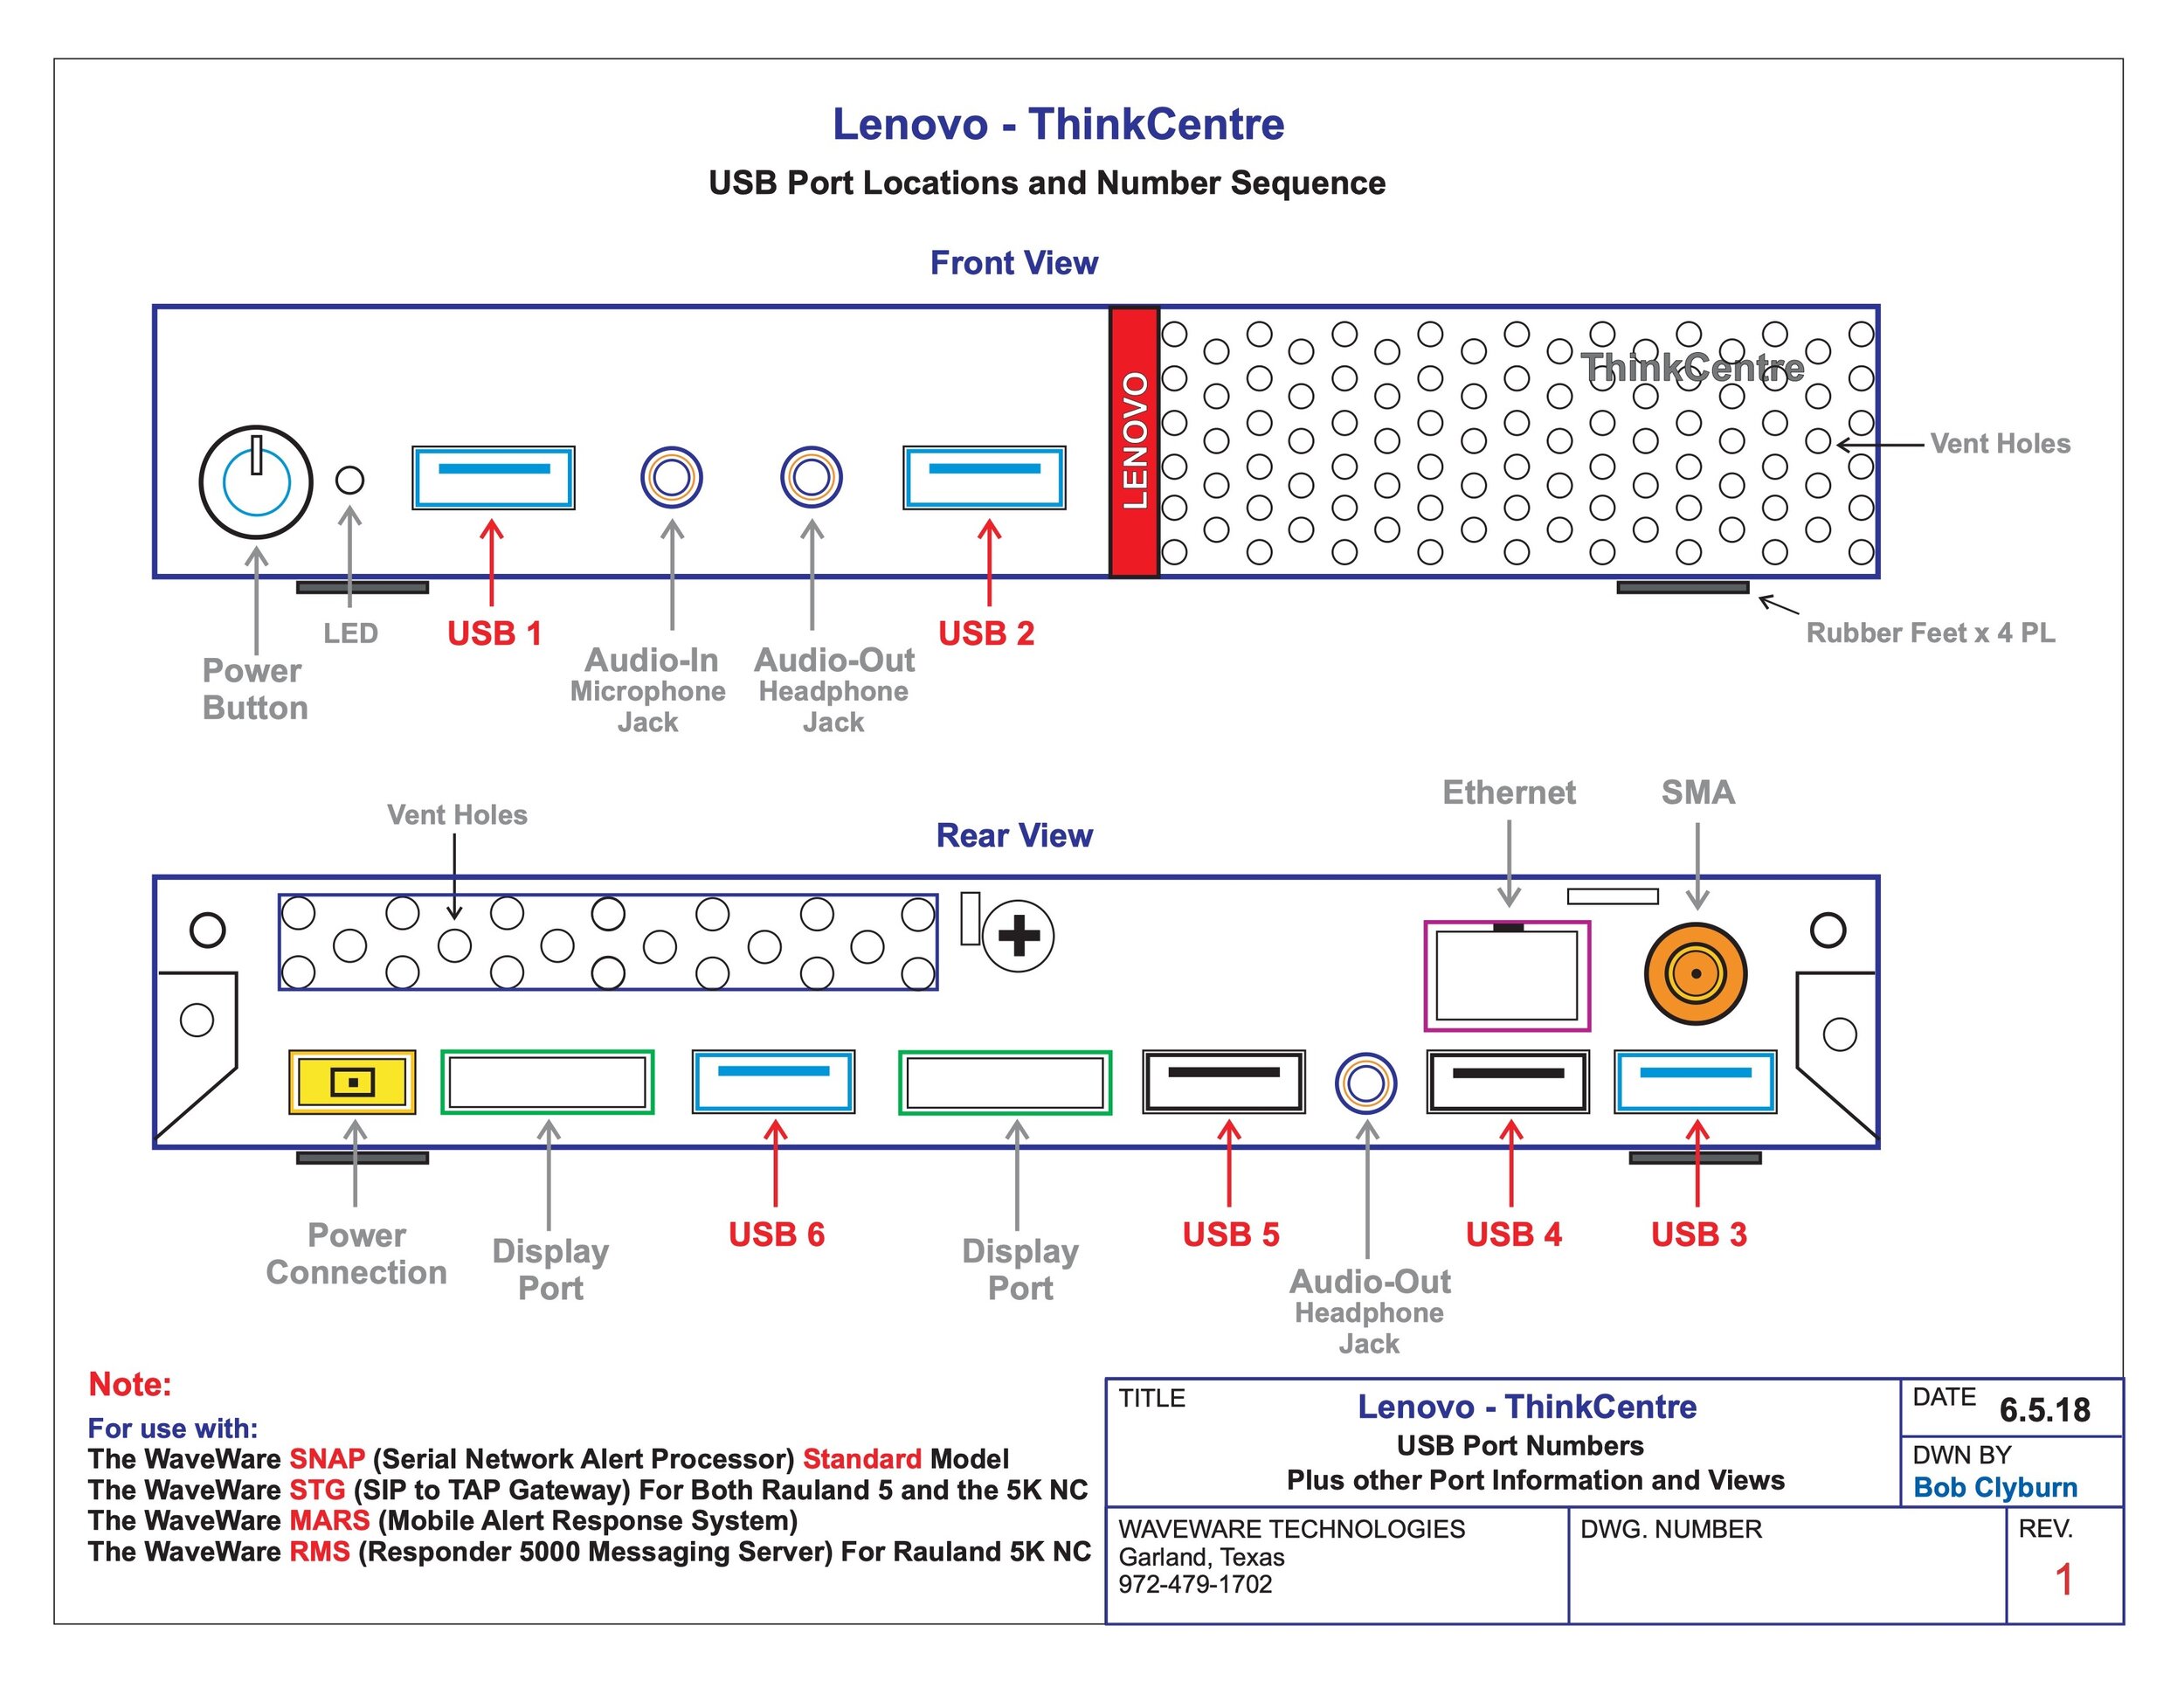
Lenovo ThinkCentre USB Port Locations and Number Sequence
View fullsize
PT-5000 KW Installation Diagram
View fullsize
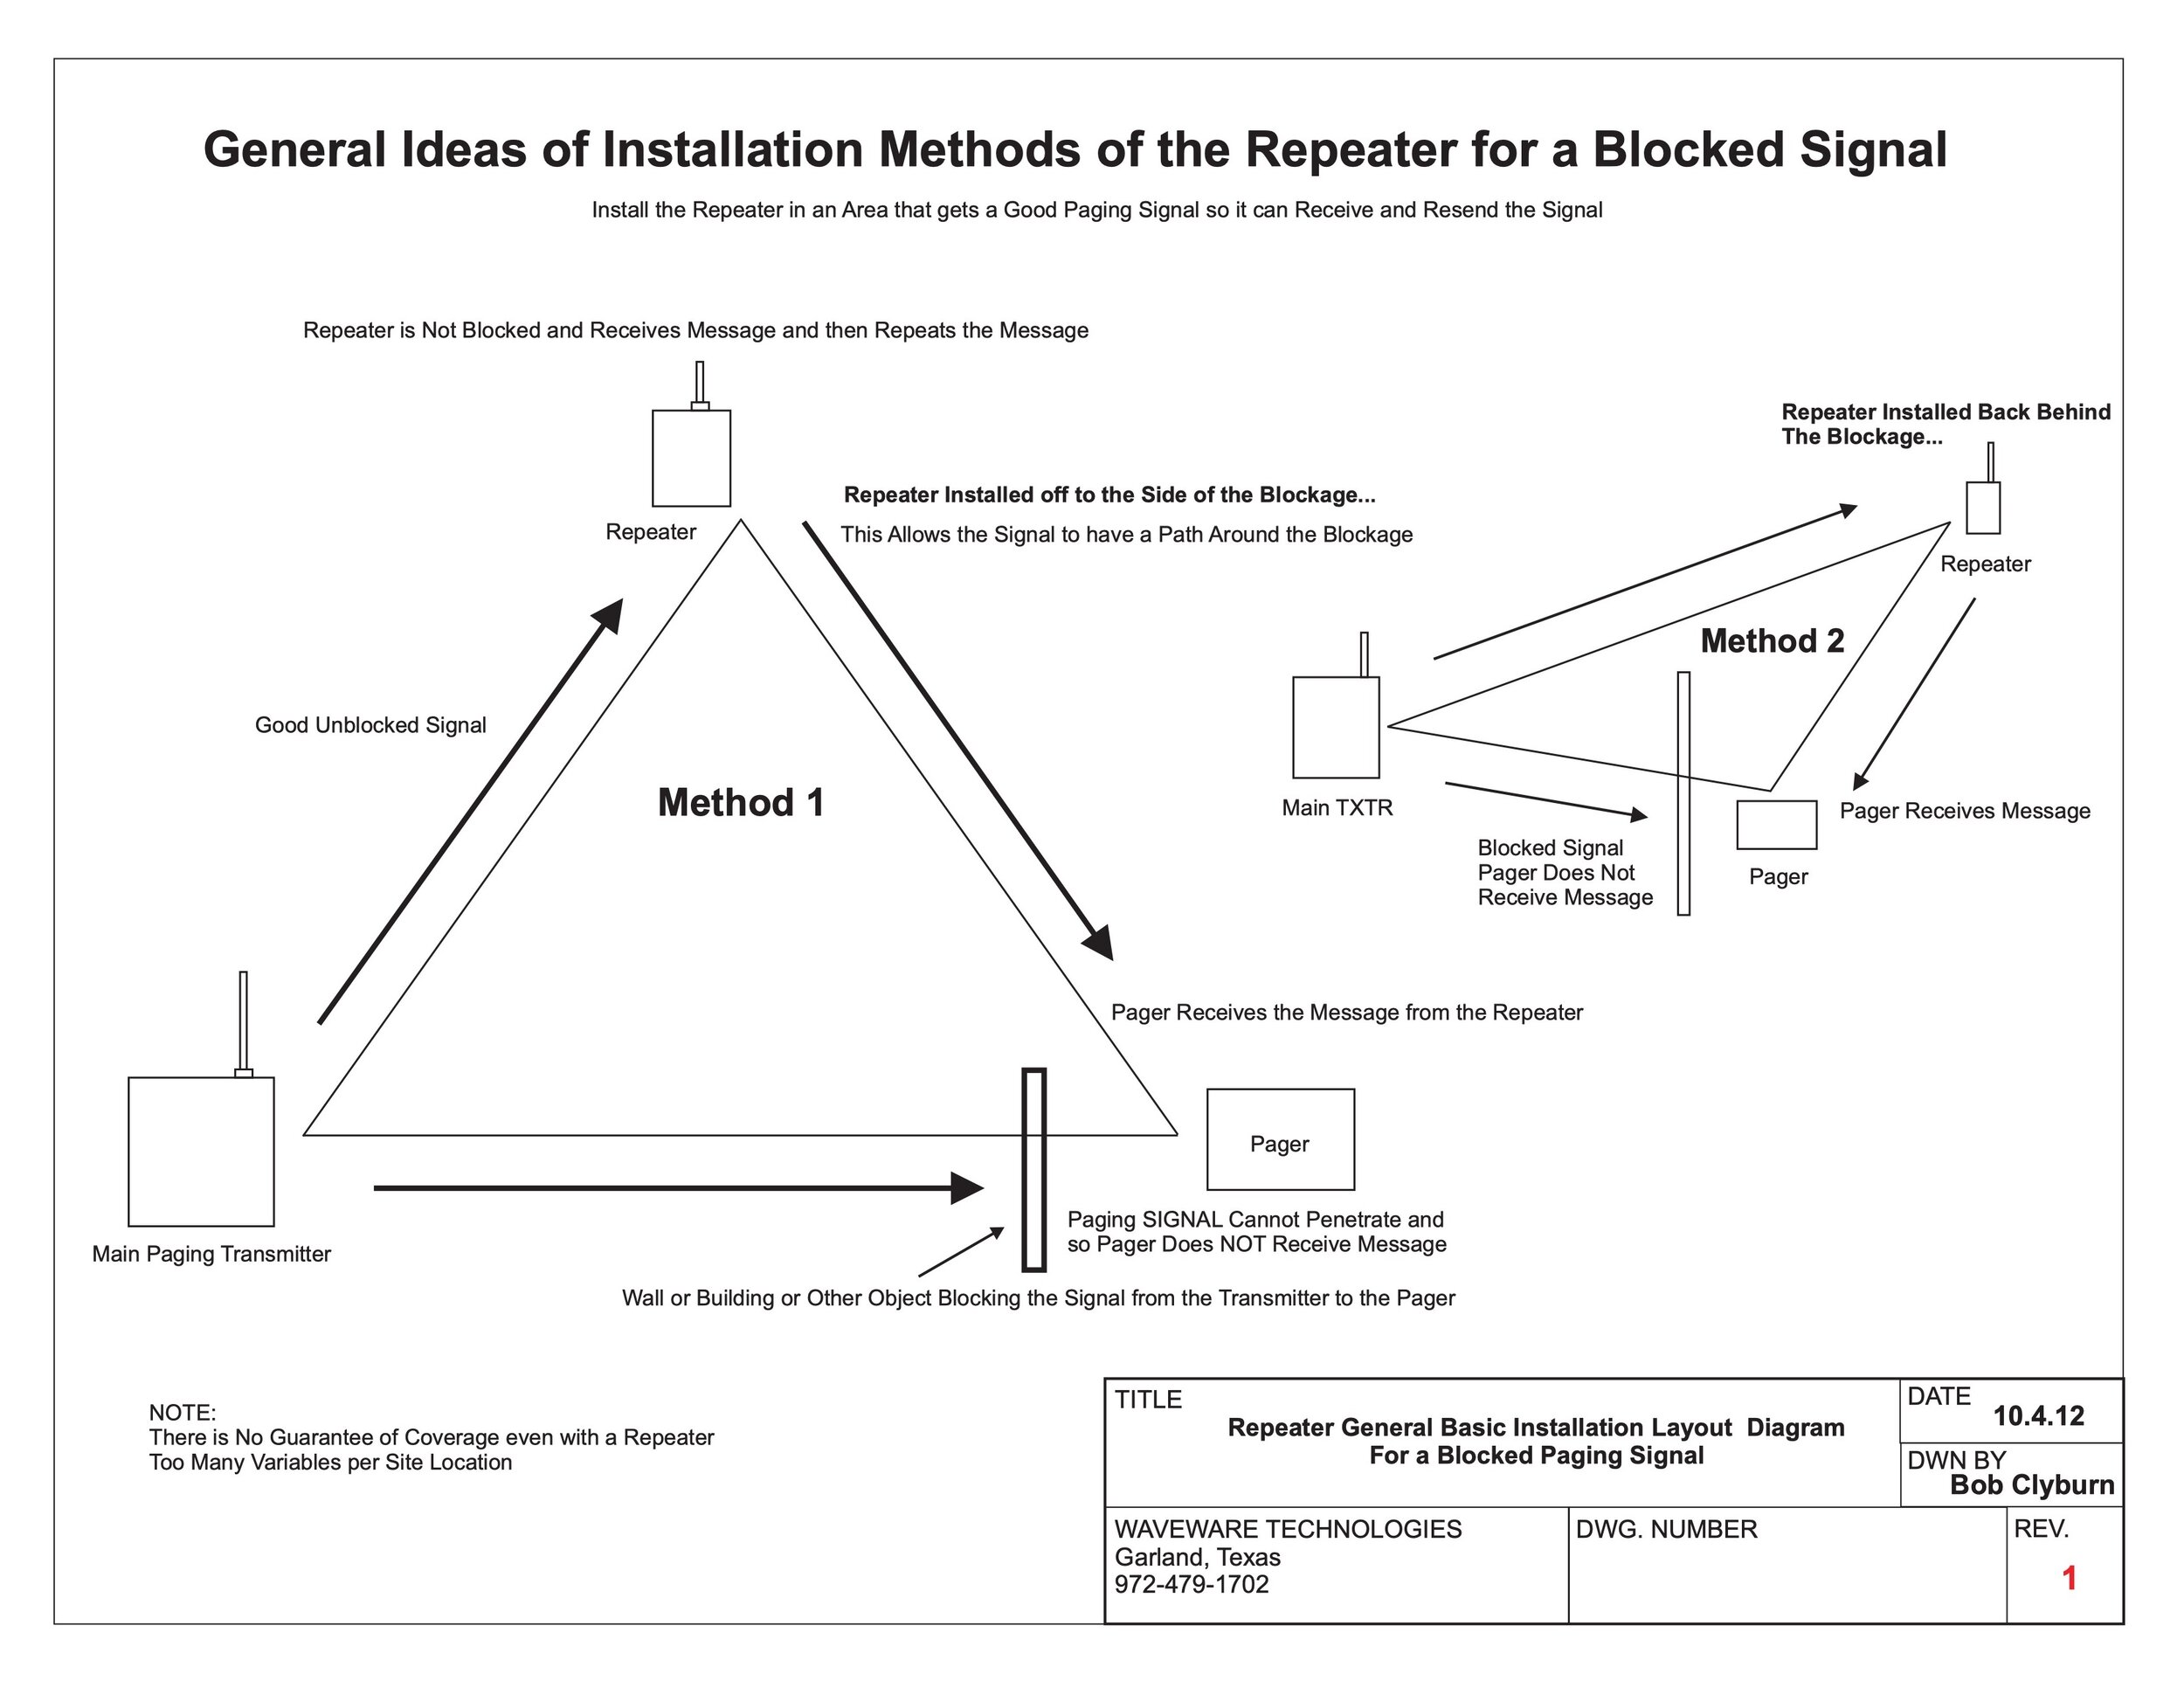
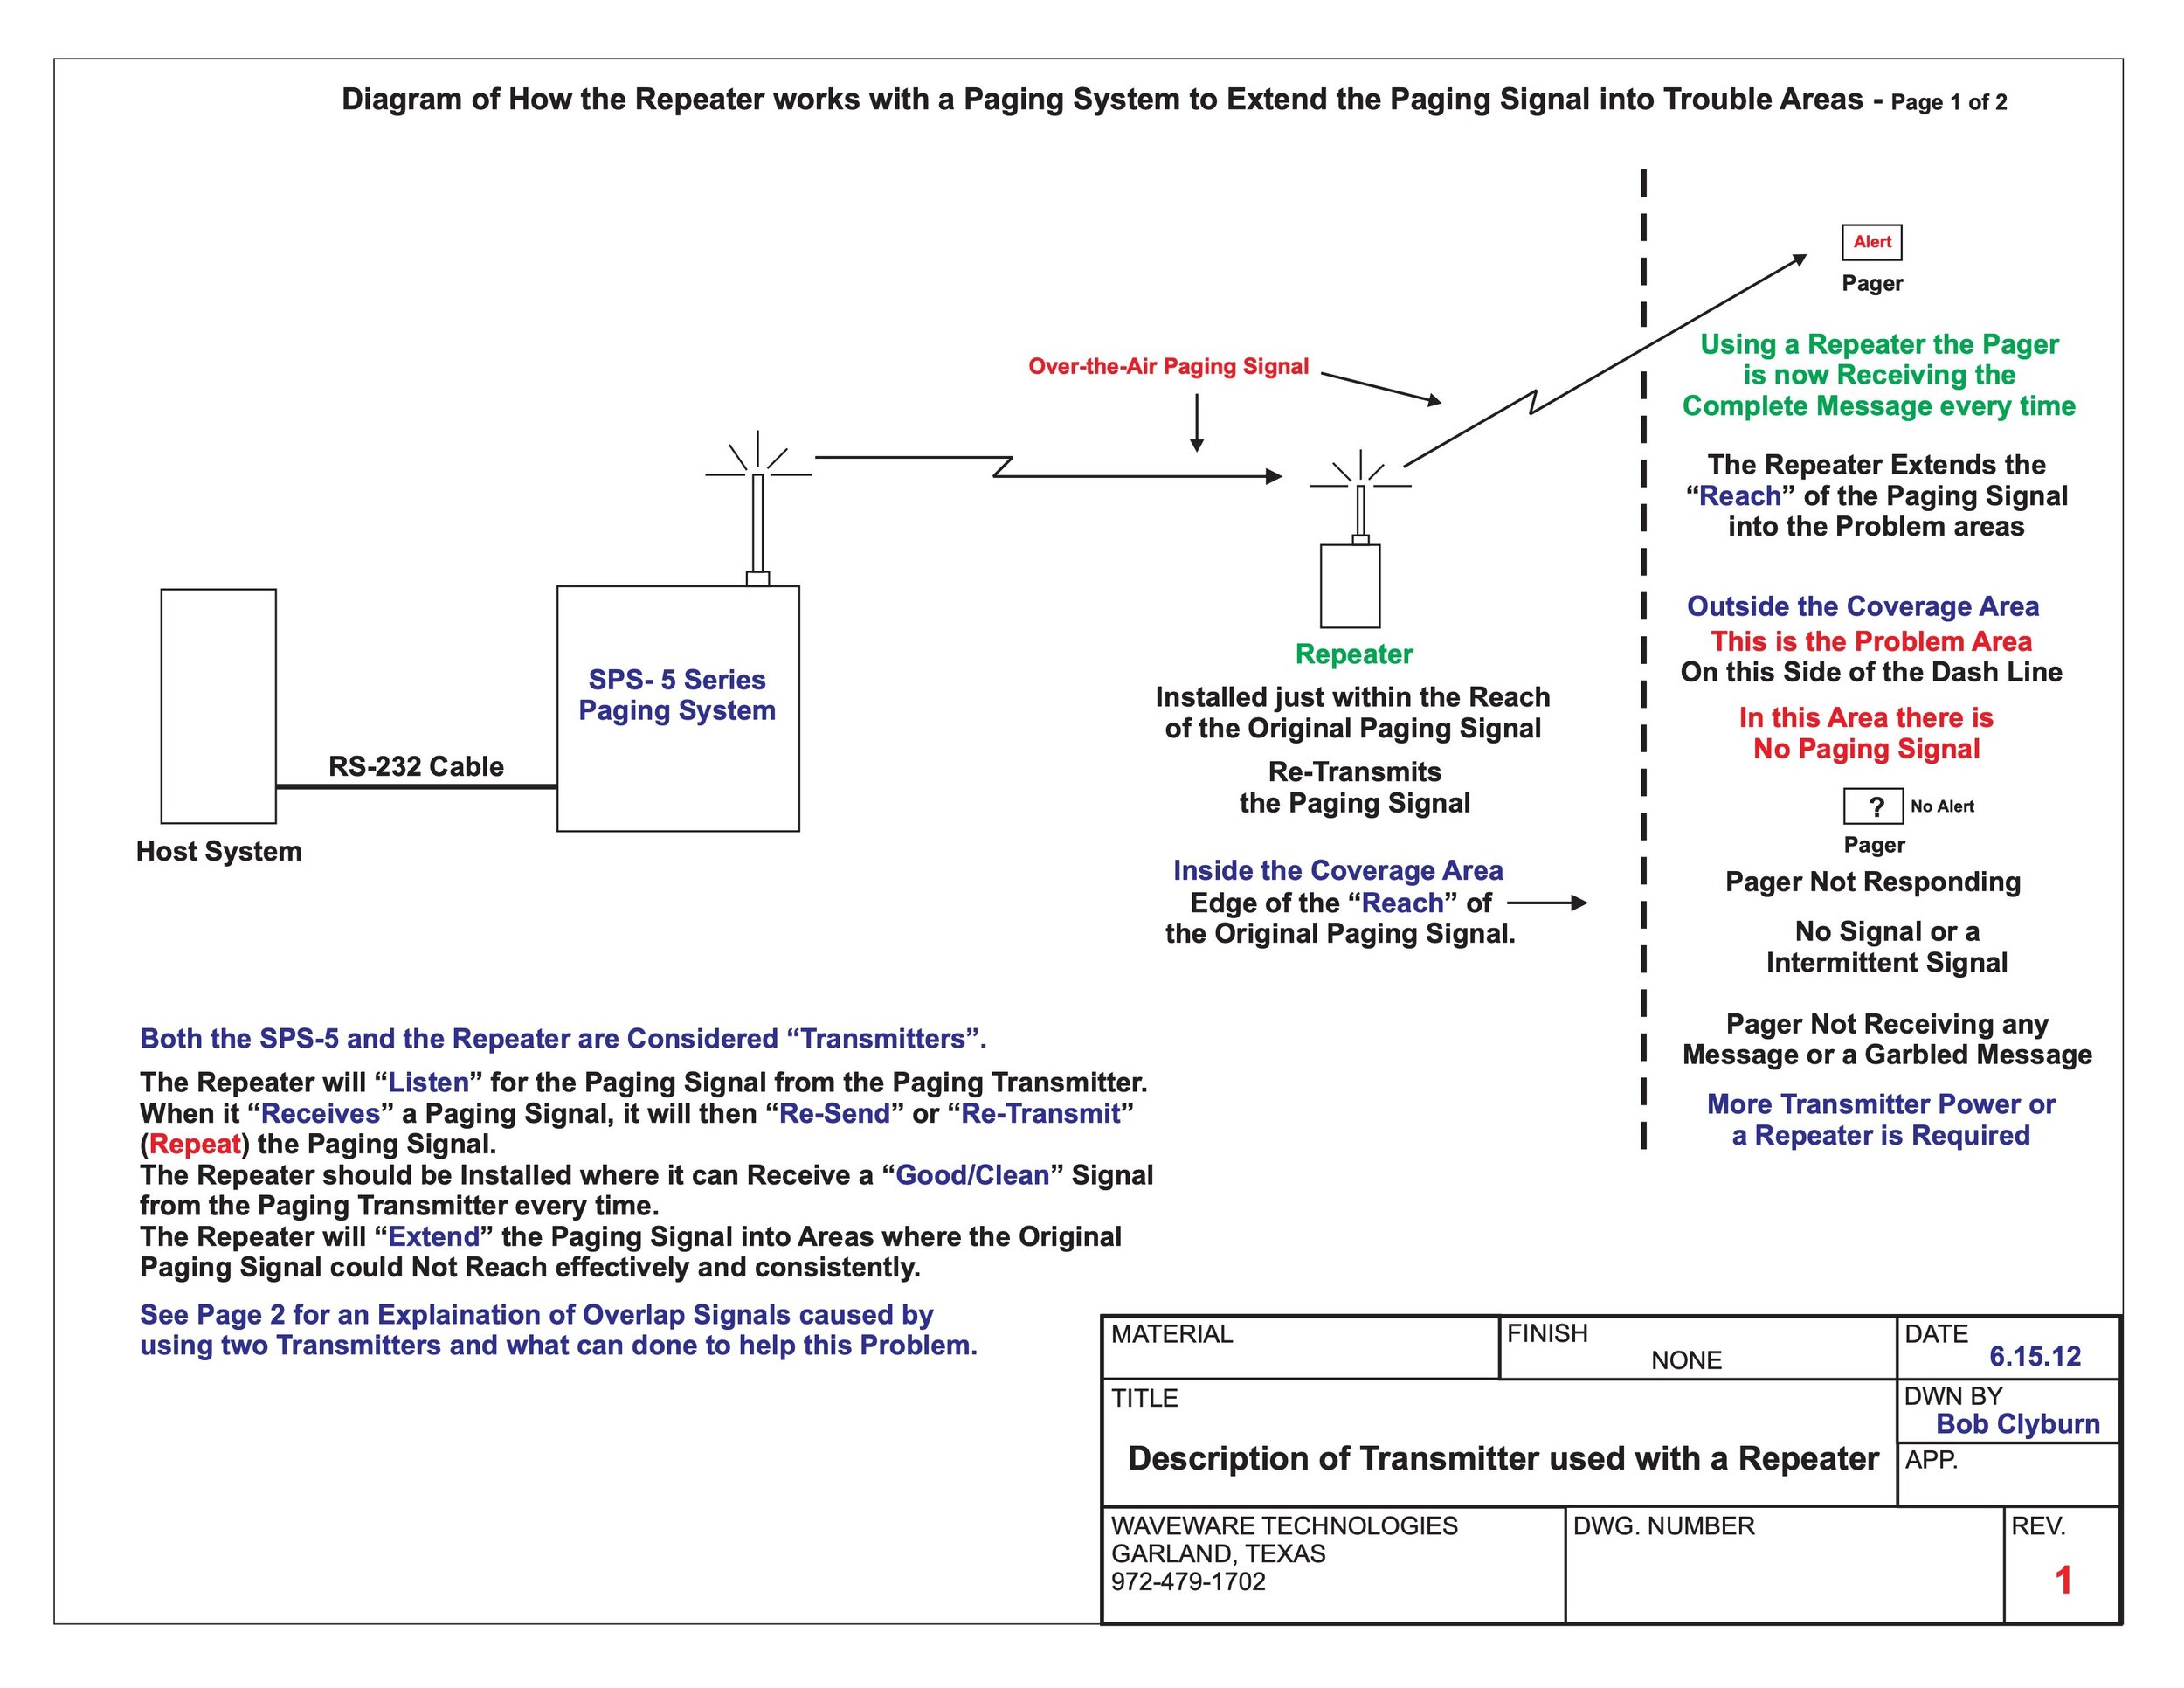
Description of Transmitter used with a Repeater
View fullsize
Repeater Coverage Diagram 2
View fullsize
Repeater Coverage Diagram 3
View fullsize
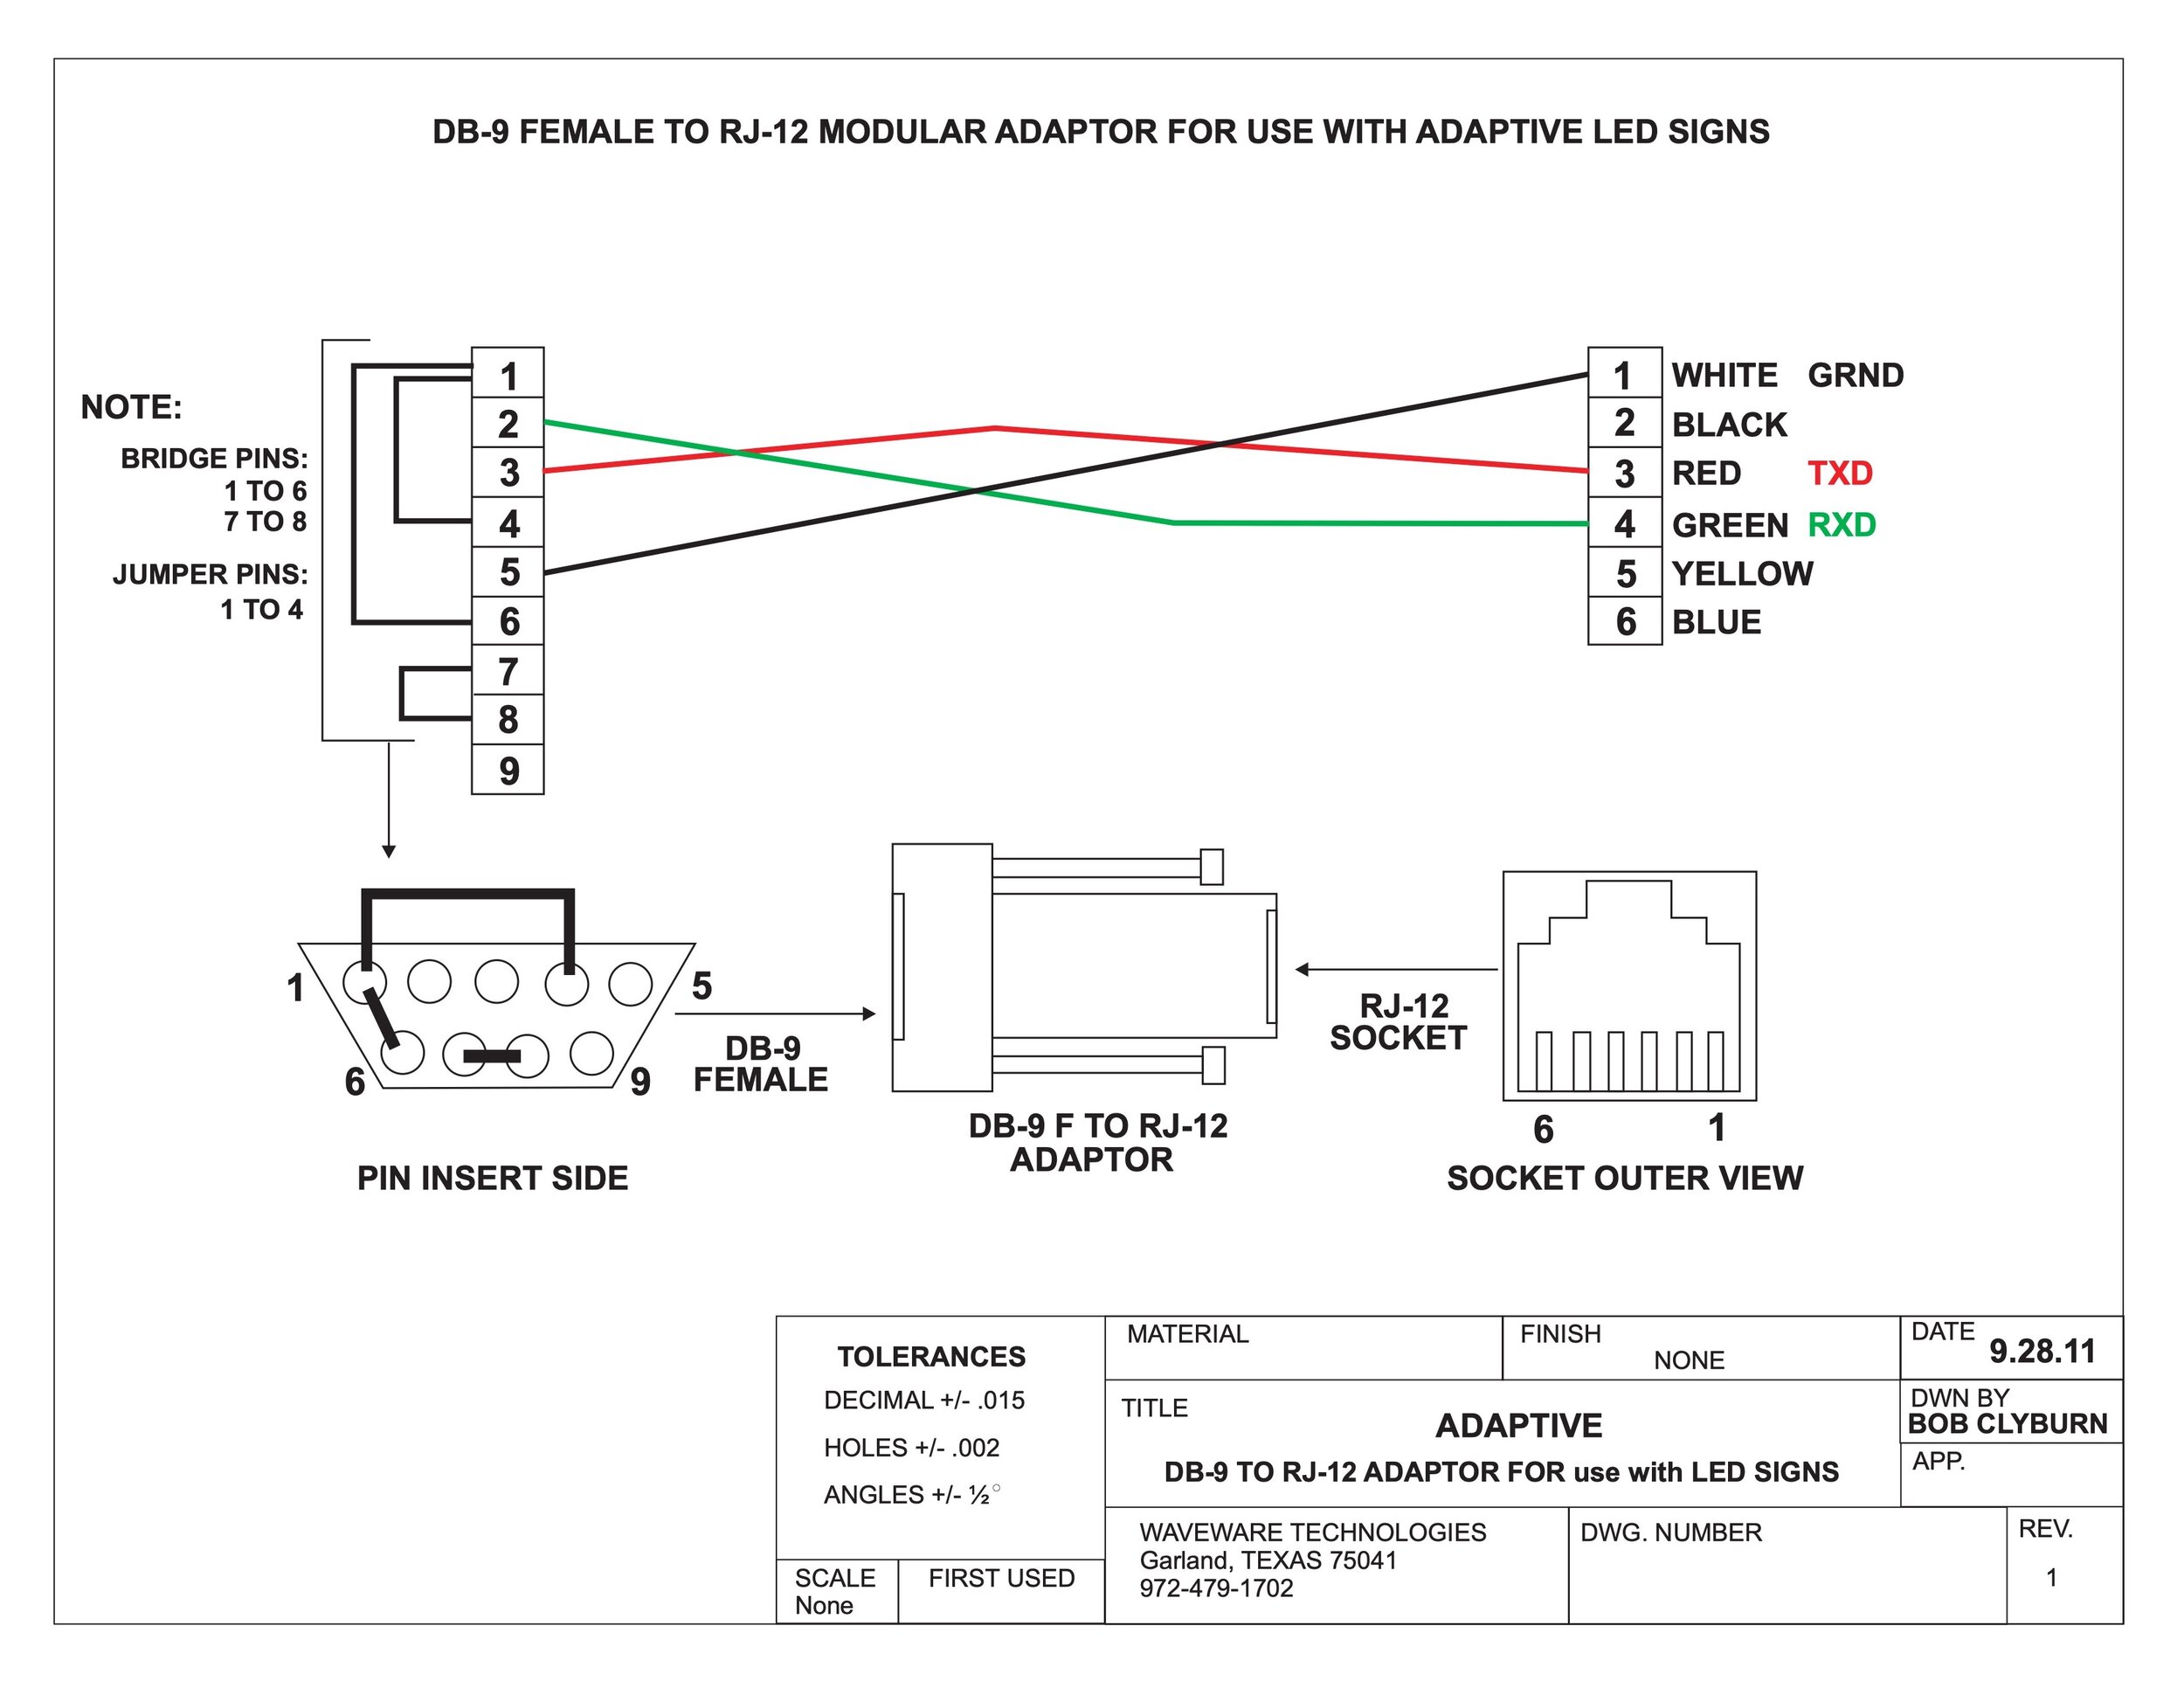
RJ12 to DB9 Adaptive LED Signs
View fullsize
Short Haul Modem Wiring
View fullsize
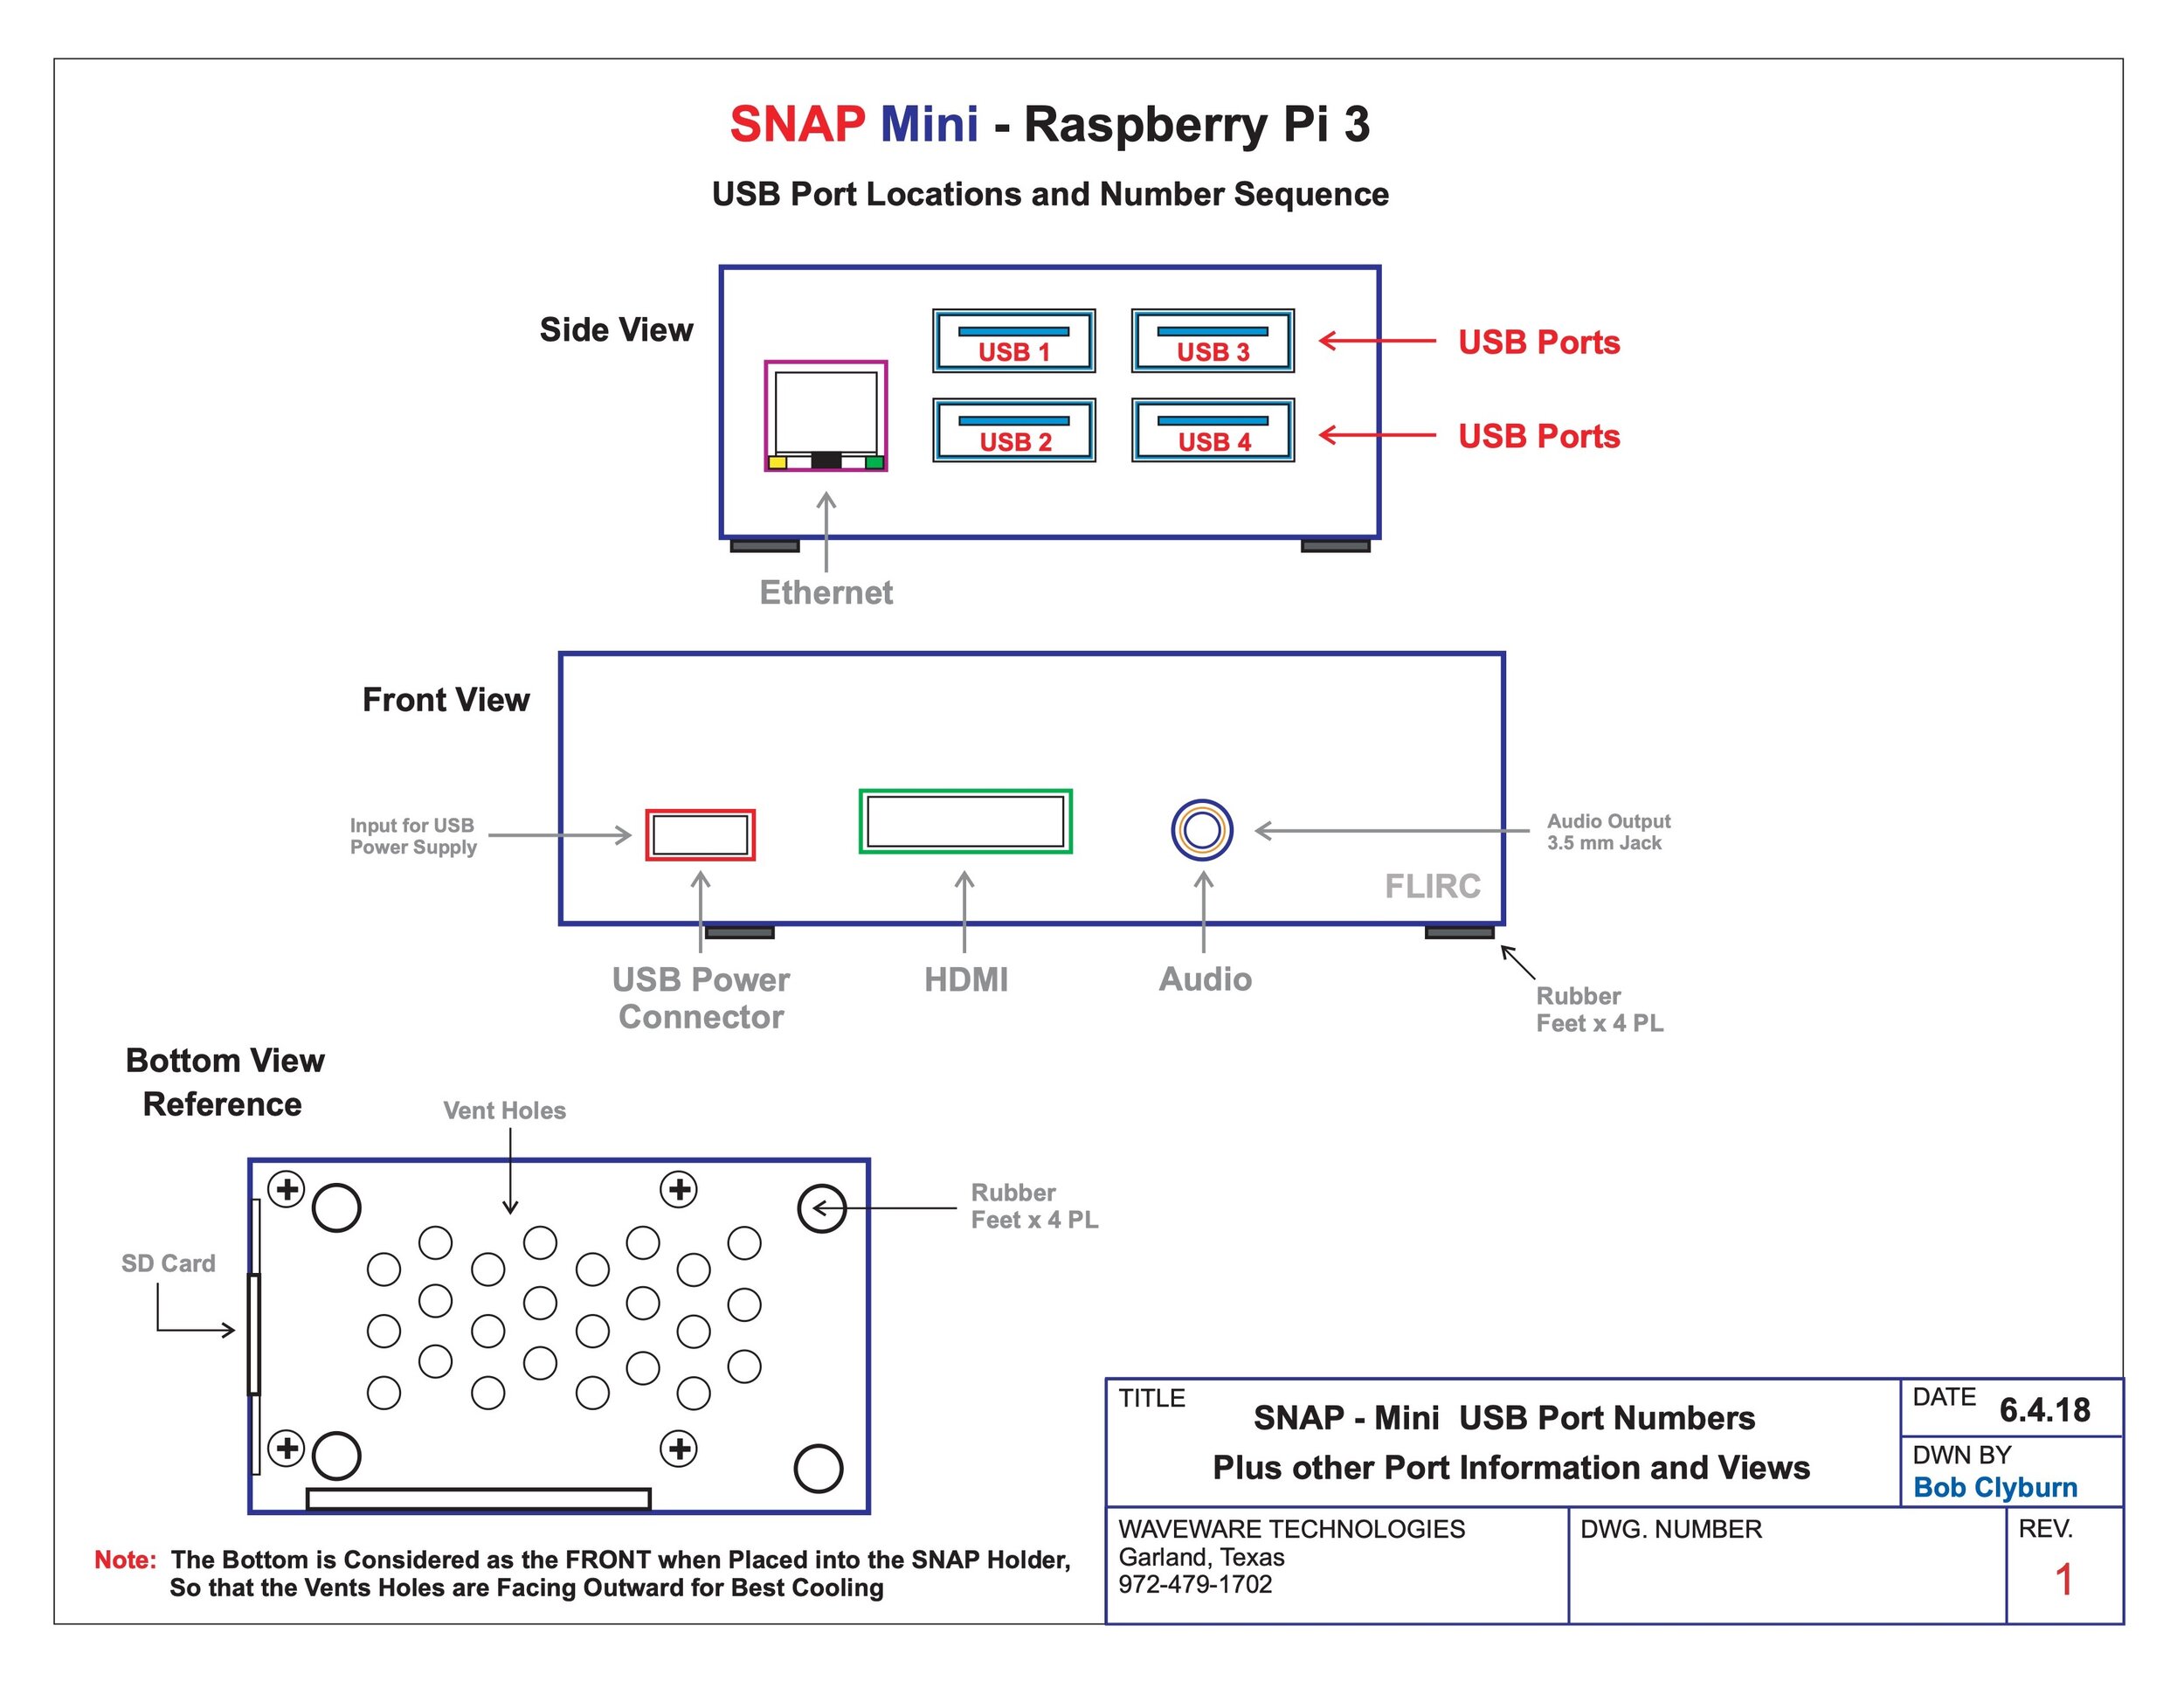
SNAP Mini USB Ports
View fullsize
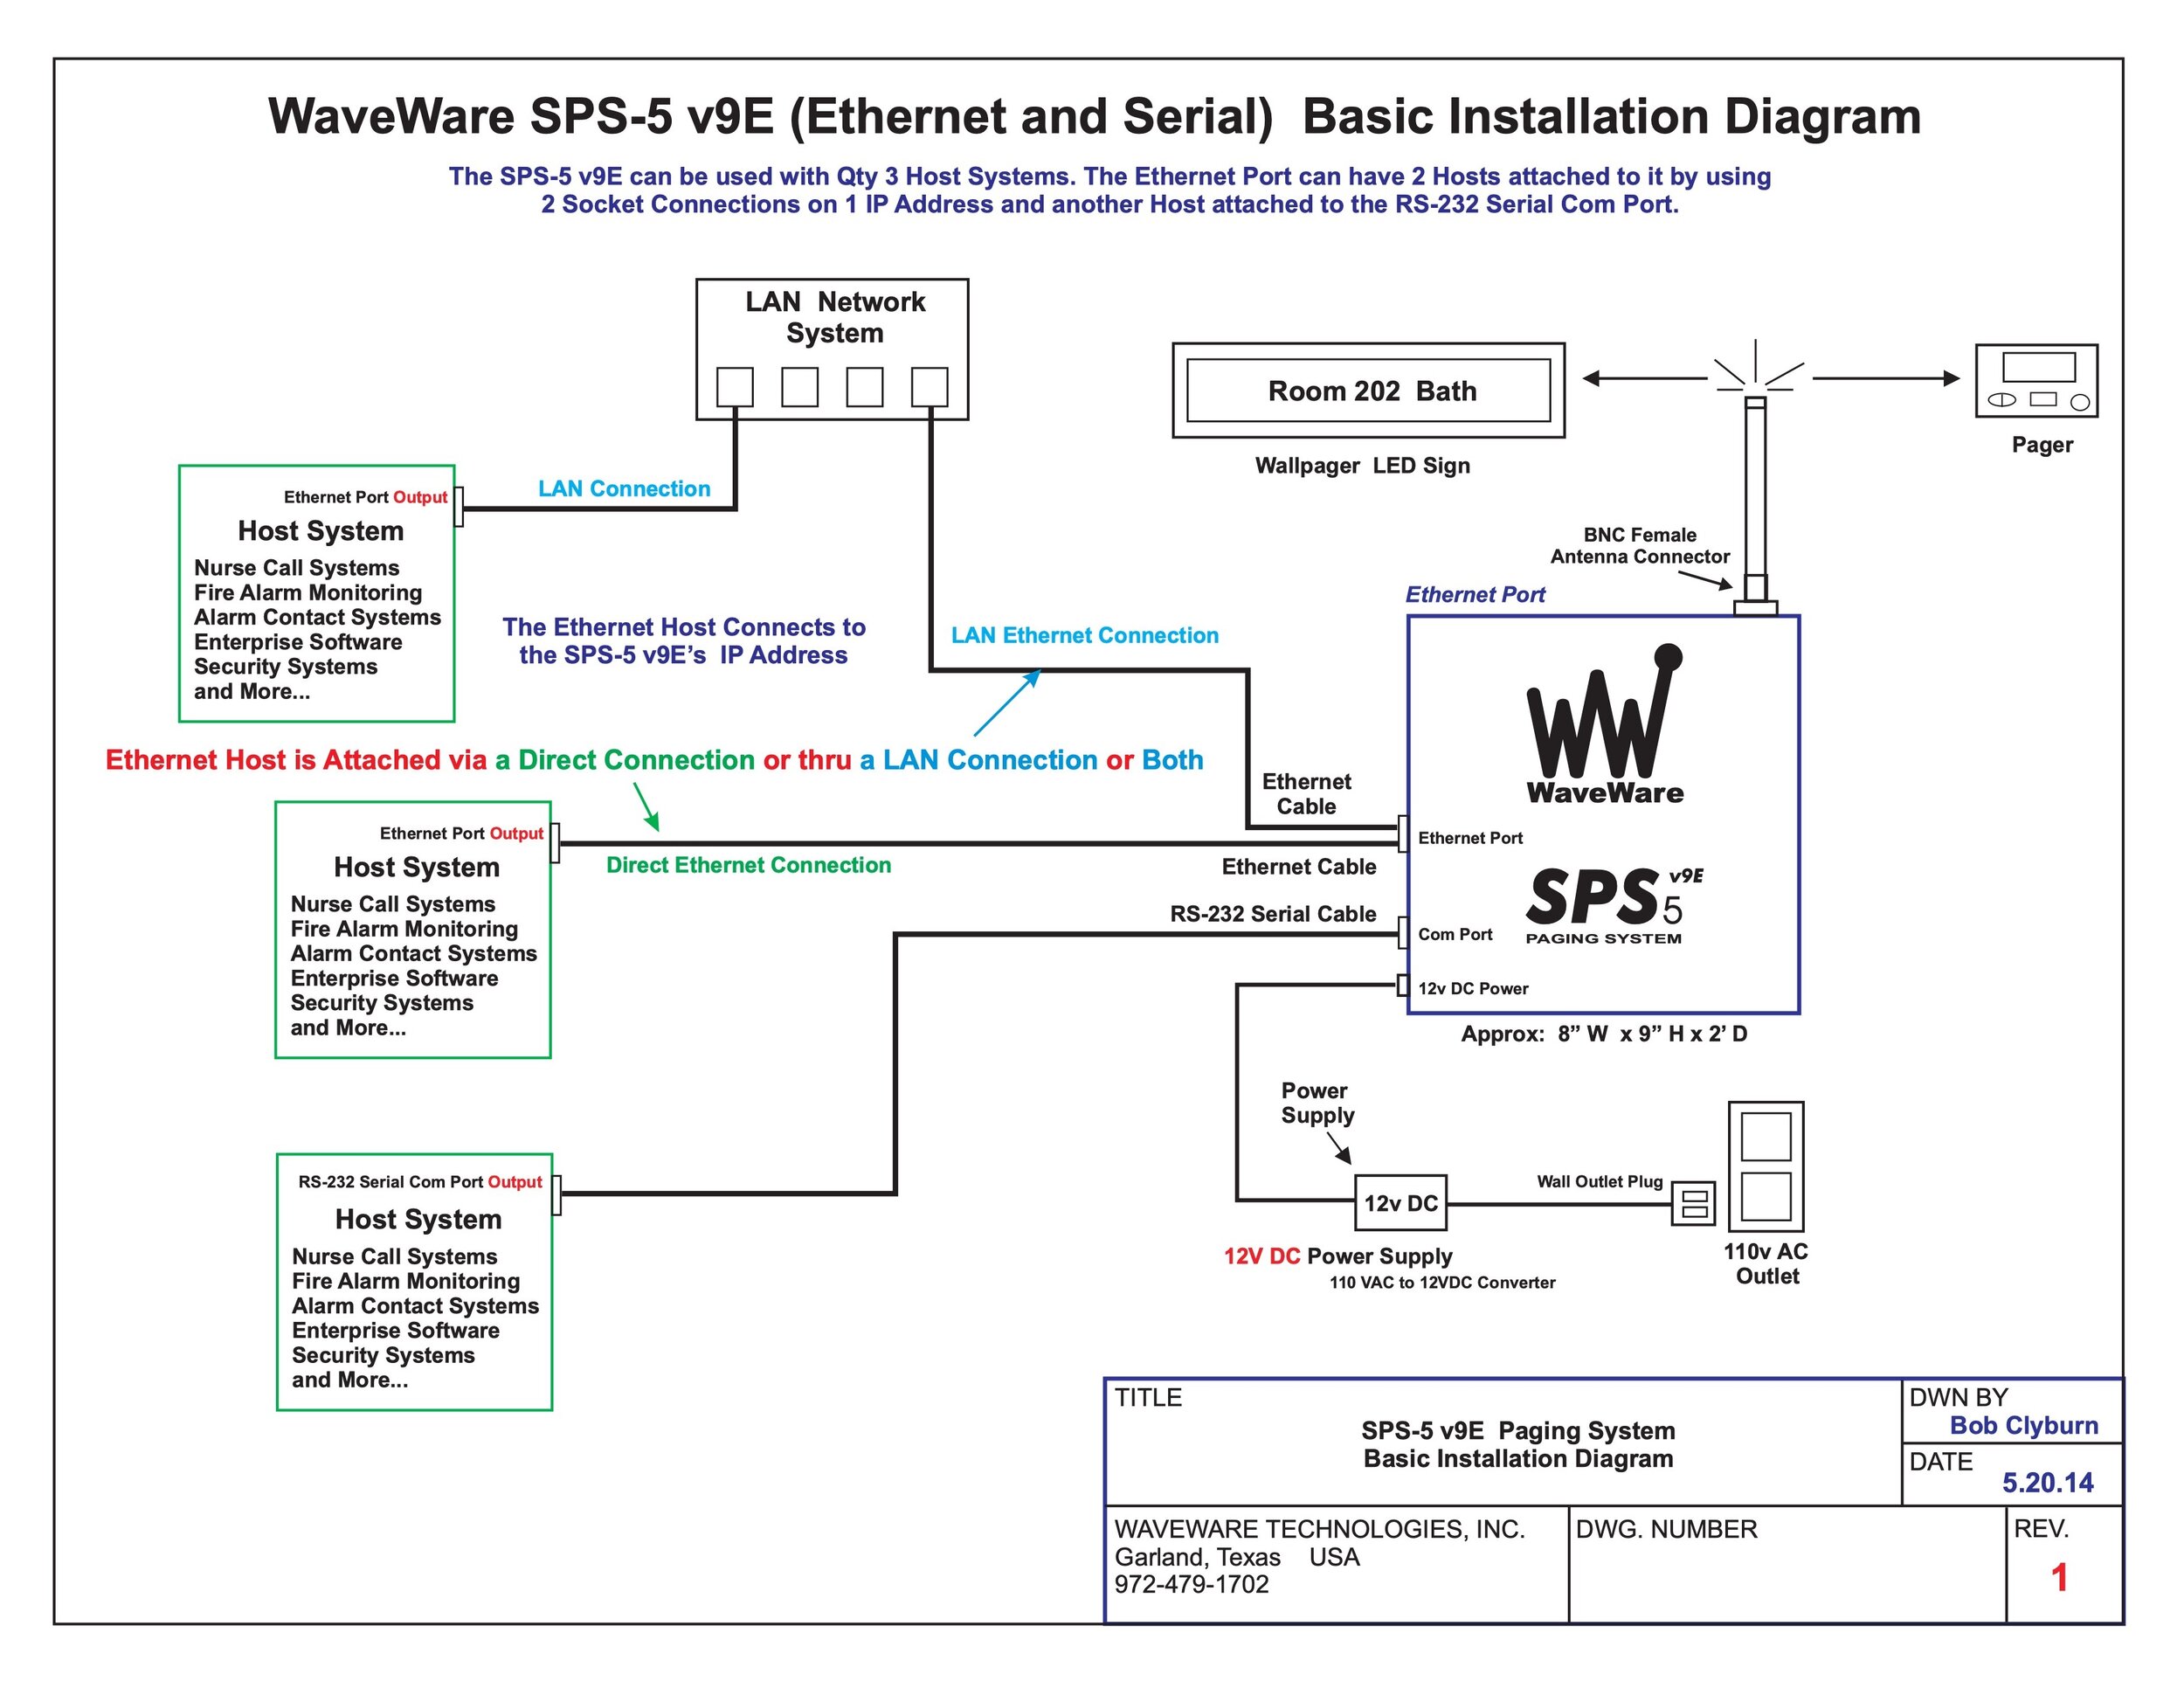
SPS-5 v9E Basic Install Diagram
View fullsize
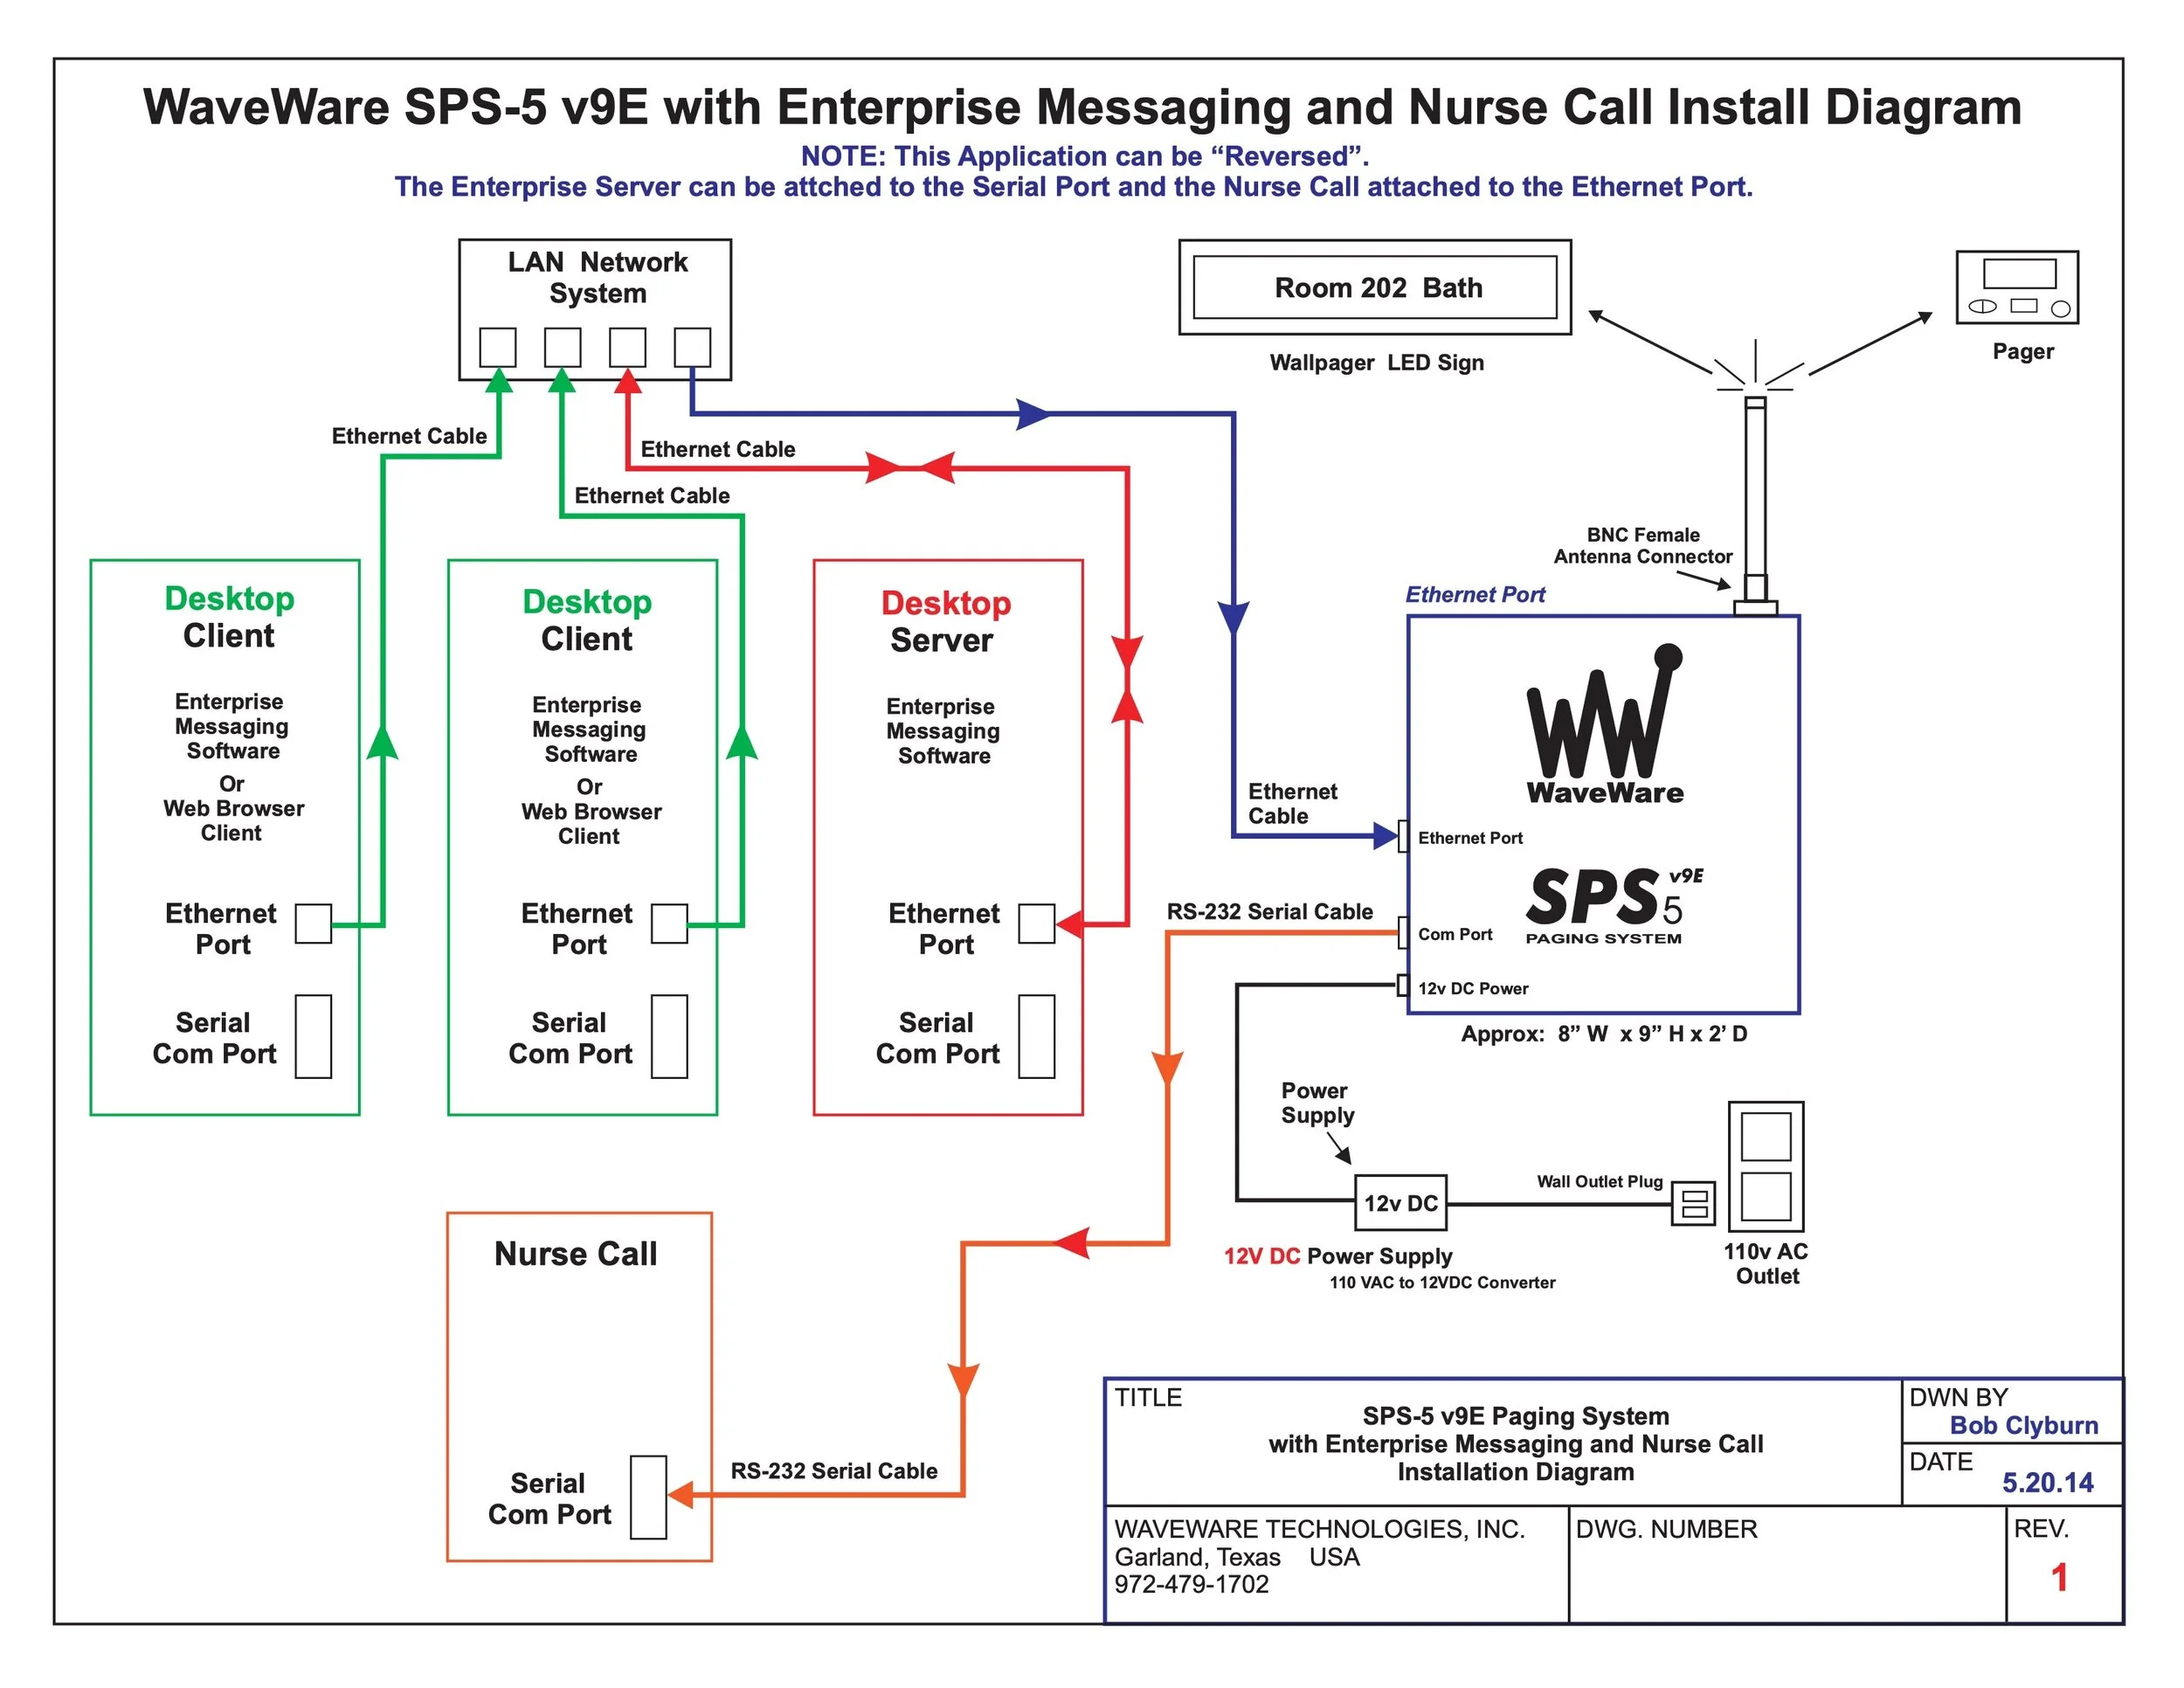
SPS5-v9E Enterprise Messaging and Nurse Call Install Diagram
View fullsize
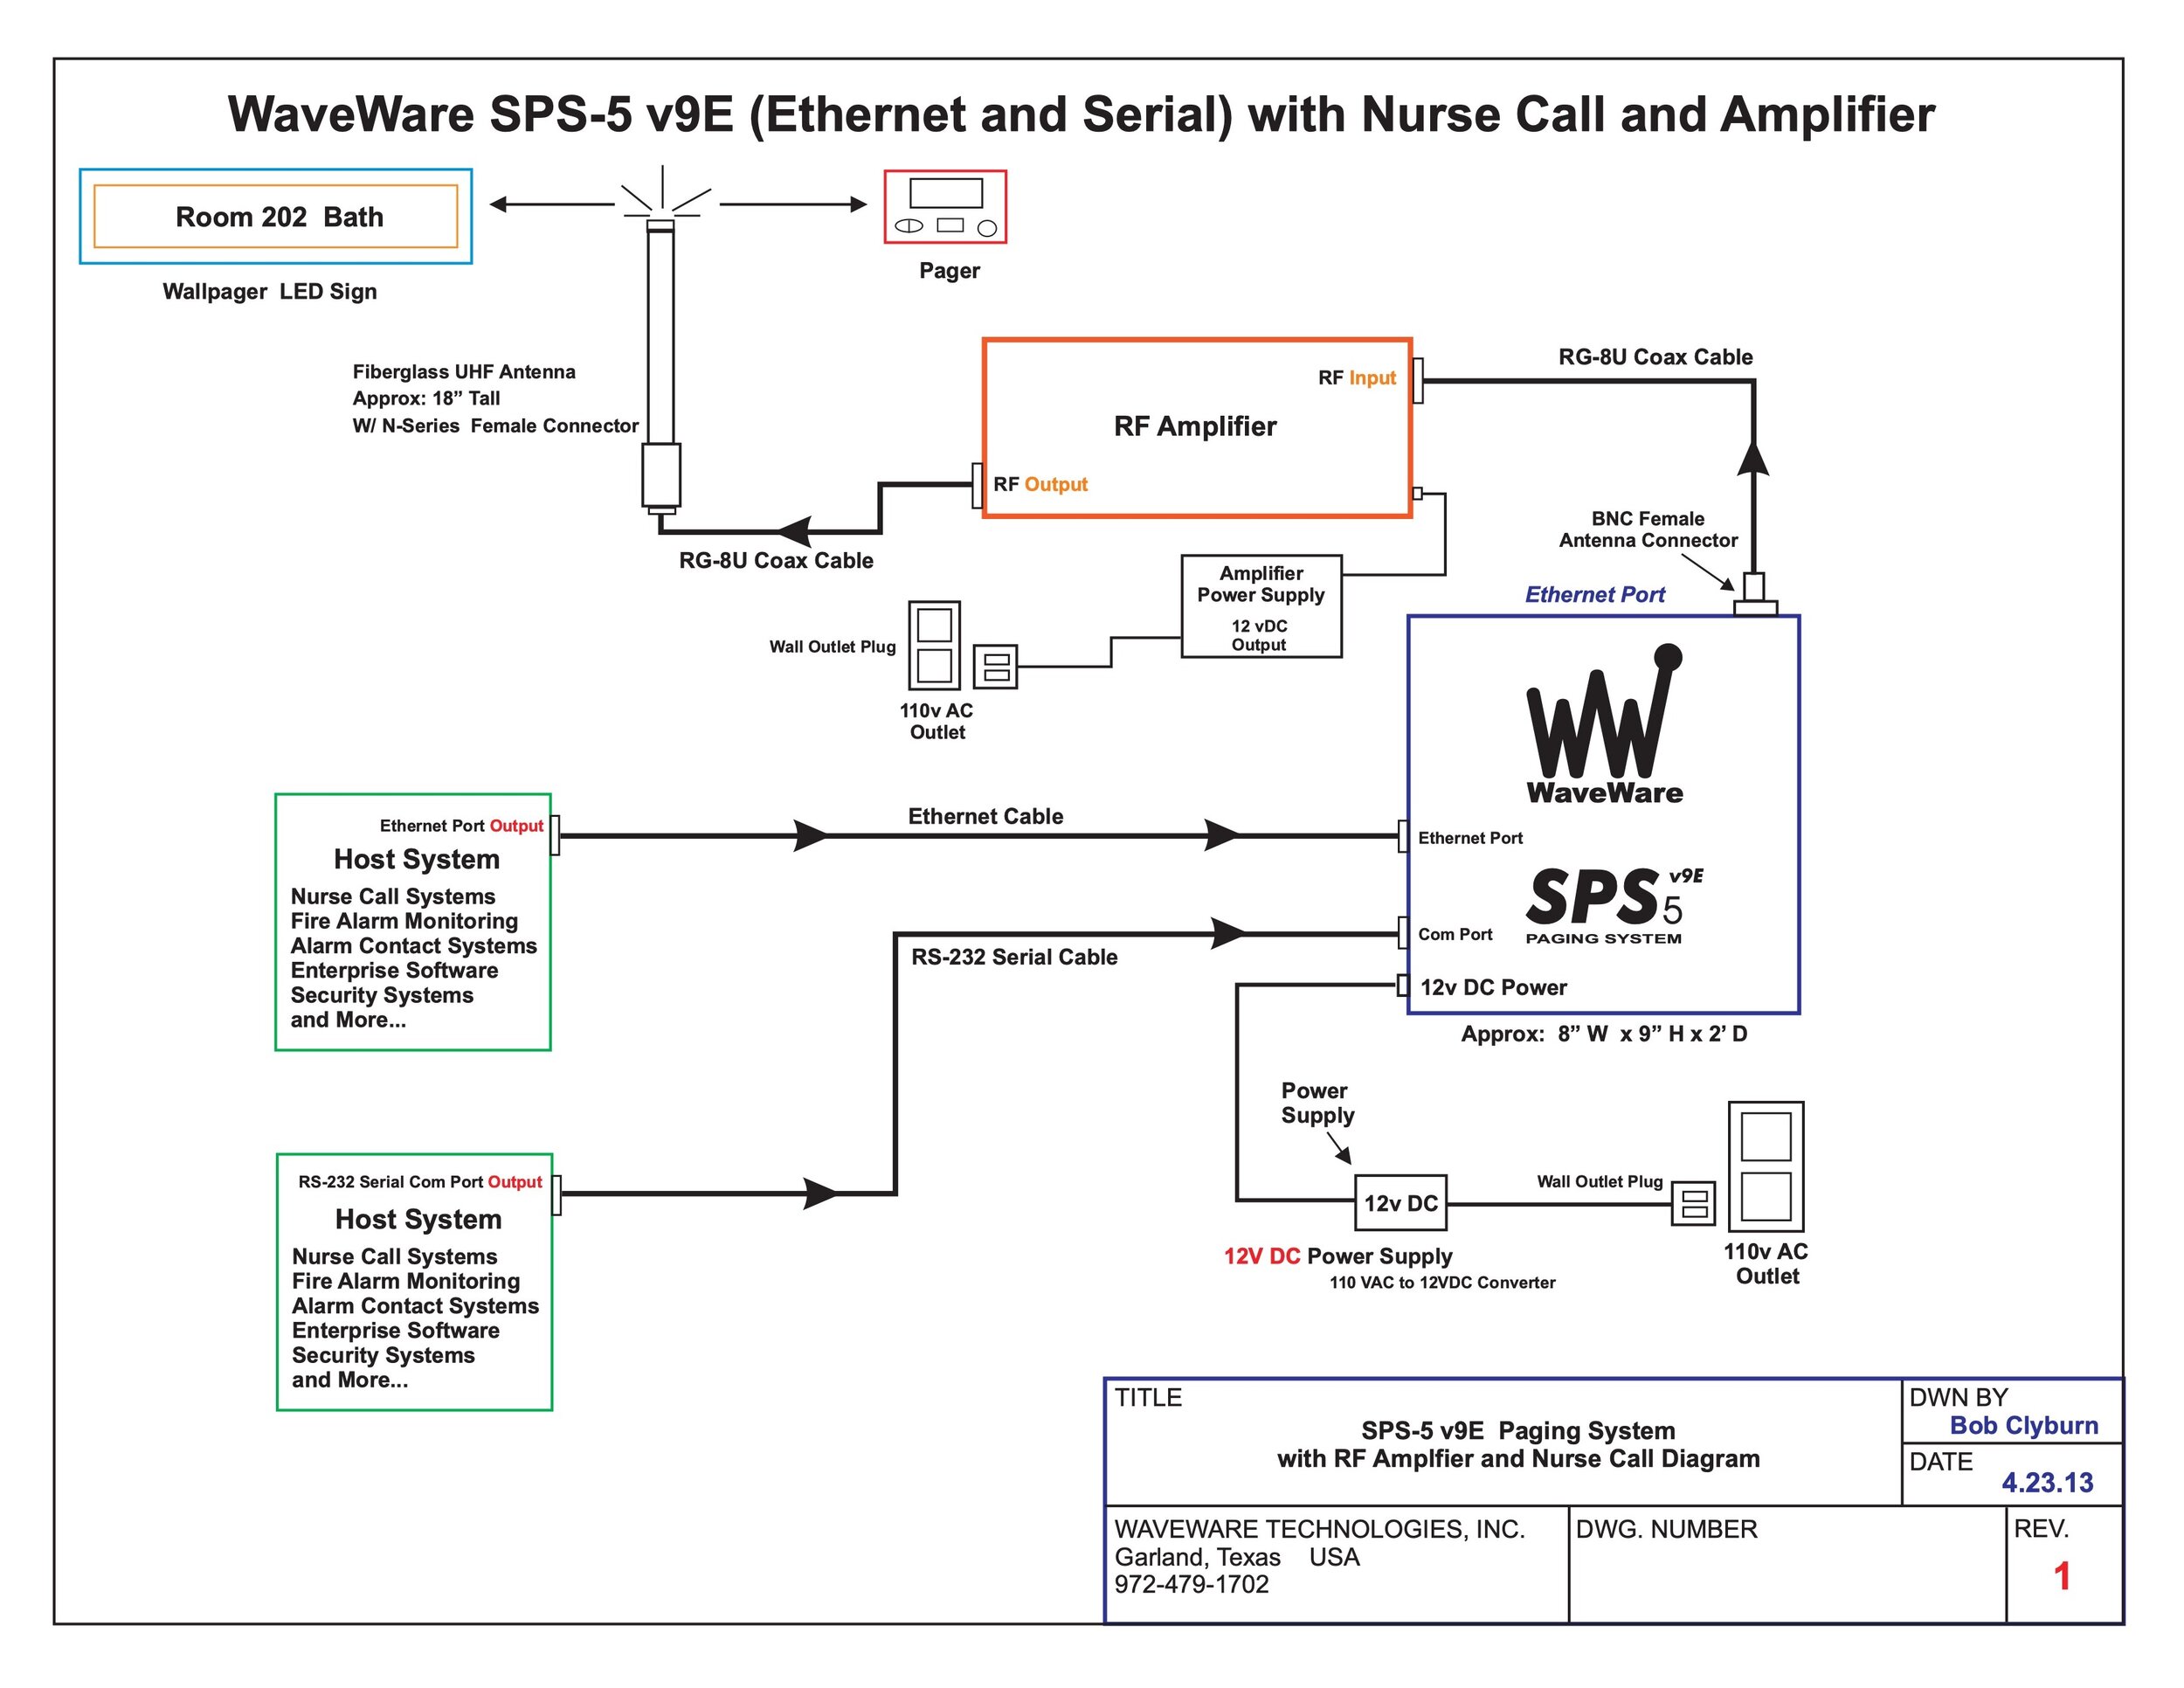
SPS5-v9E Nurse Call & Amplifier Diagram
View fullsize
SPS5-v9E Nurse Call & Amplifier Diagram 2
View fullsize
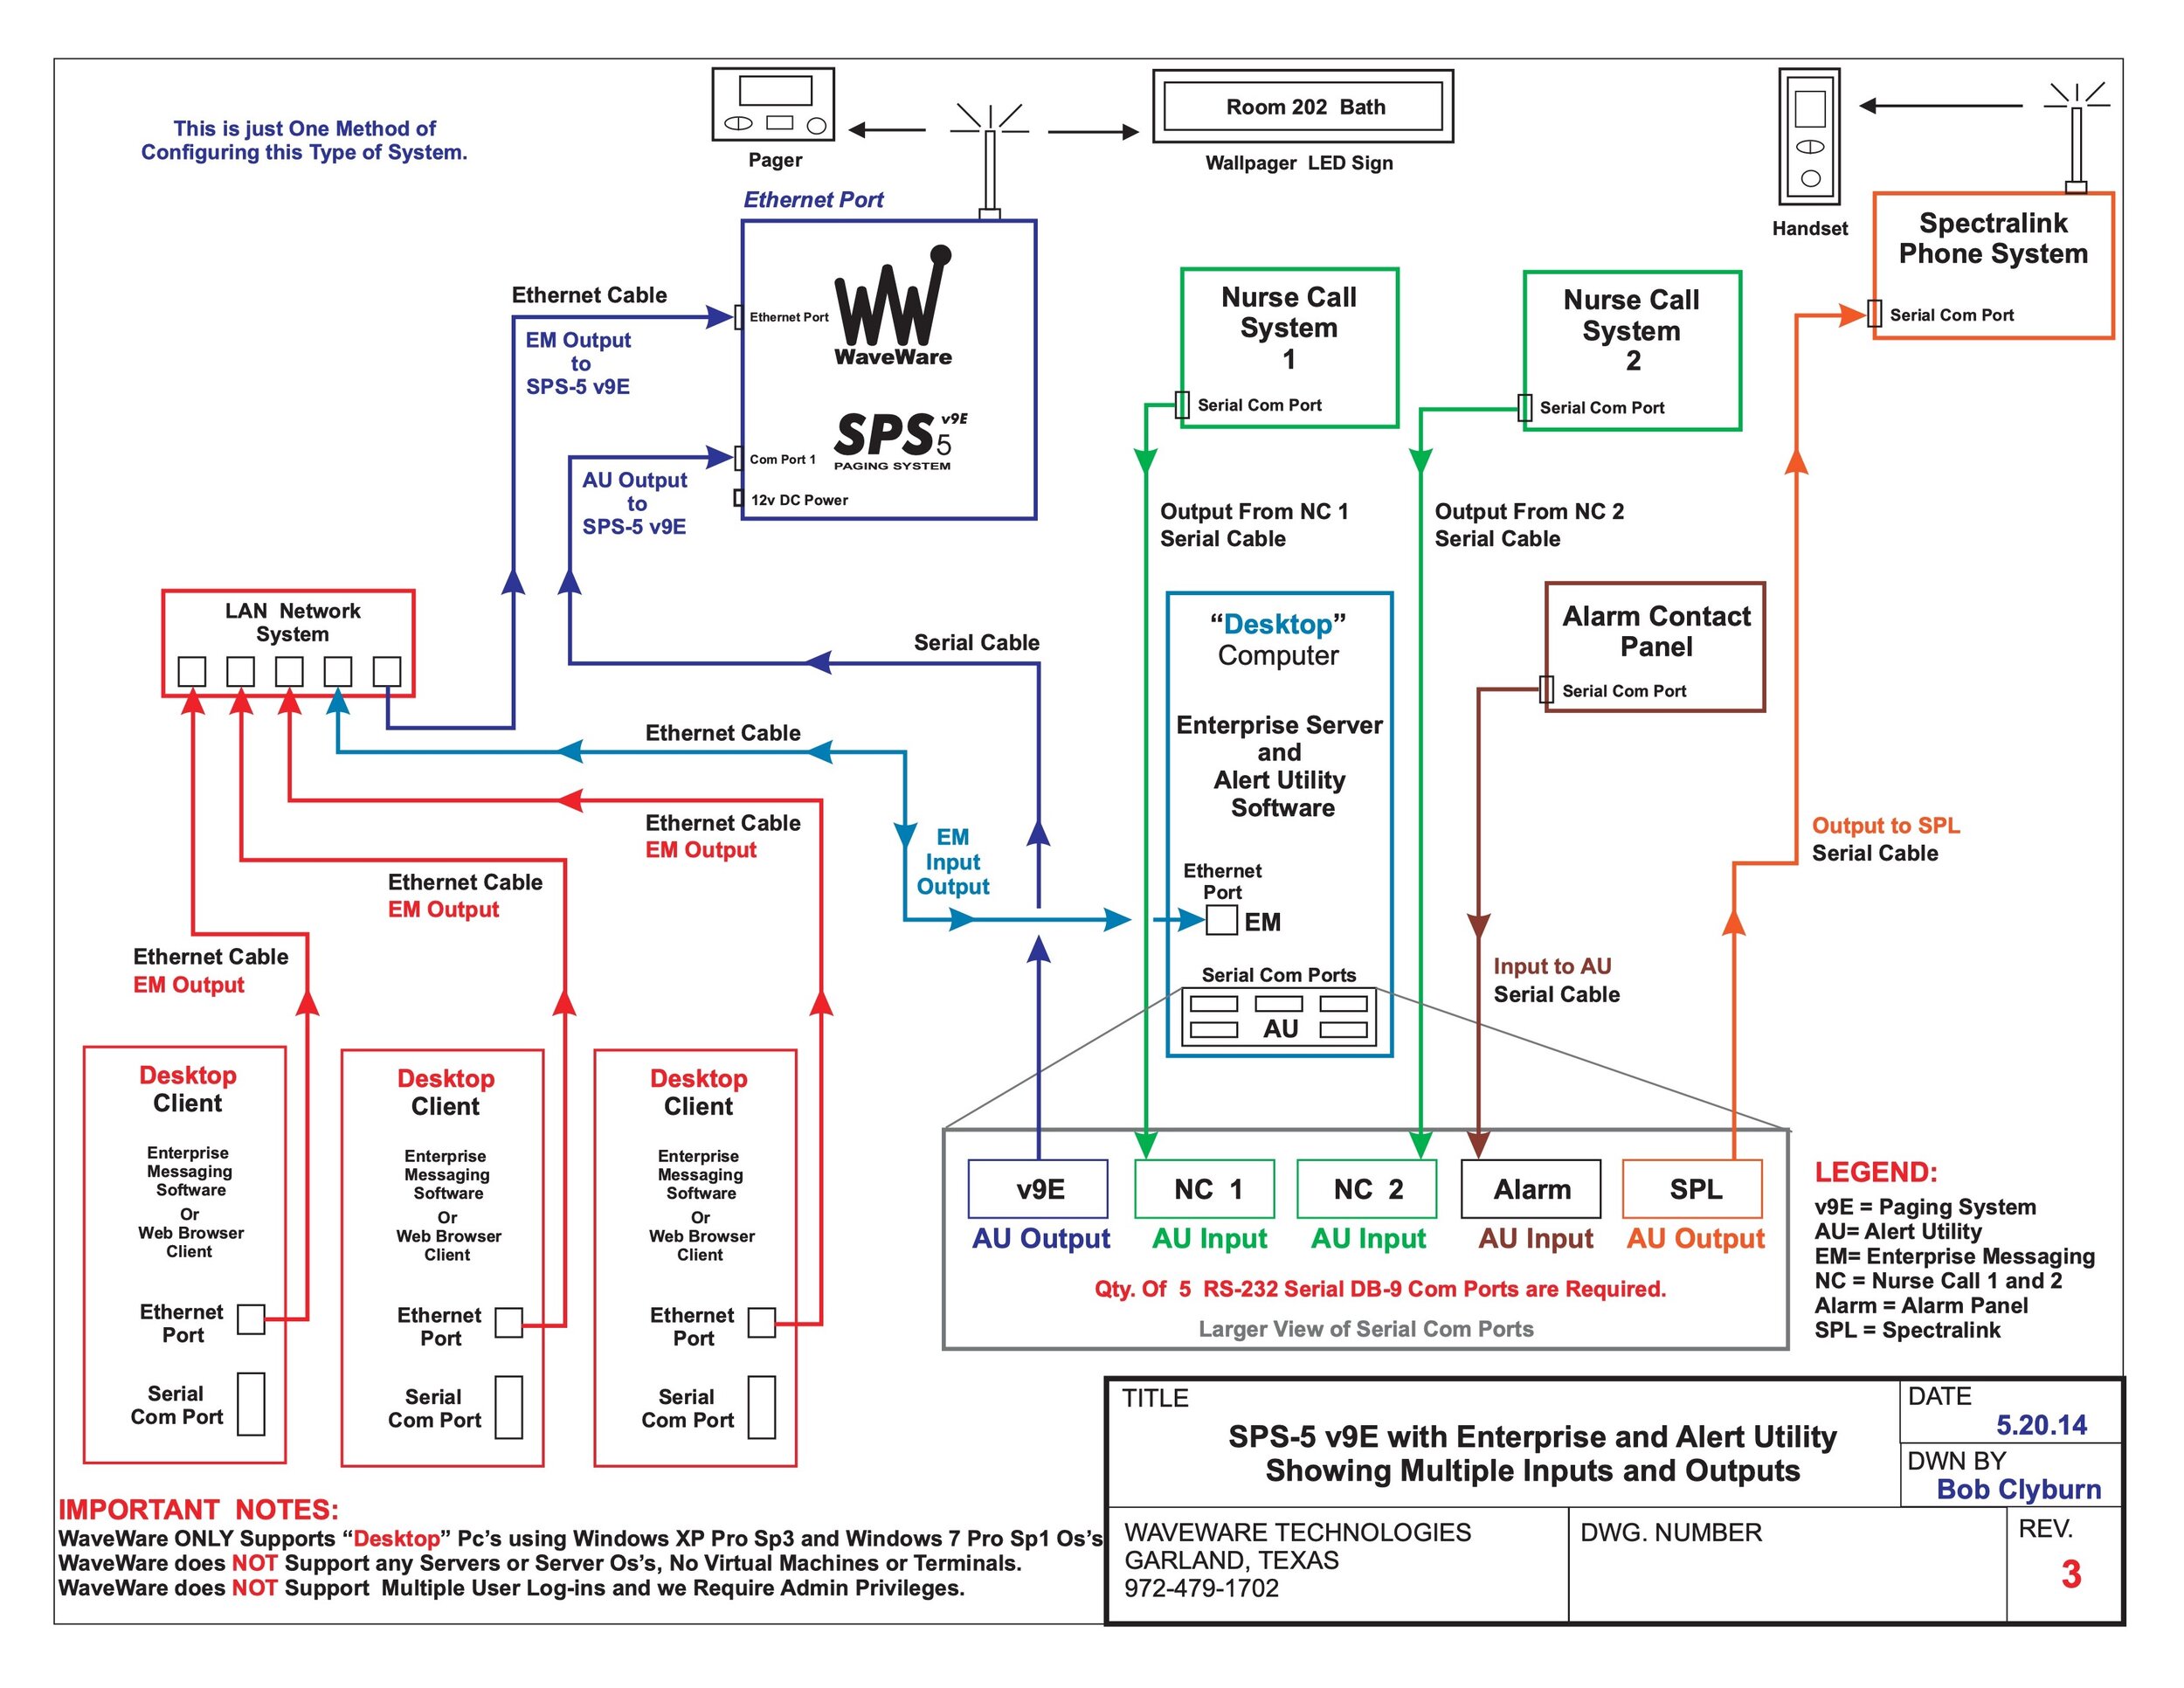
SPS5-v9E with Enterprise Messaging and Alert Utility
View fullsize
Inovonics Alert System Setup Diagram
View fullsize
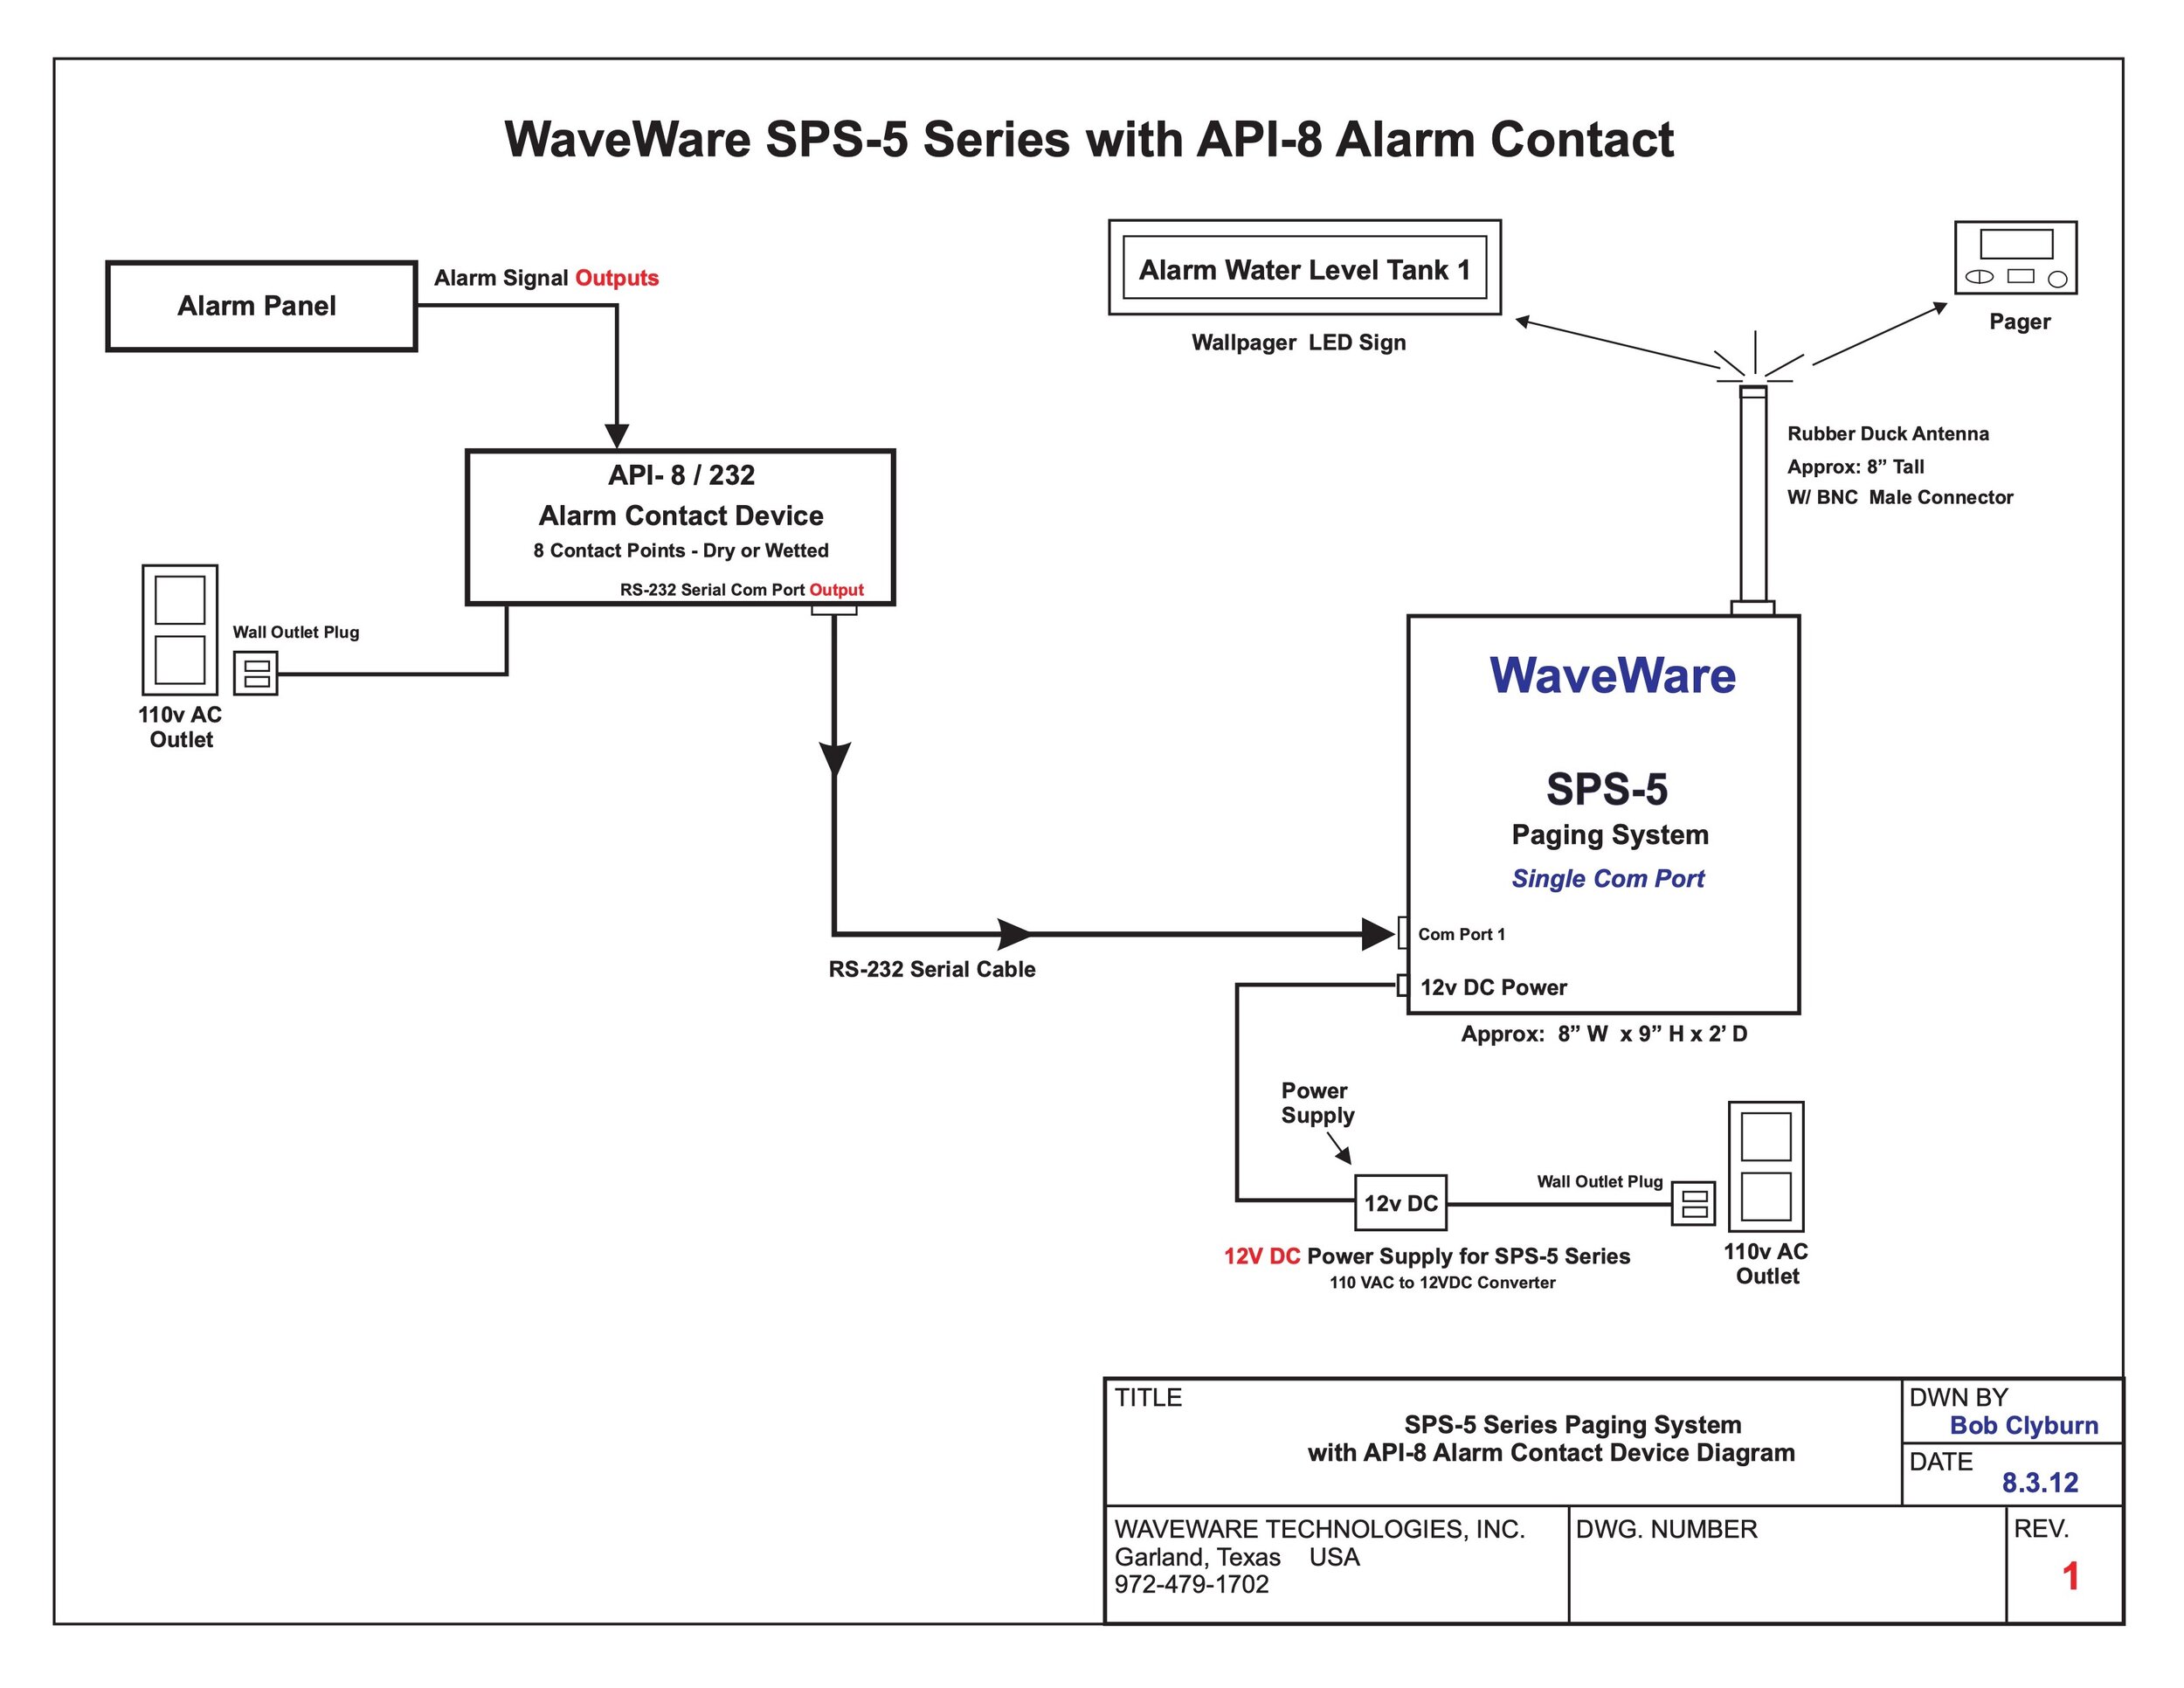
SPS-5 Series with API-8 Alarm Contact
View fullsize
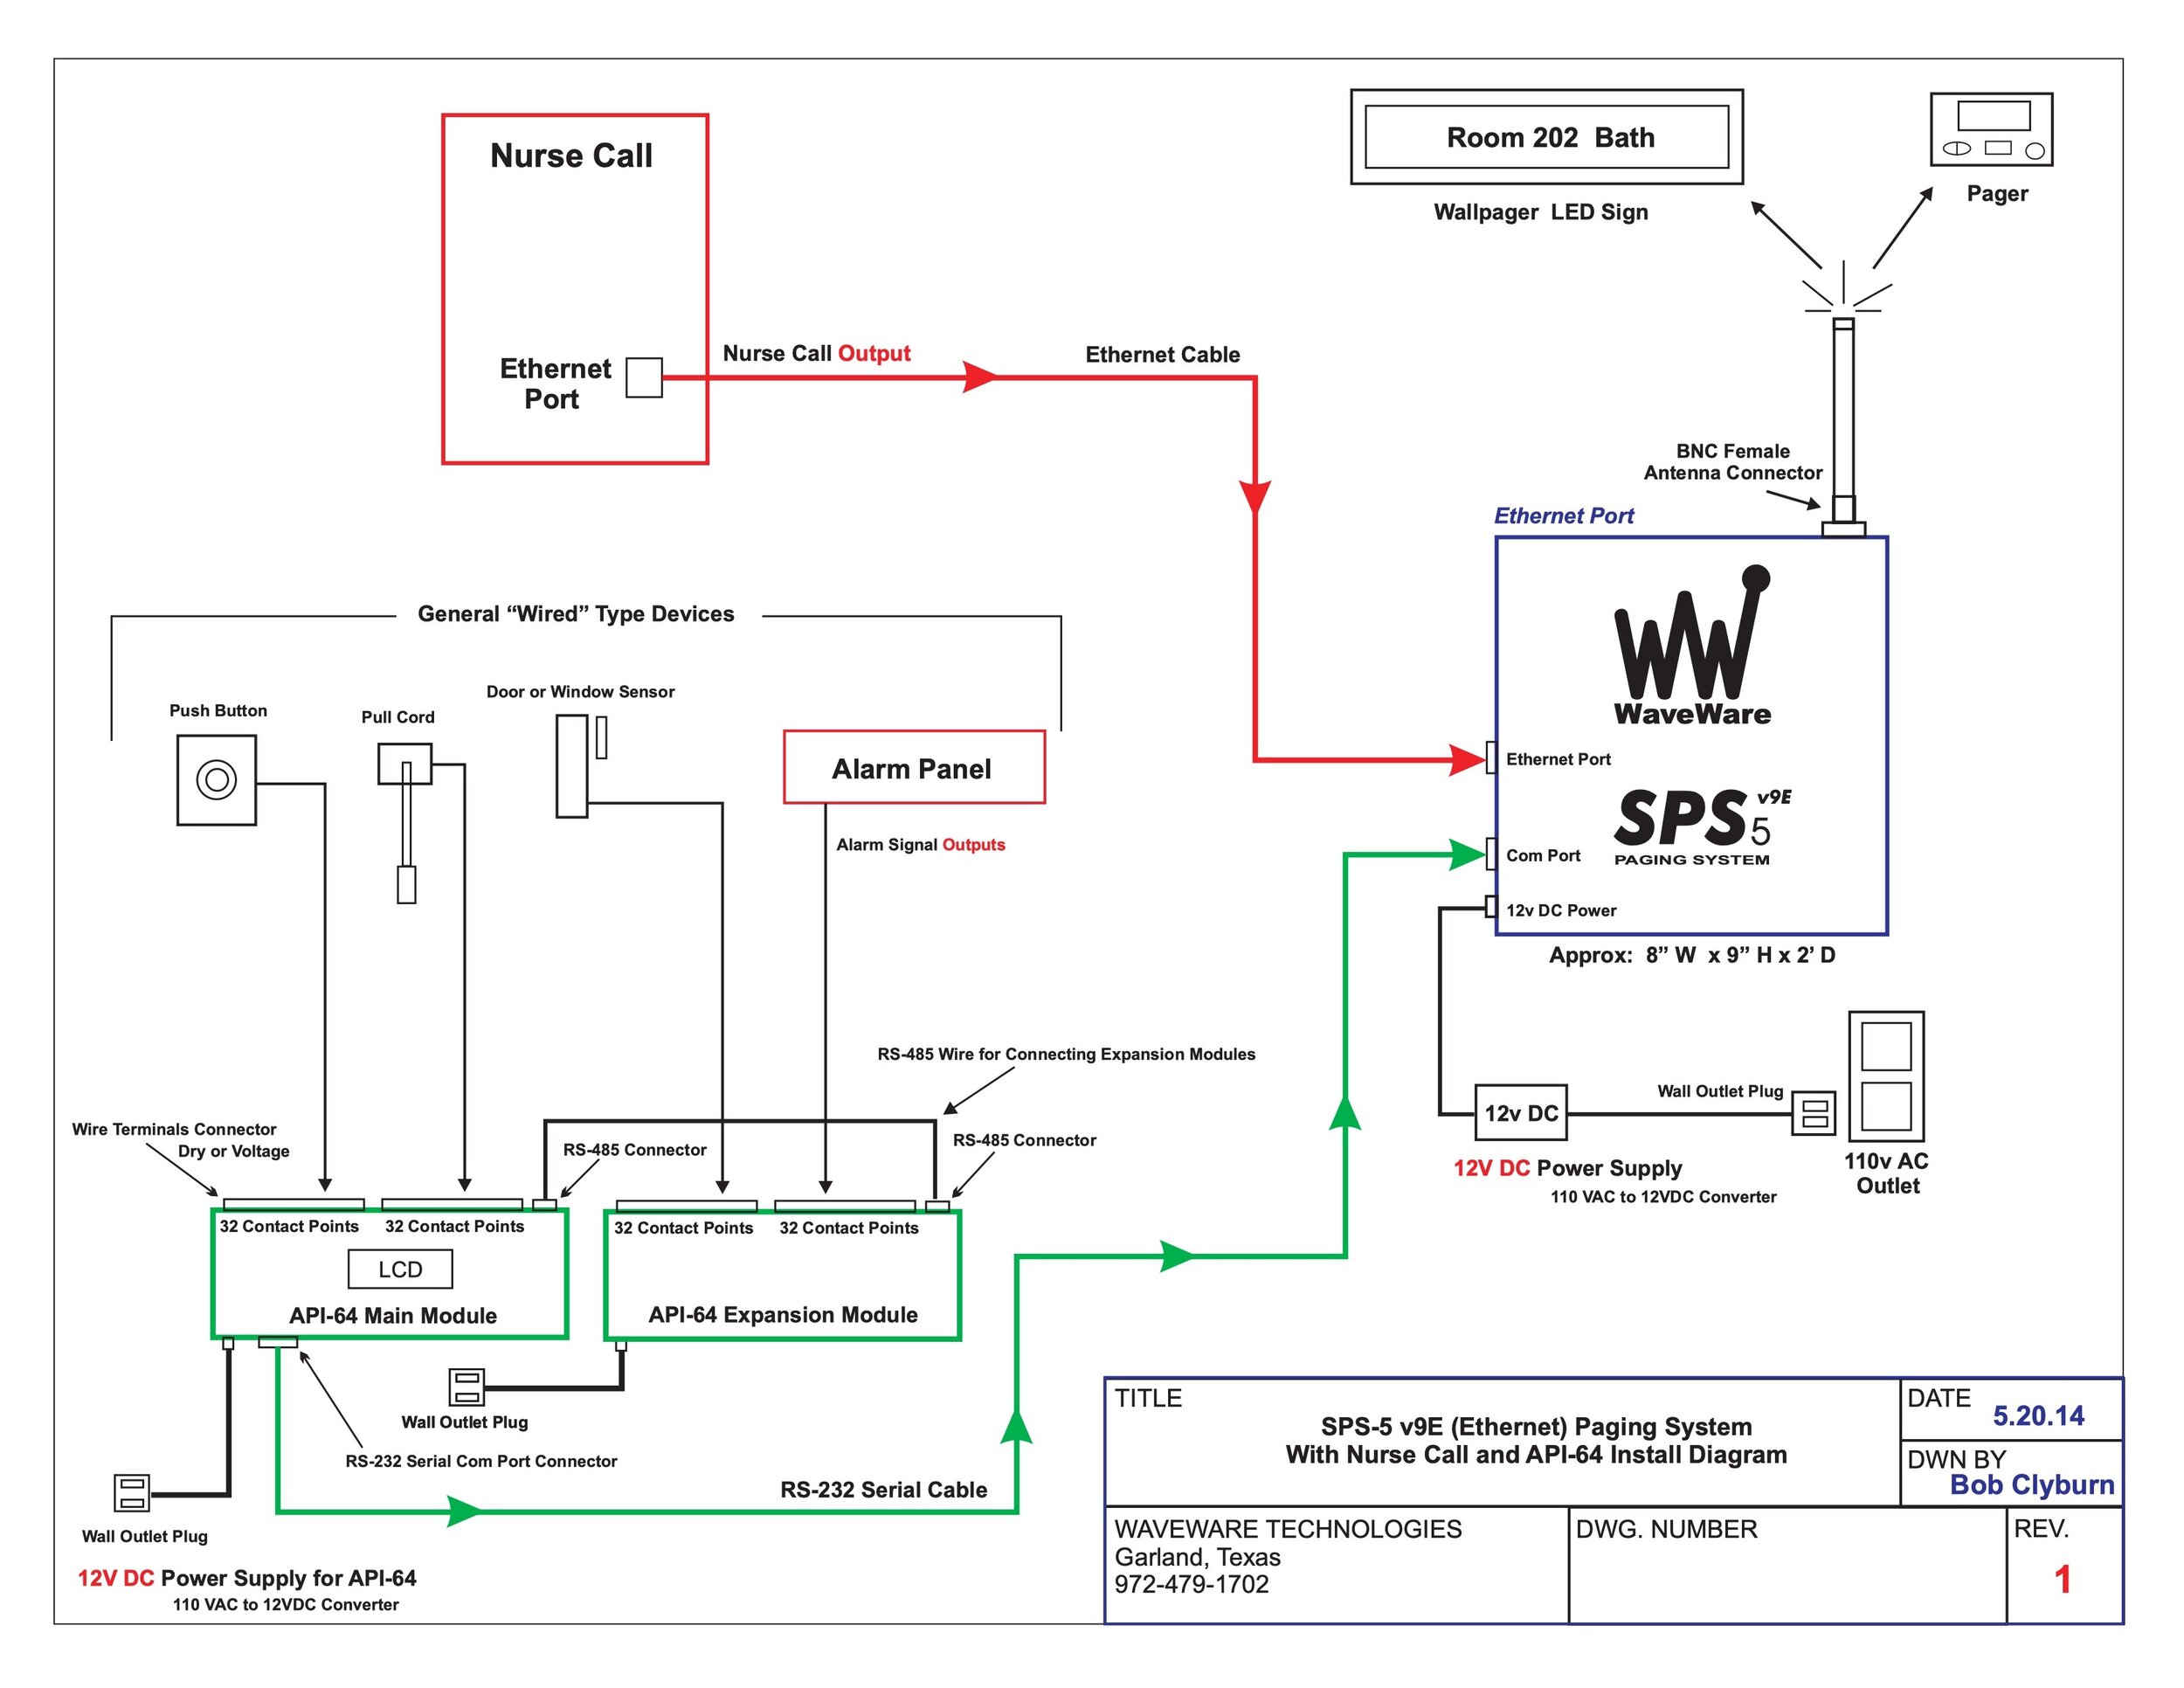
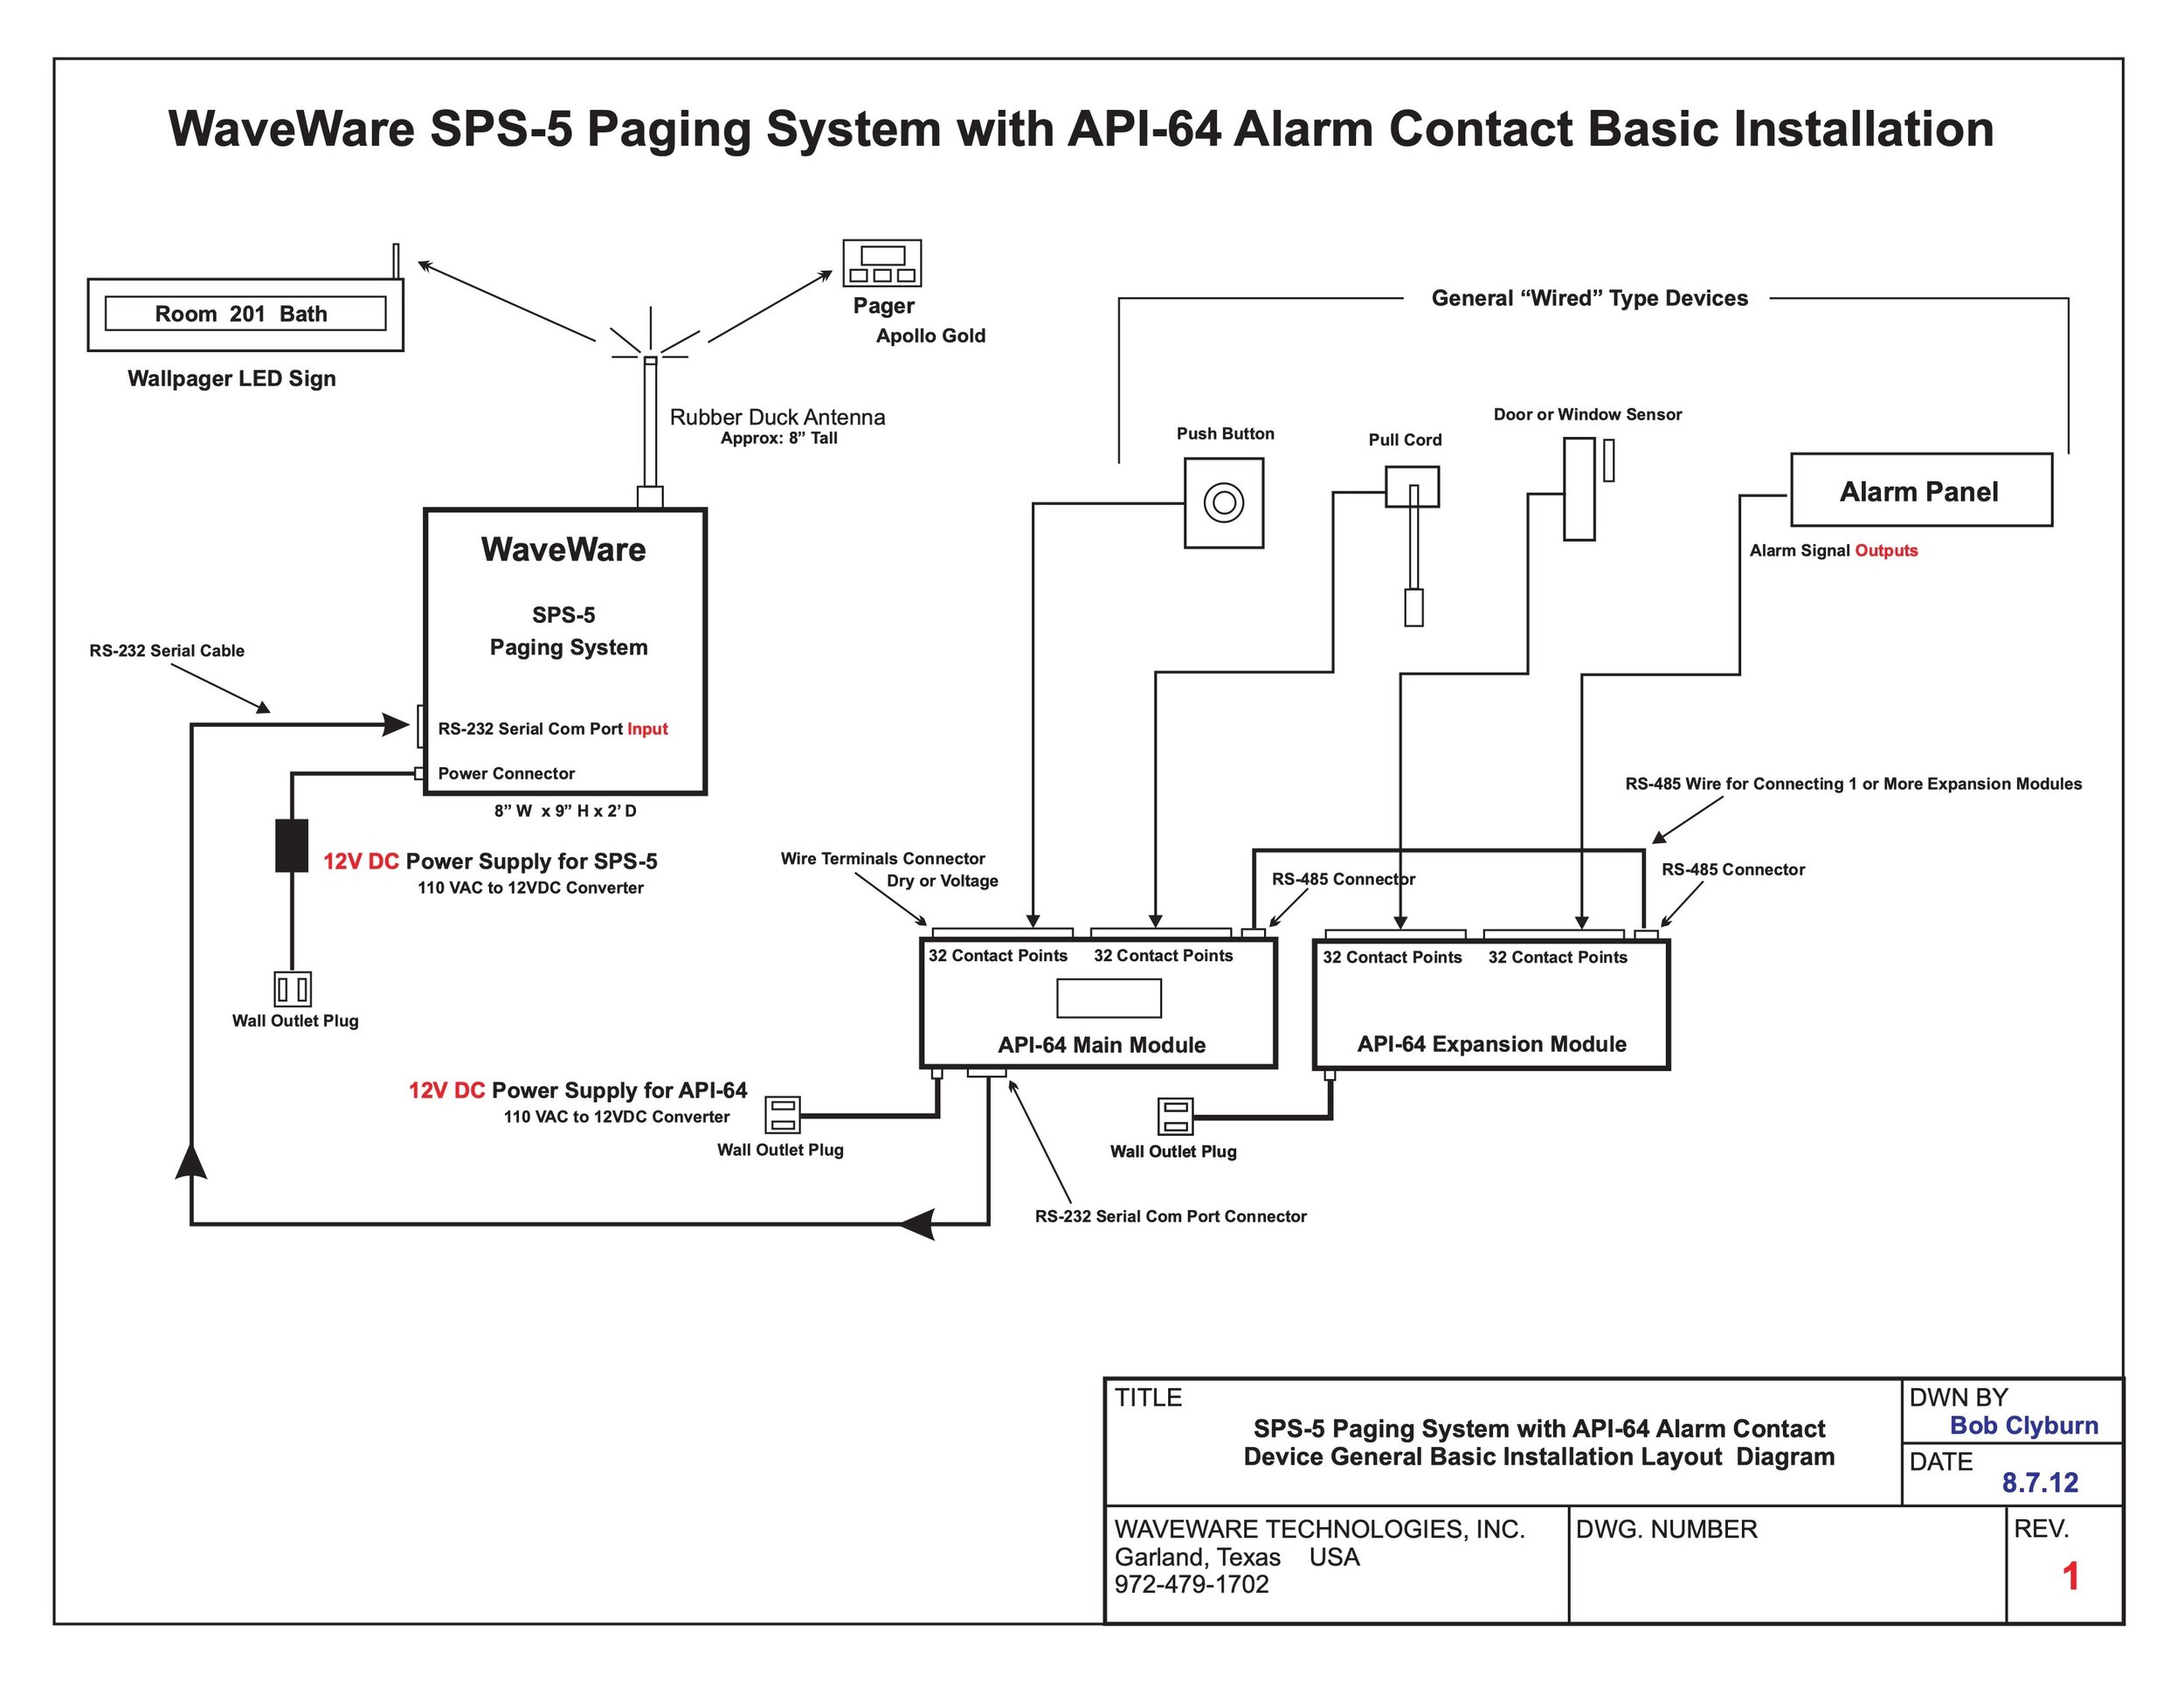
SPS-5 System with API-64 Alarm Contact Basic Installation
View fullsize
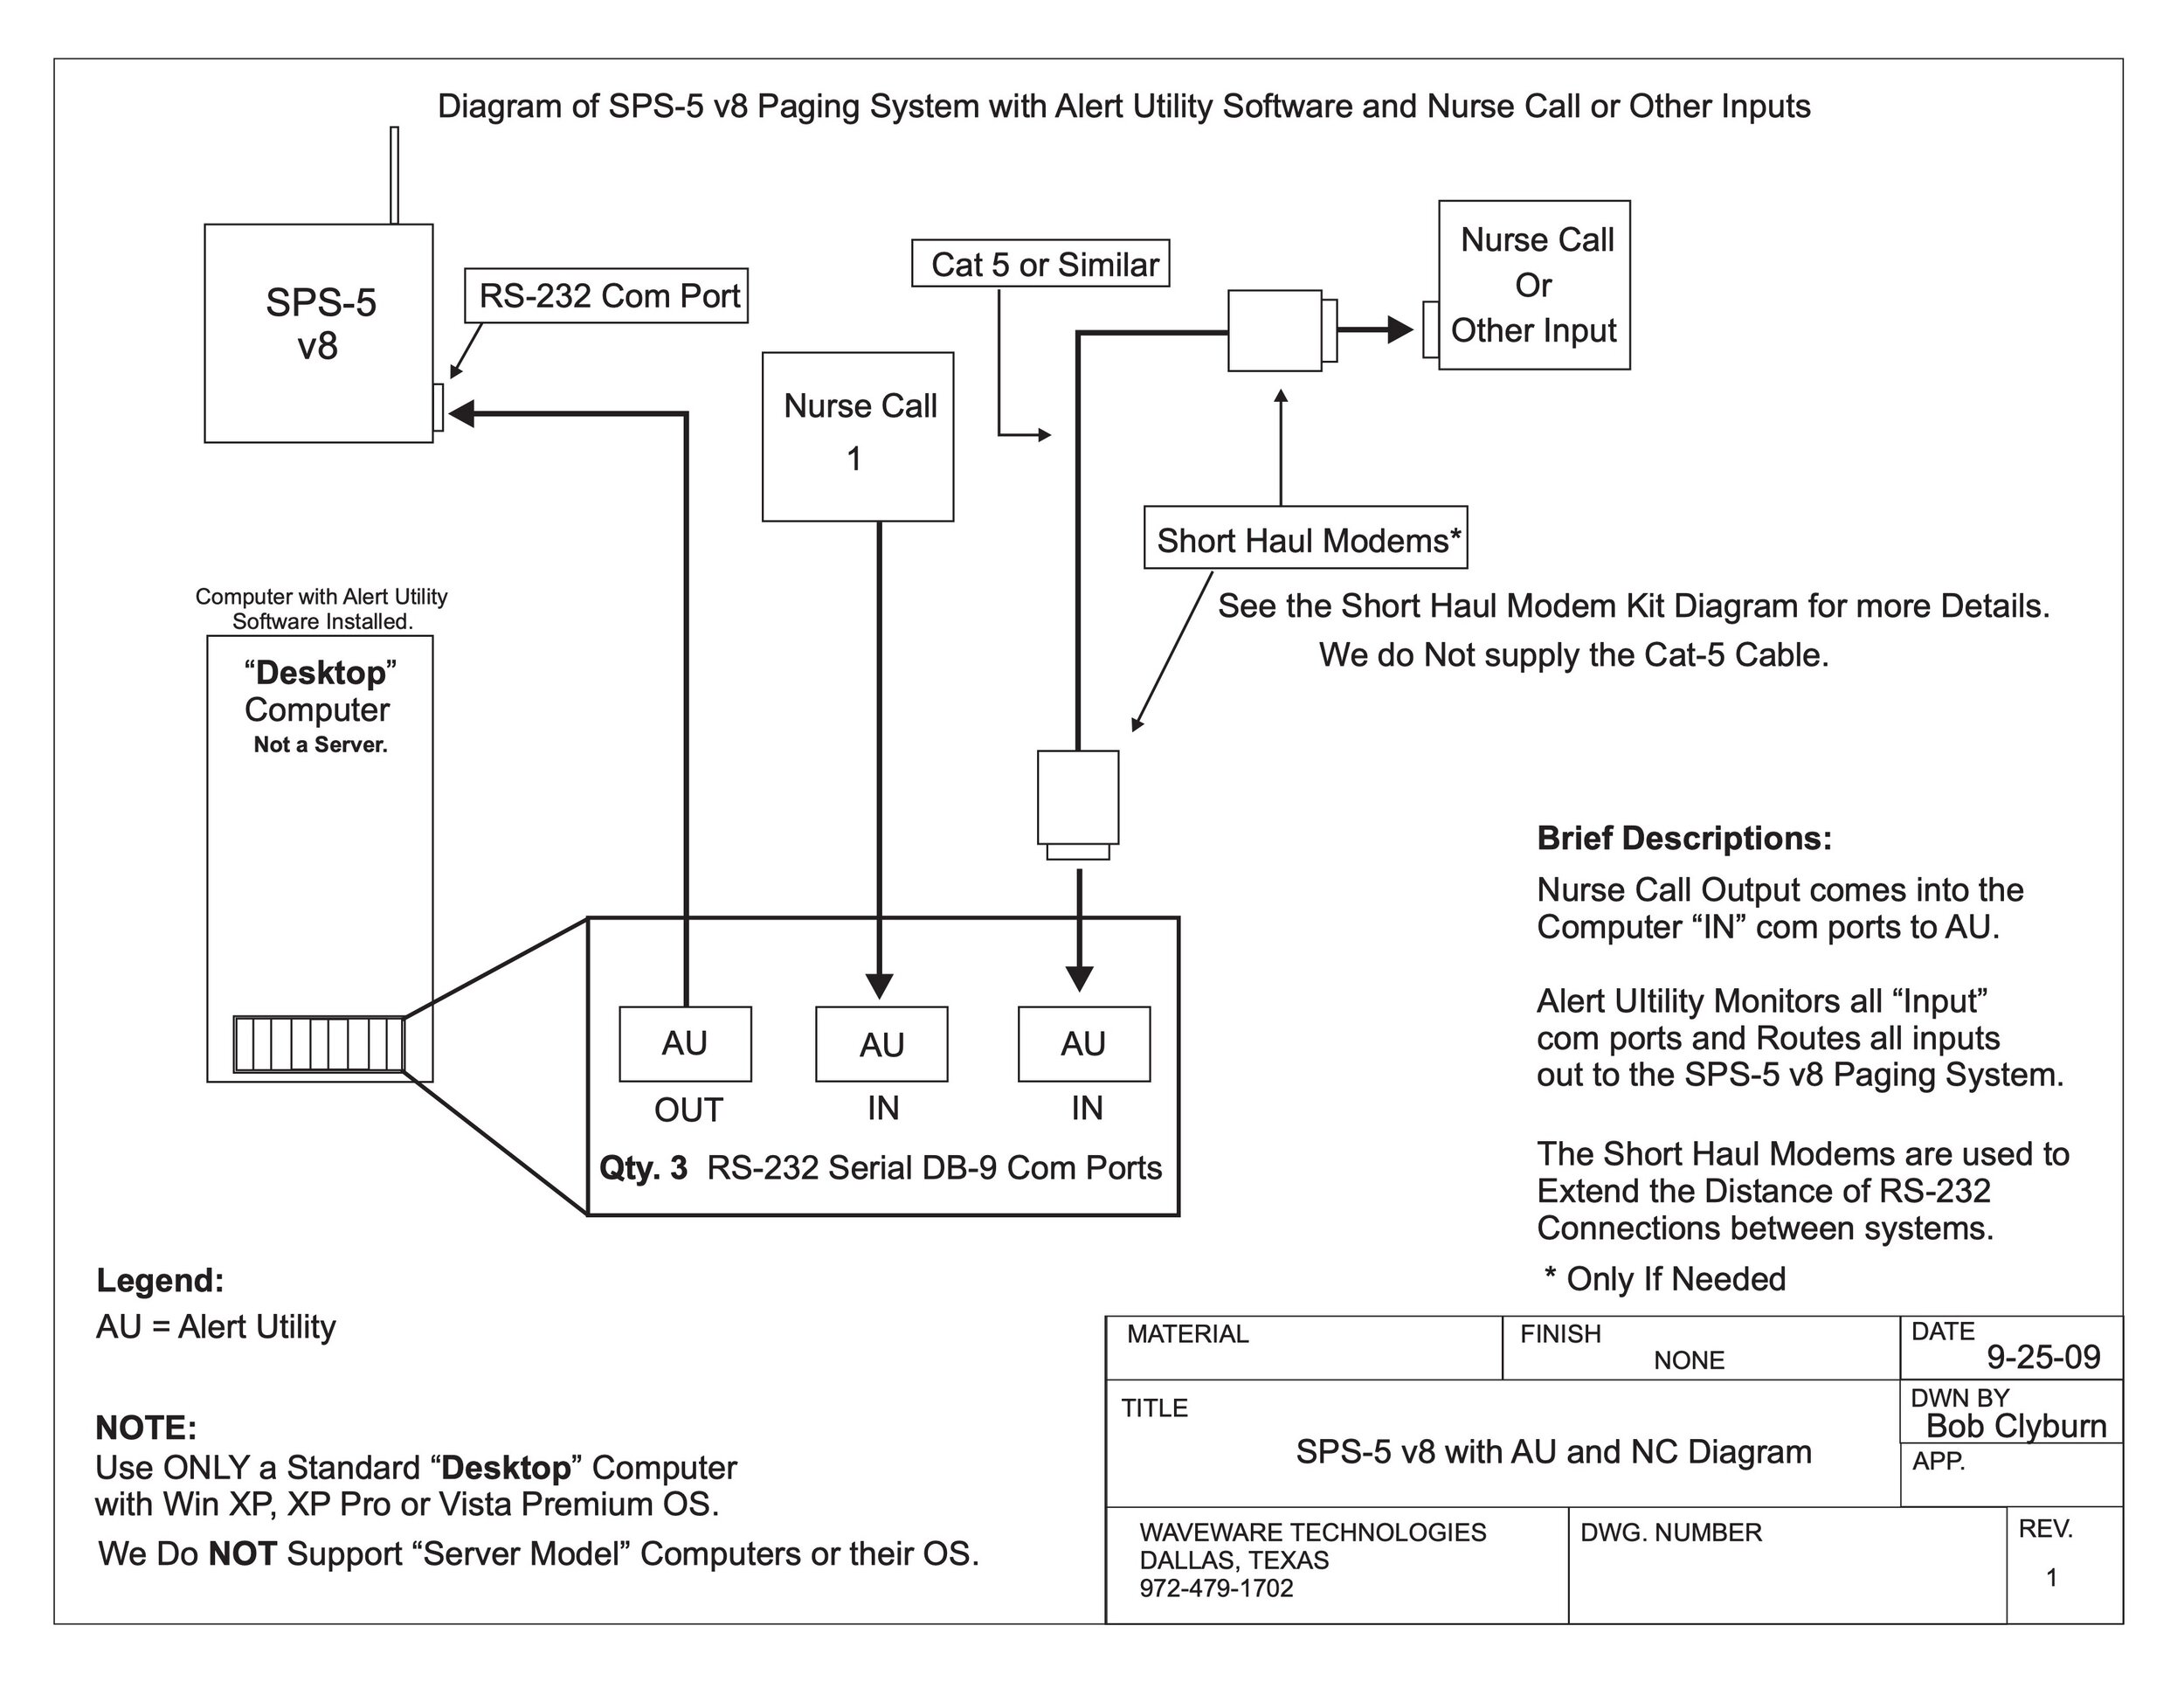
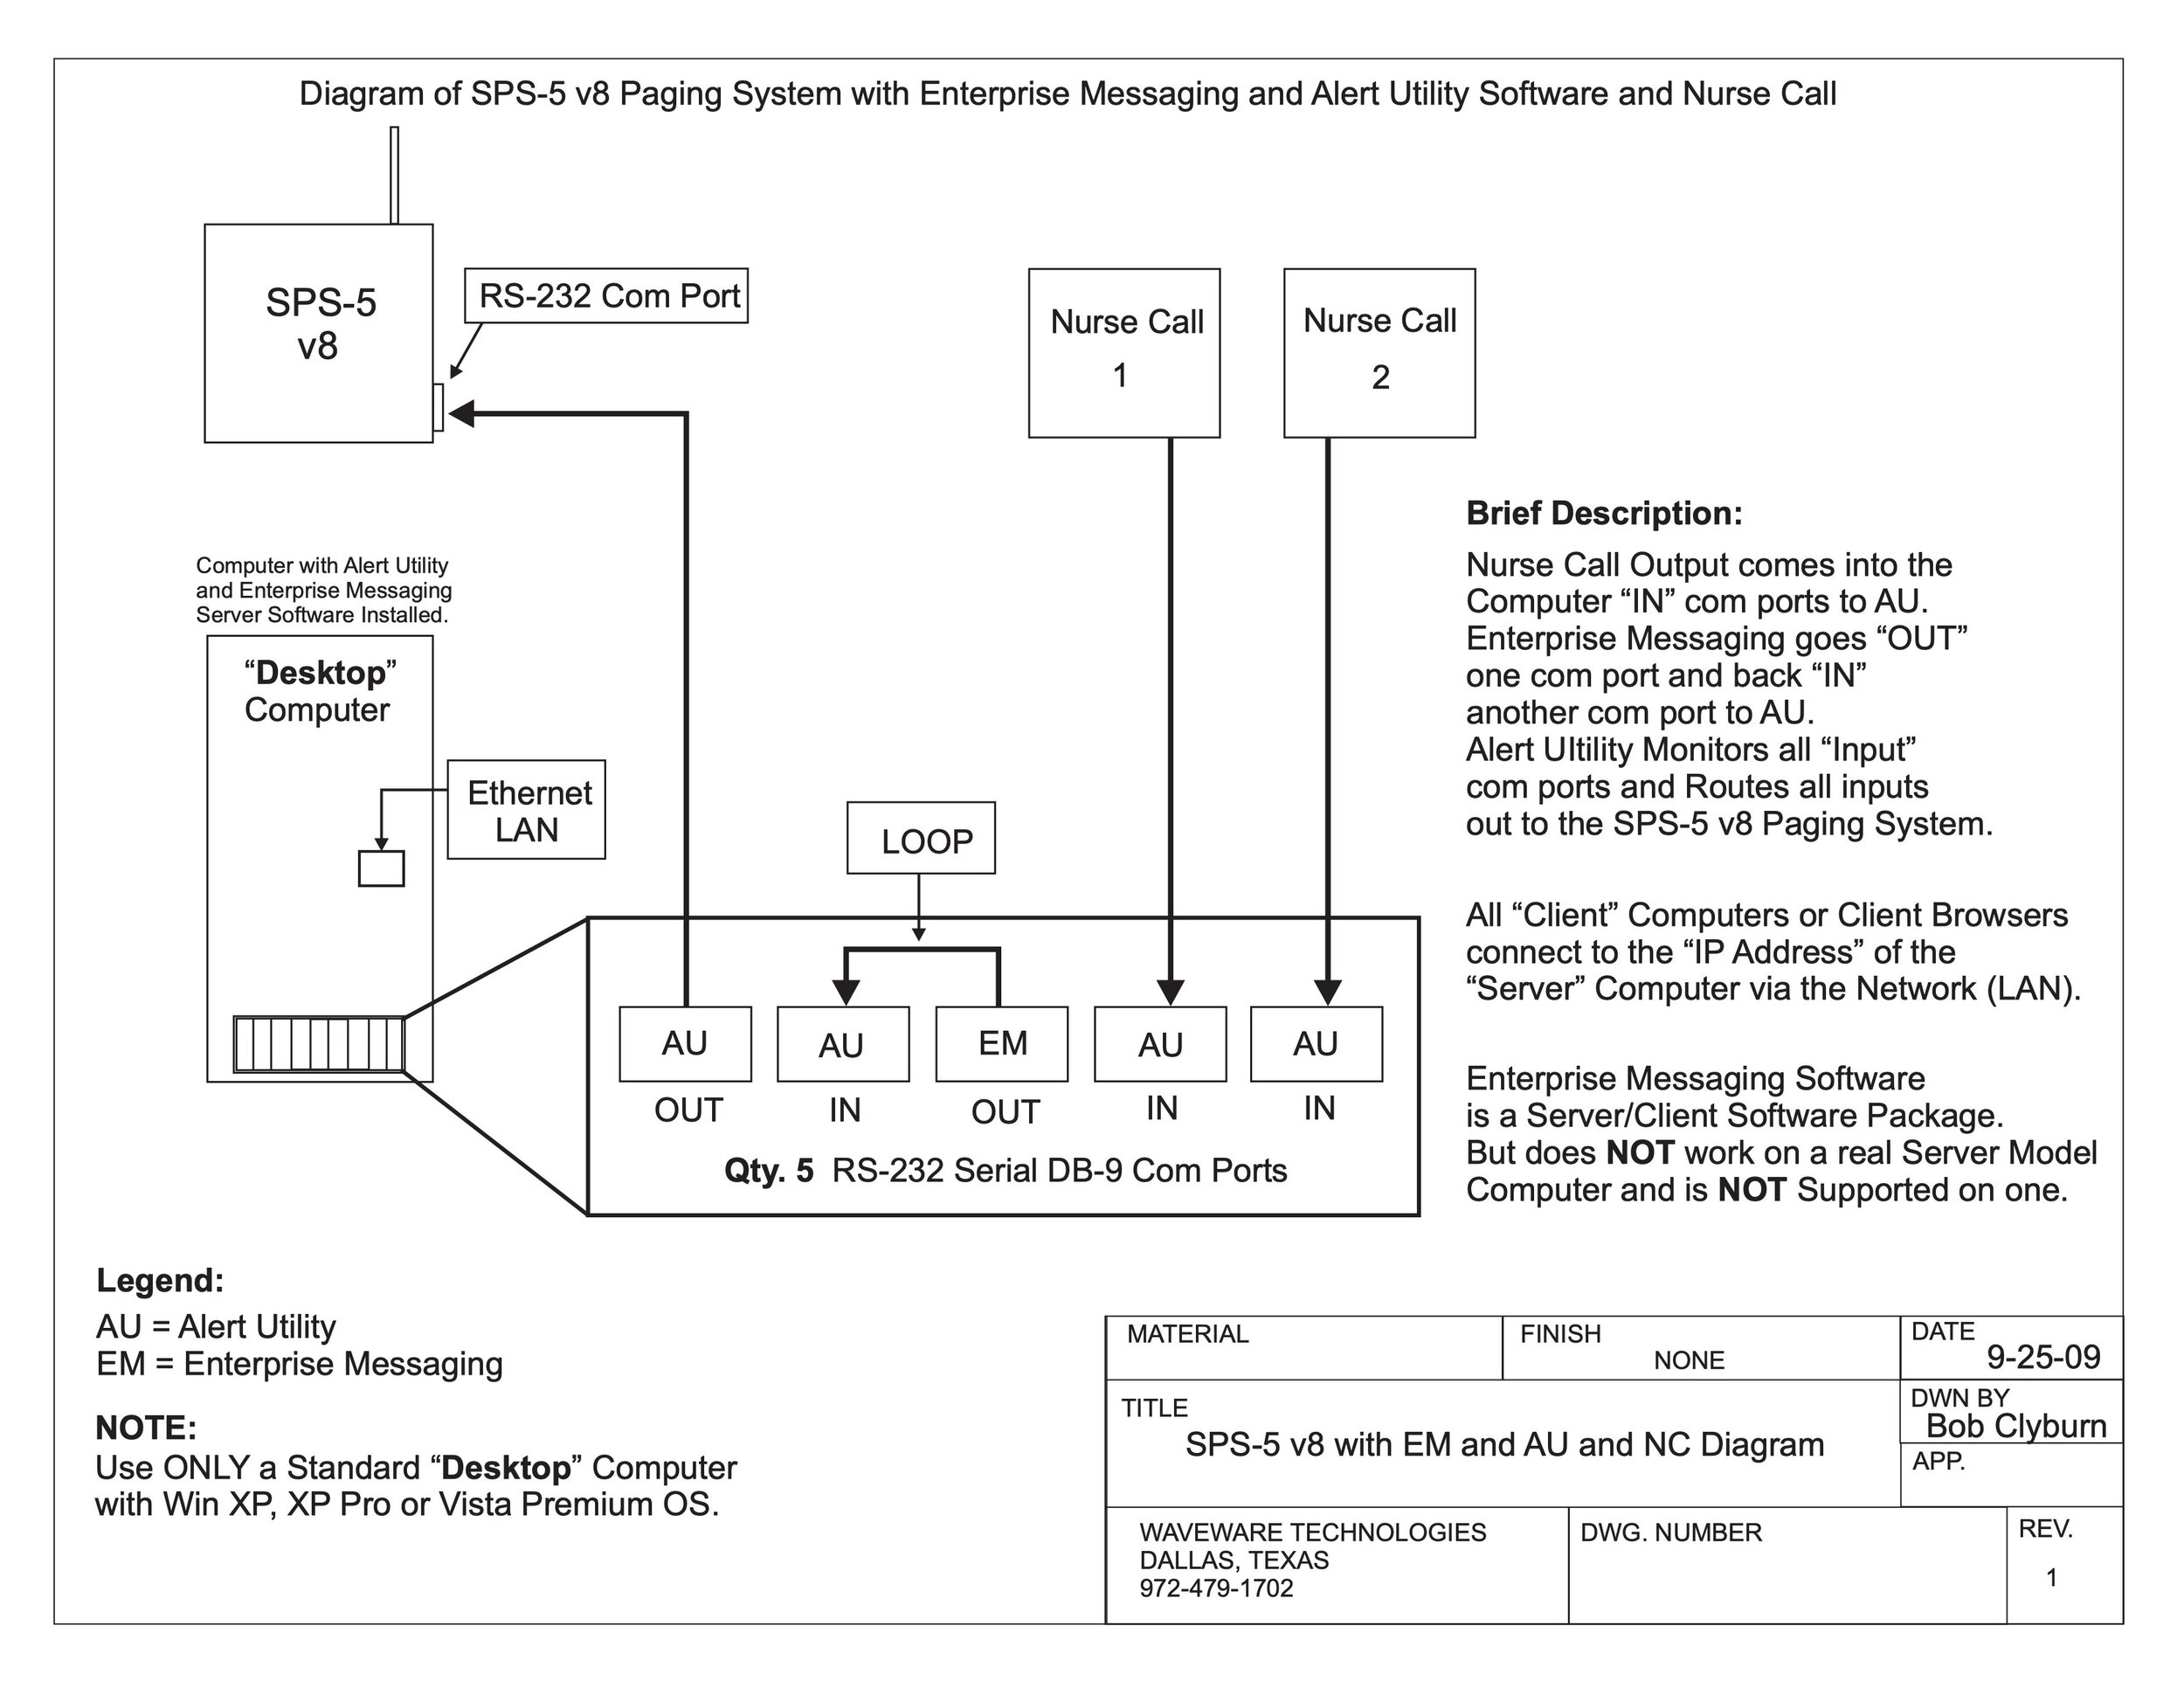
SPS5-v8 with Alert Utility & Nurse Call
View fullsize
SPS5-v8 with Enterprise Messaging, Nurse Call, and Alert Utility Diagram
View fullsize
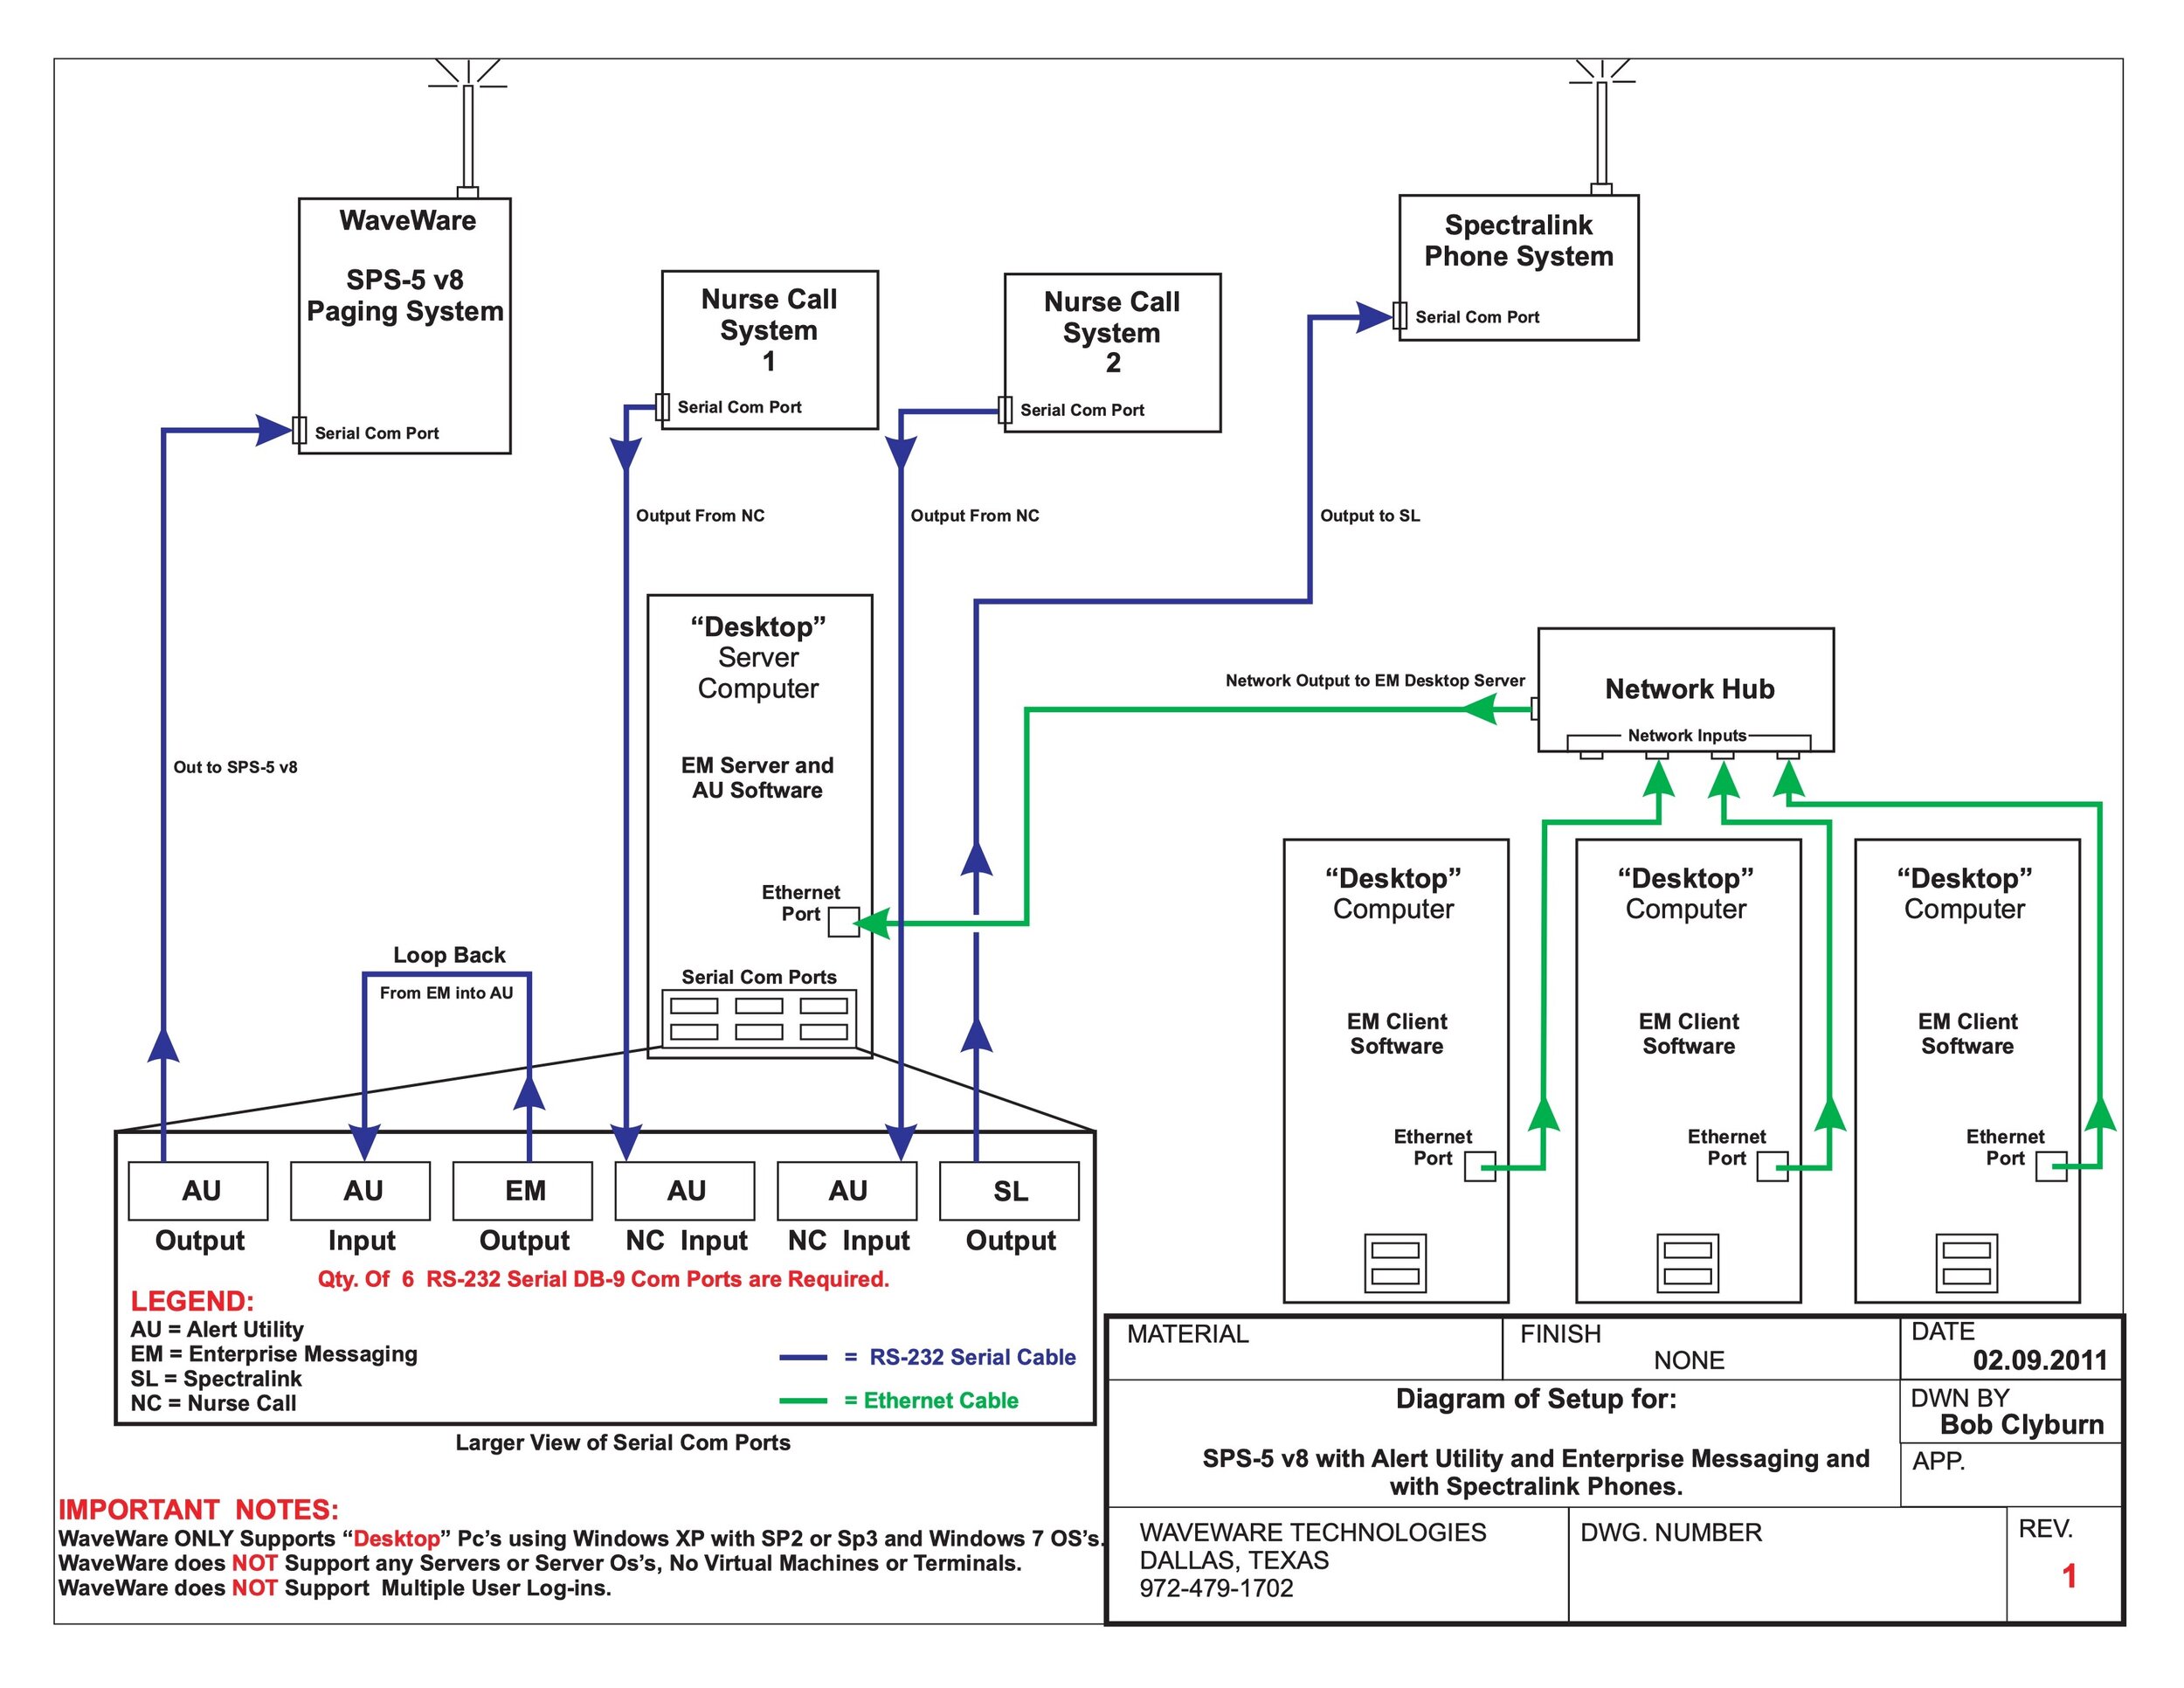
SPS-5v8 with Alert Utility, Enterprise Messaging, SpectraLink Phones
View fullsize
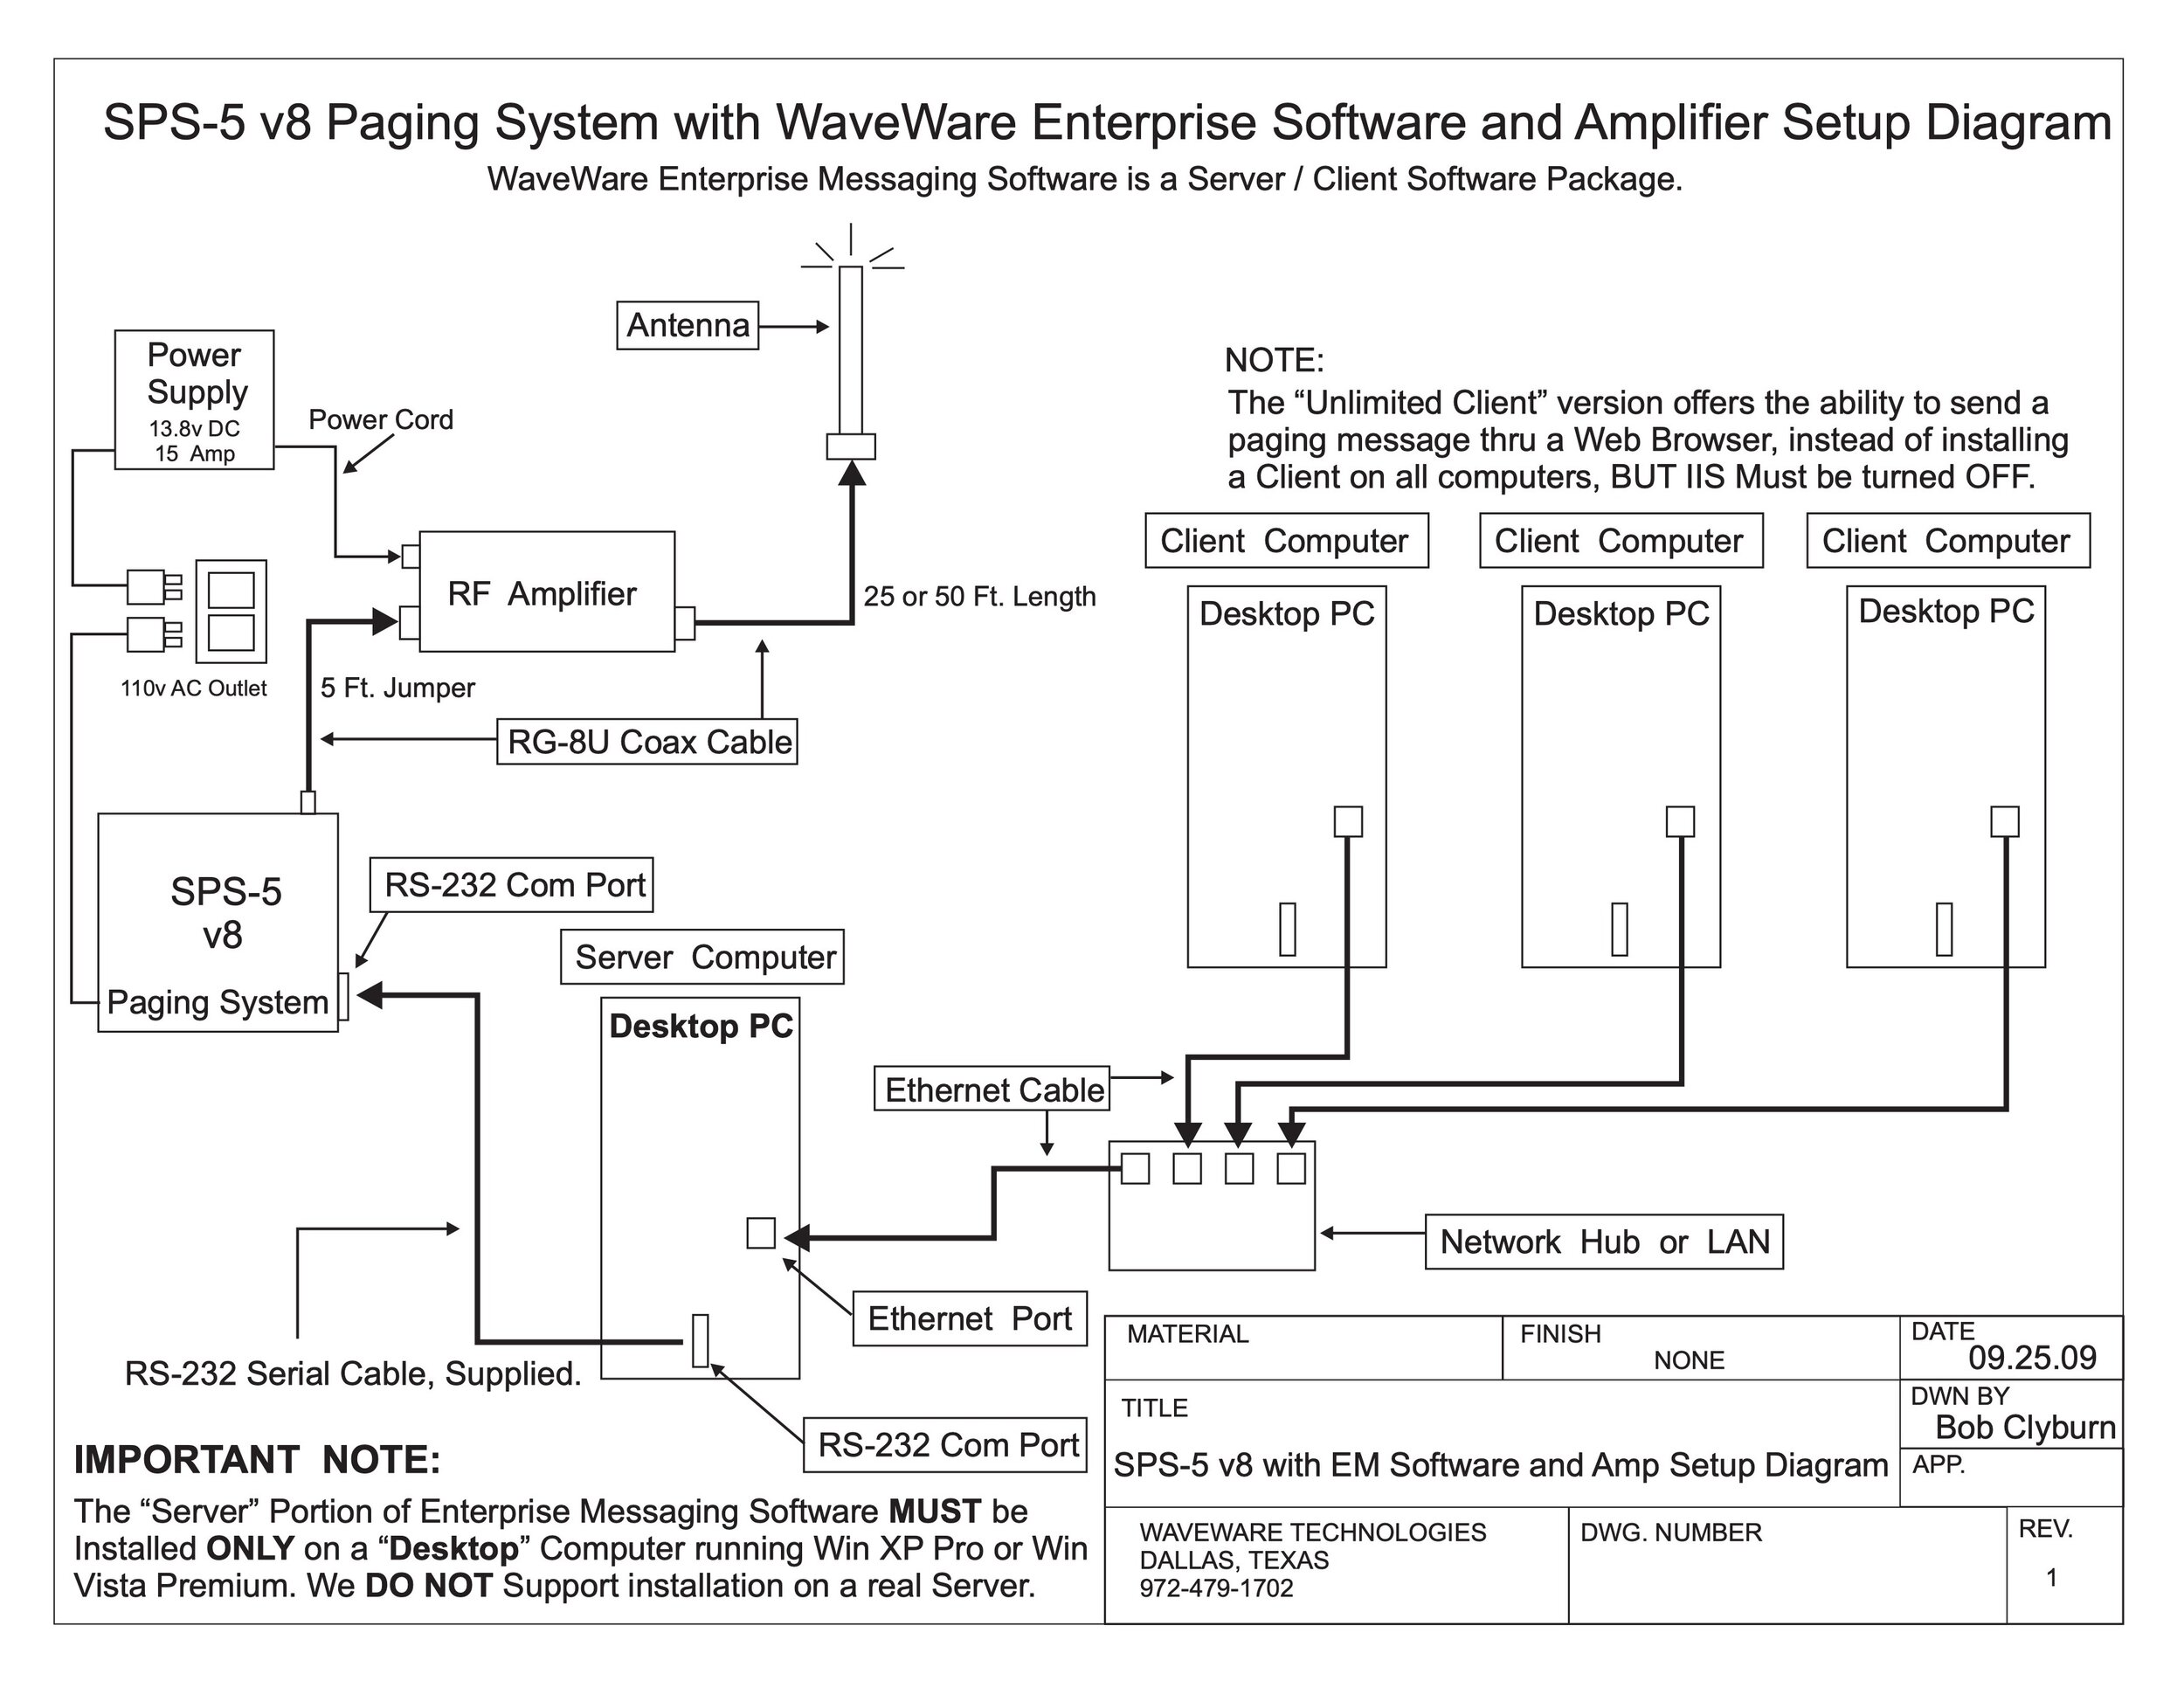
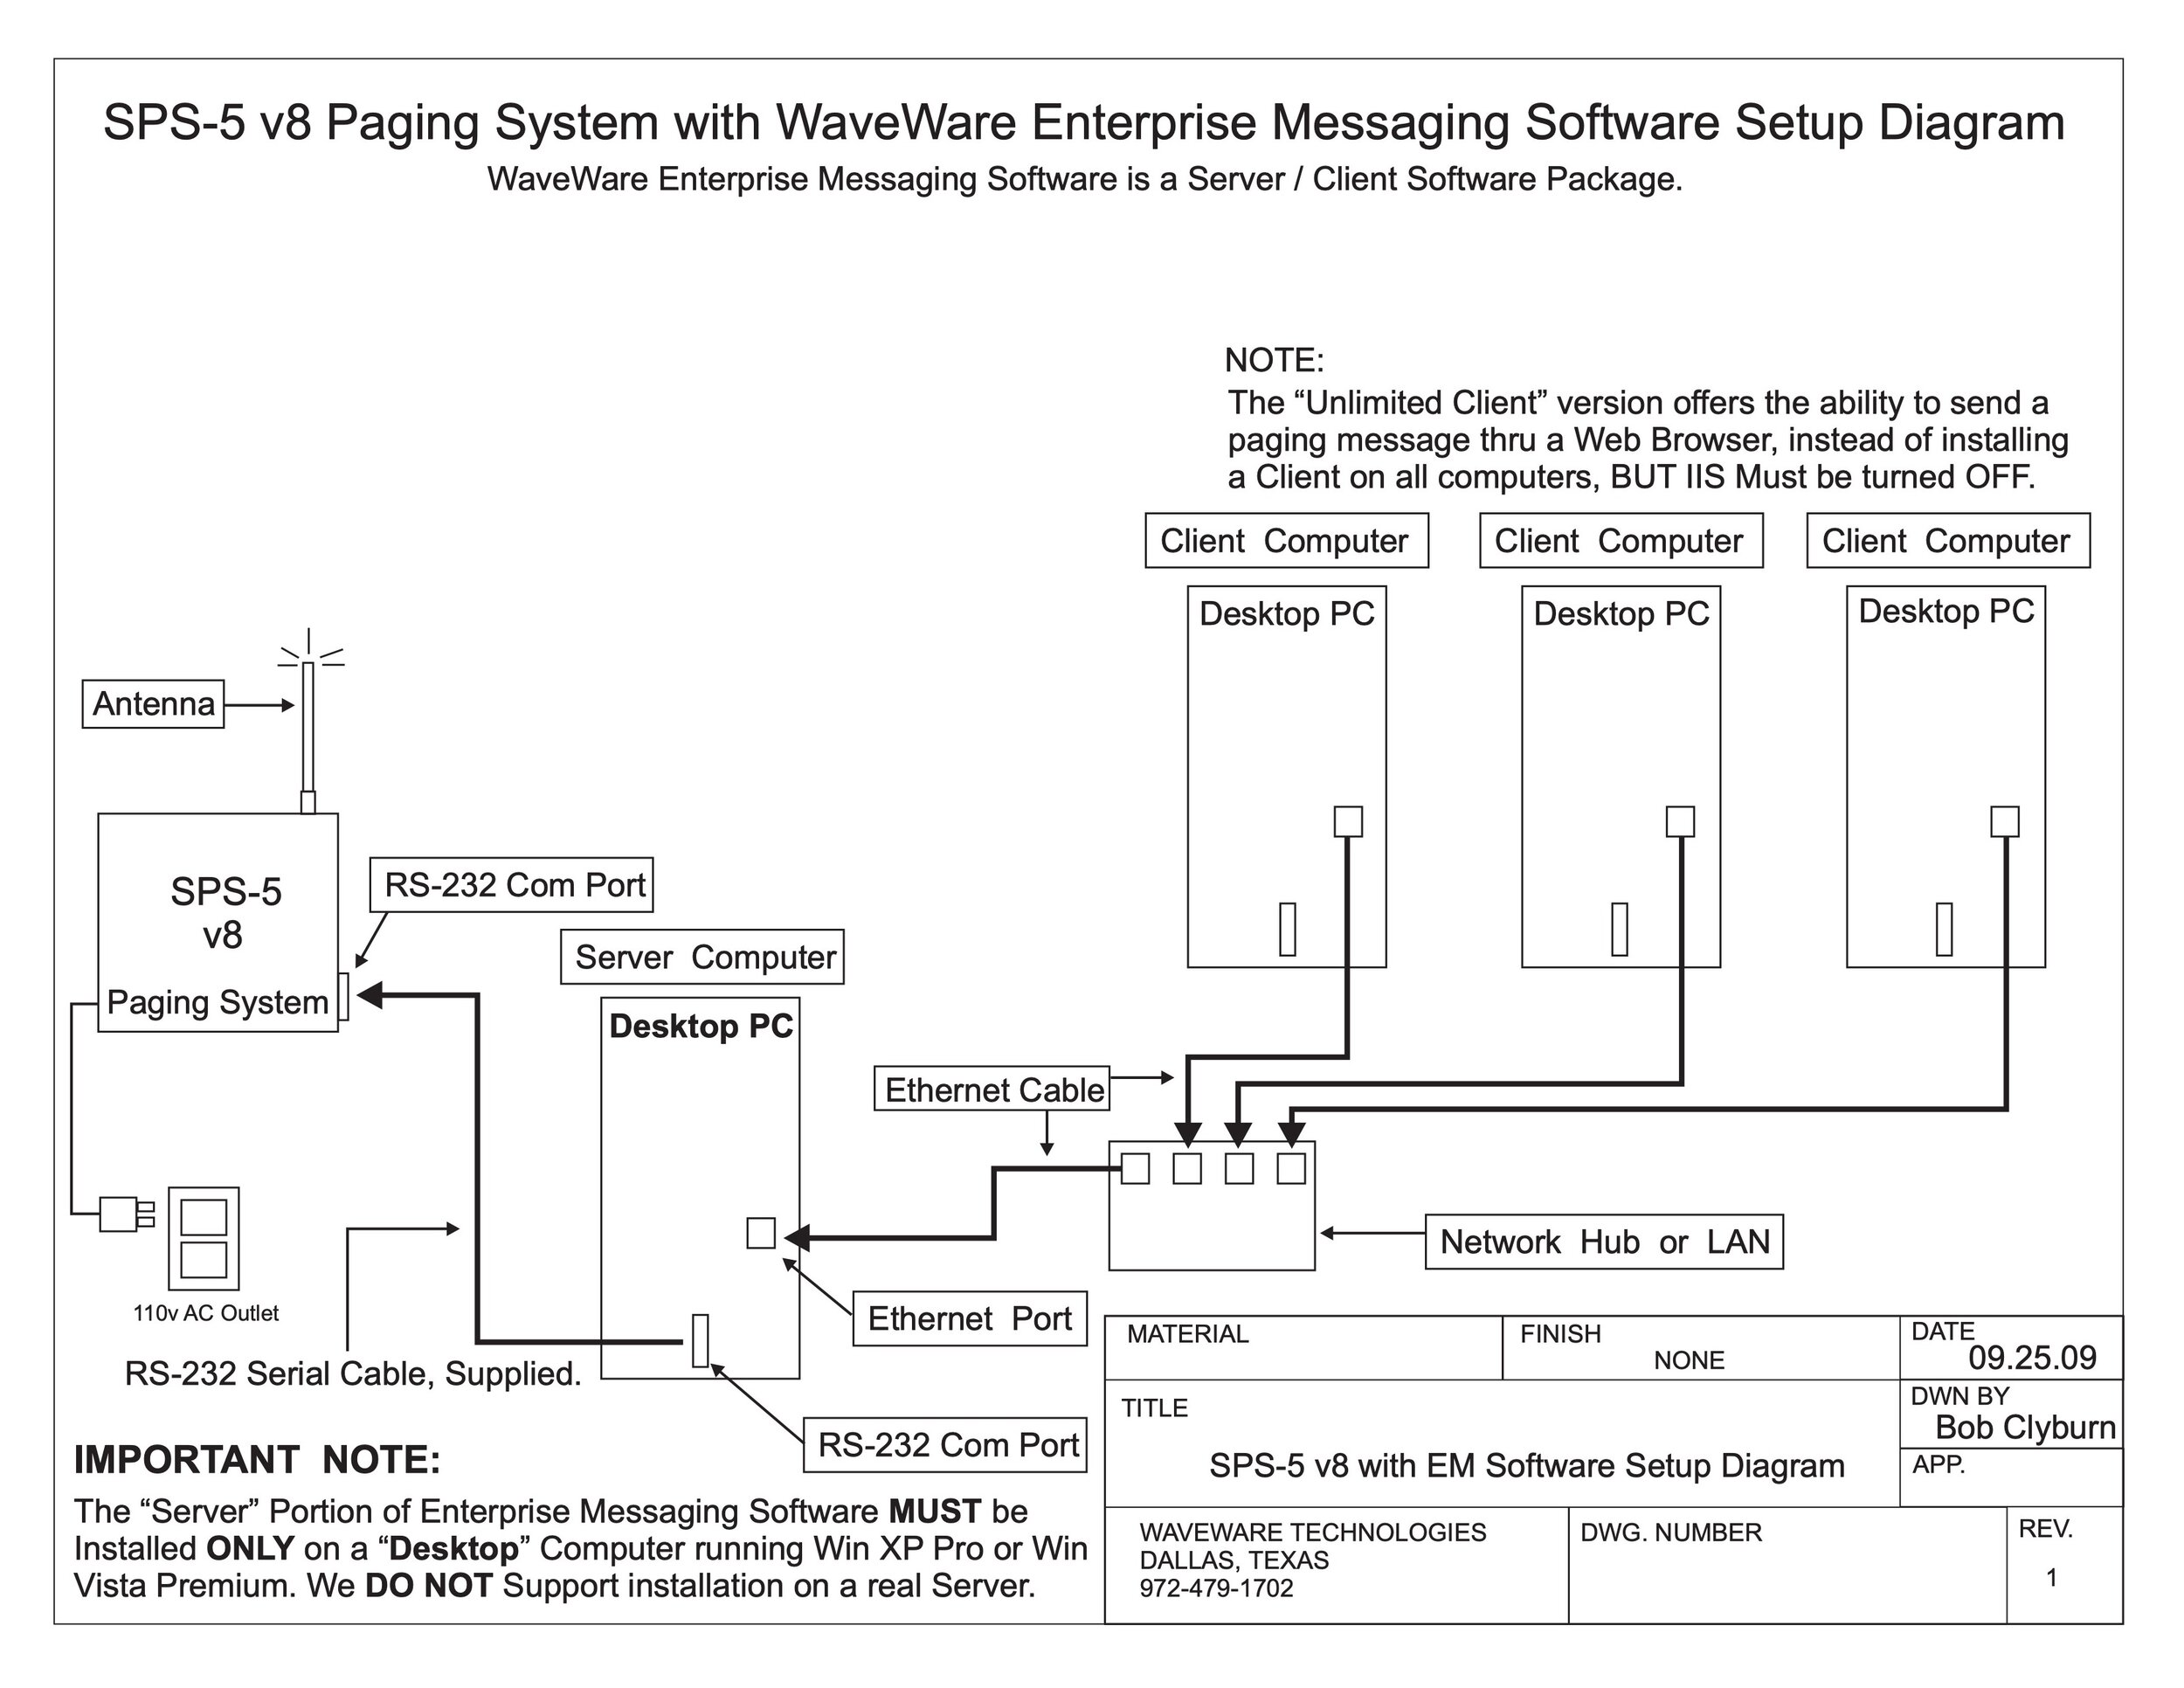
SPS5-v8 with Enterprise Software and Amp Diagram
View fullsize
SPS5-v8 with Enterprise Software and Amp Diagram 2
View fullsize
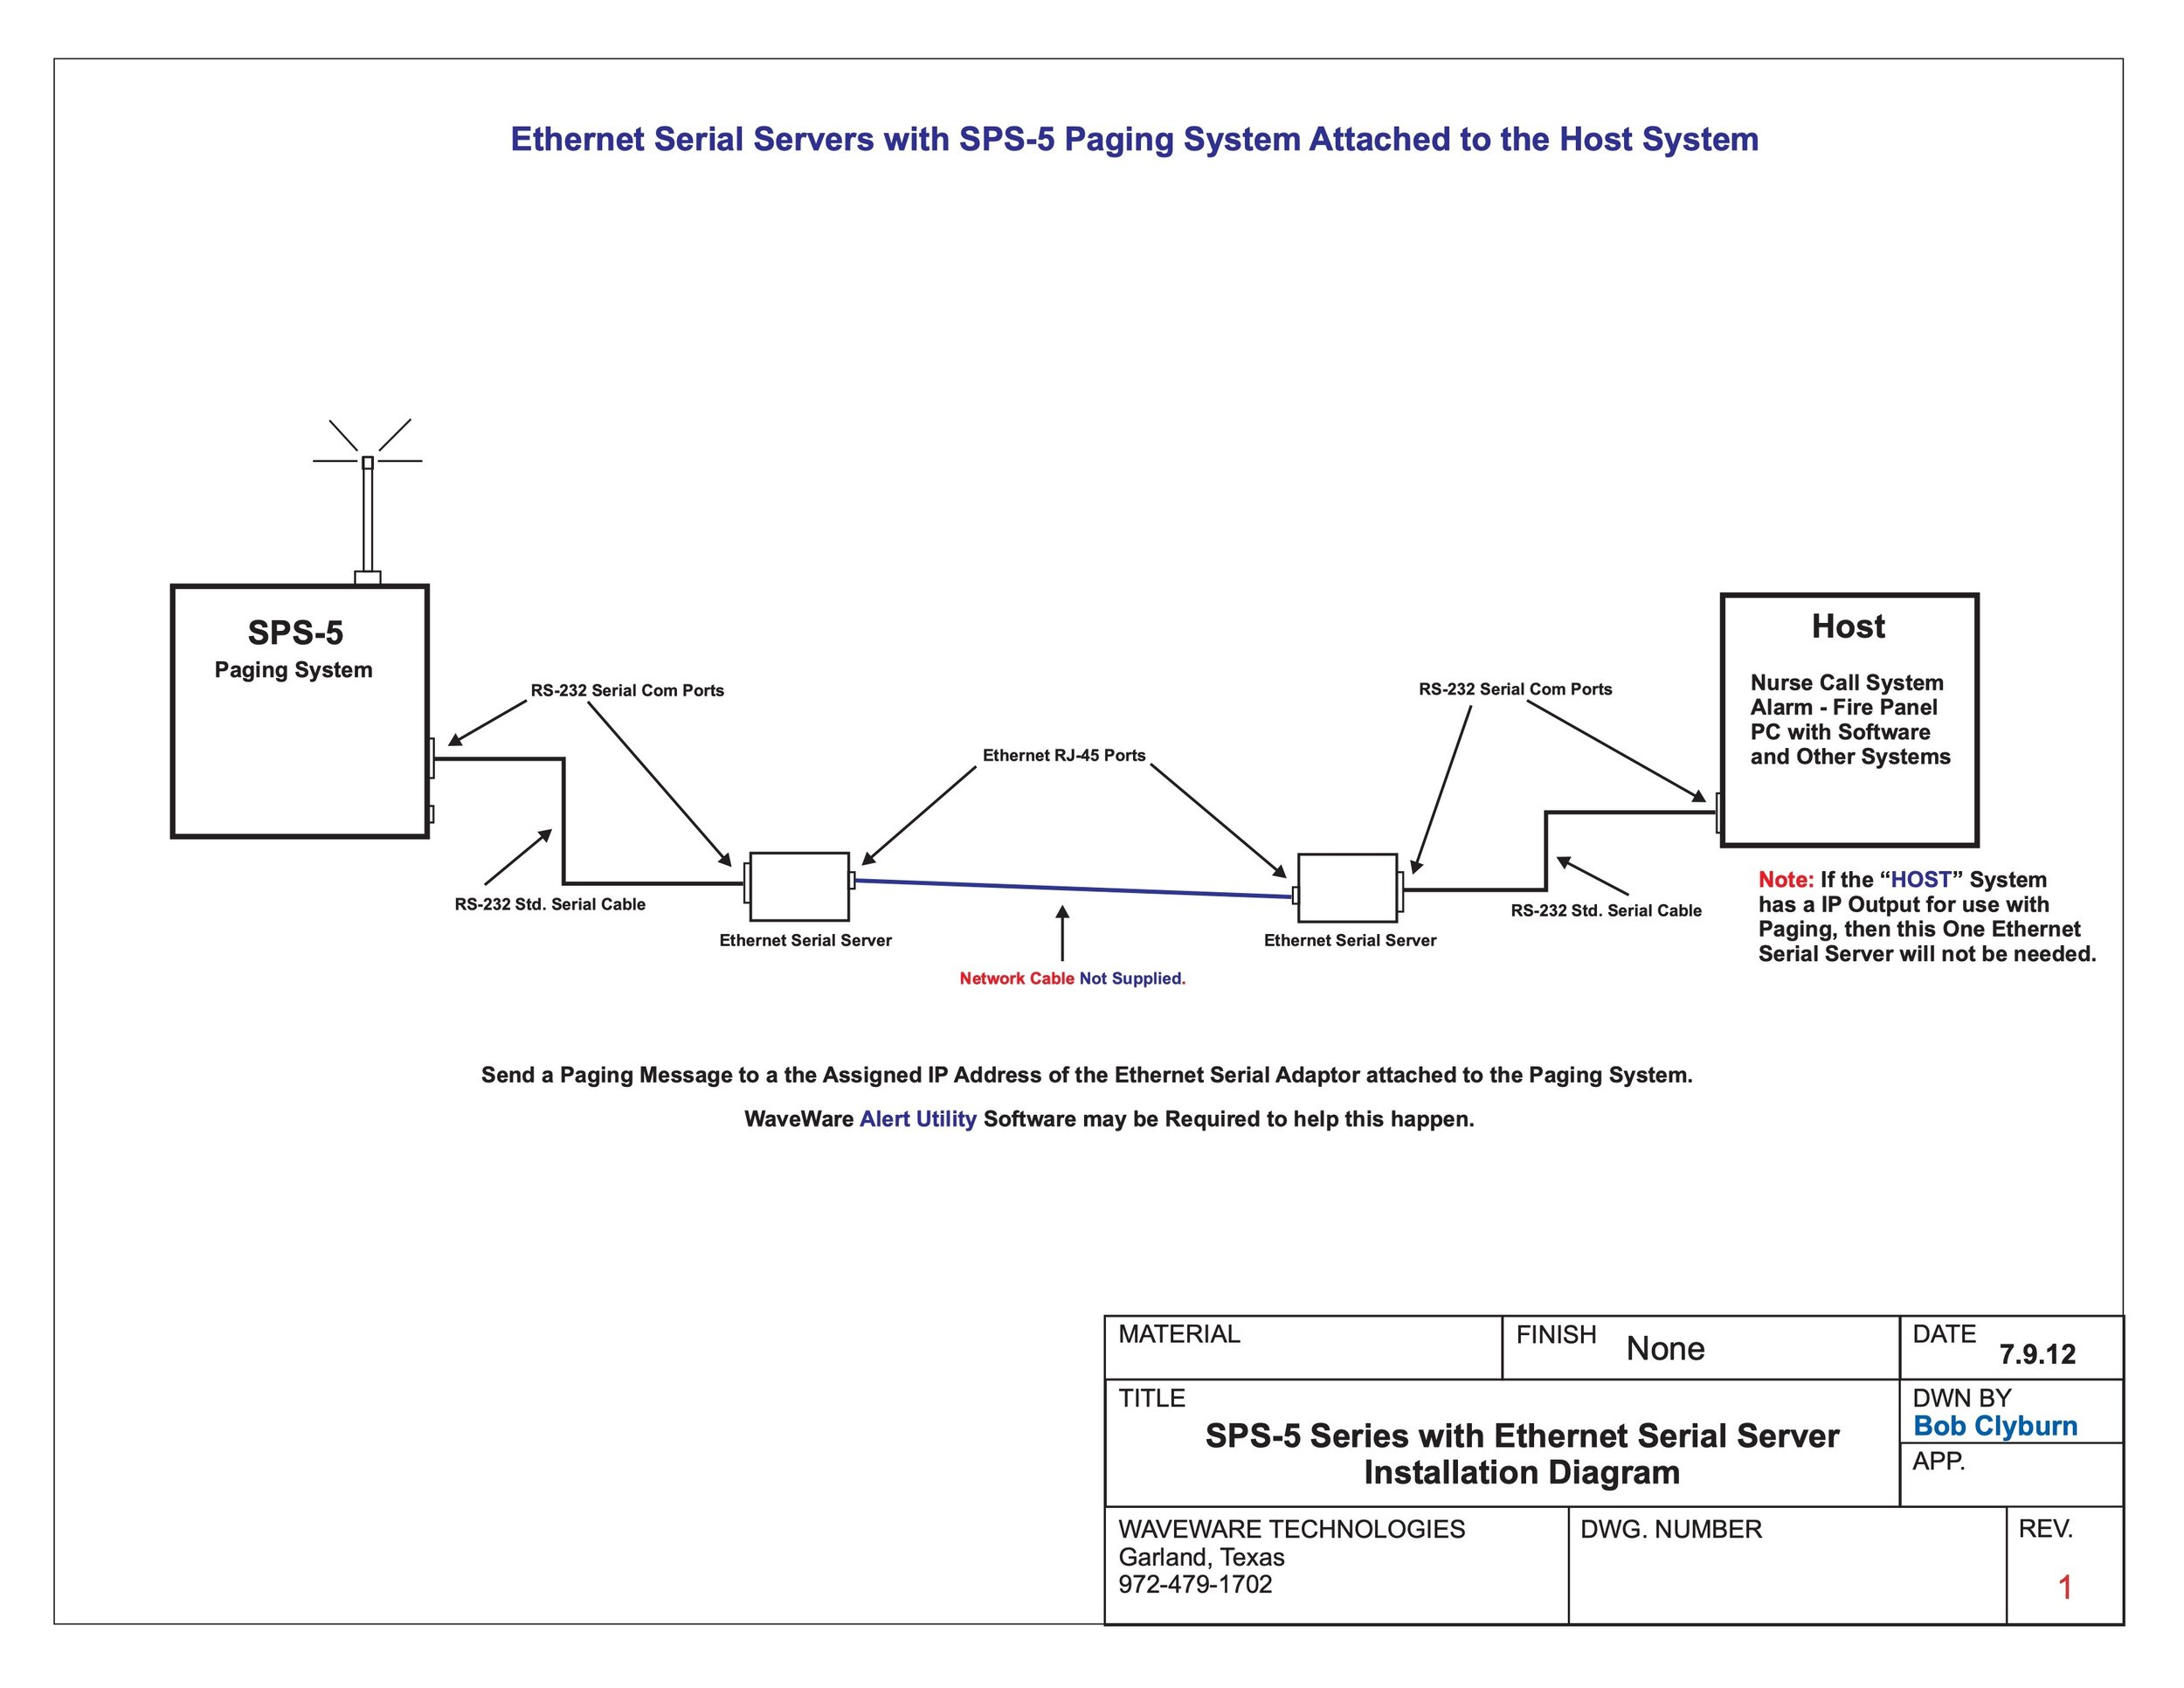
Ethernet Serial Servers with SPS-5 Paging System attached to host system
View fullsize
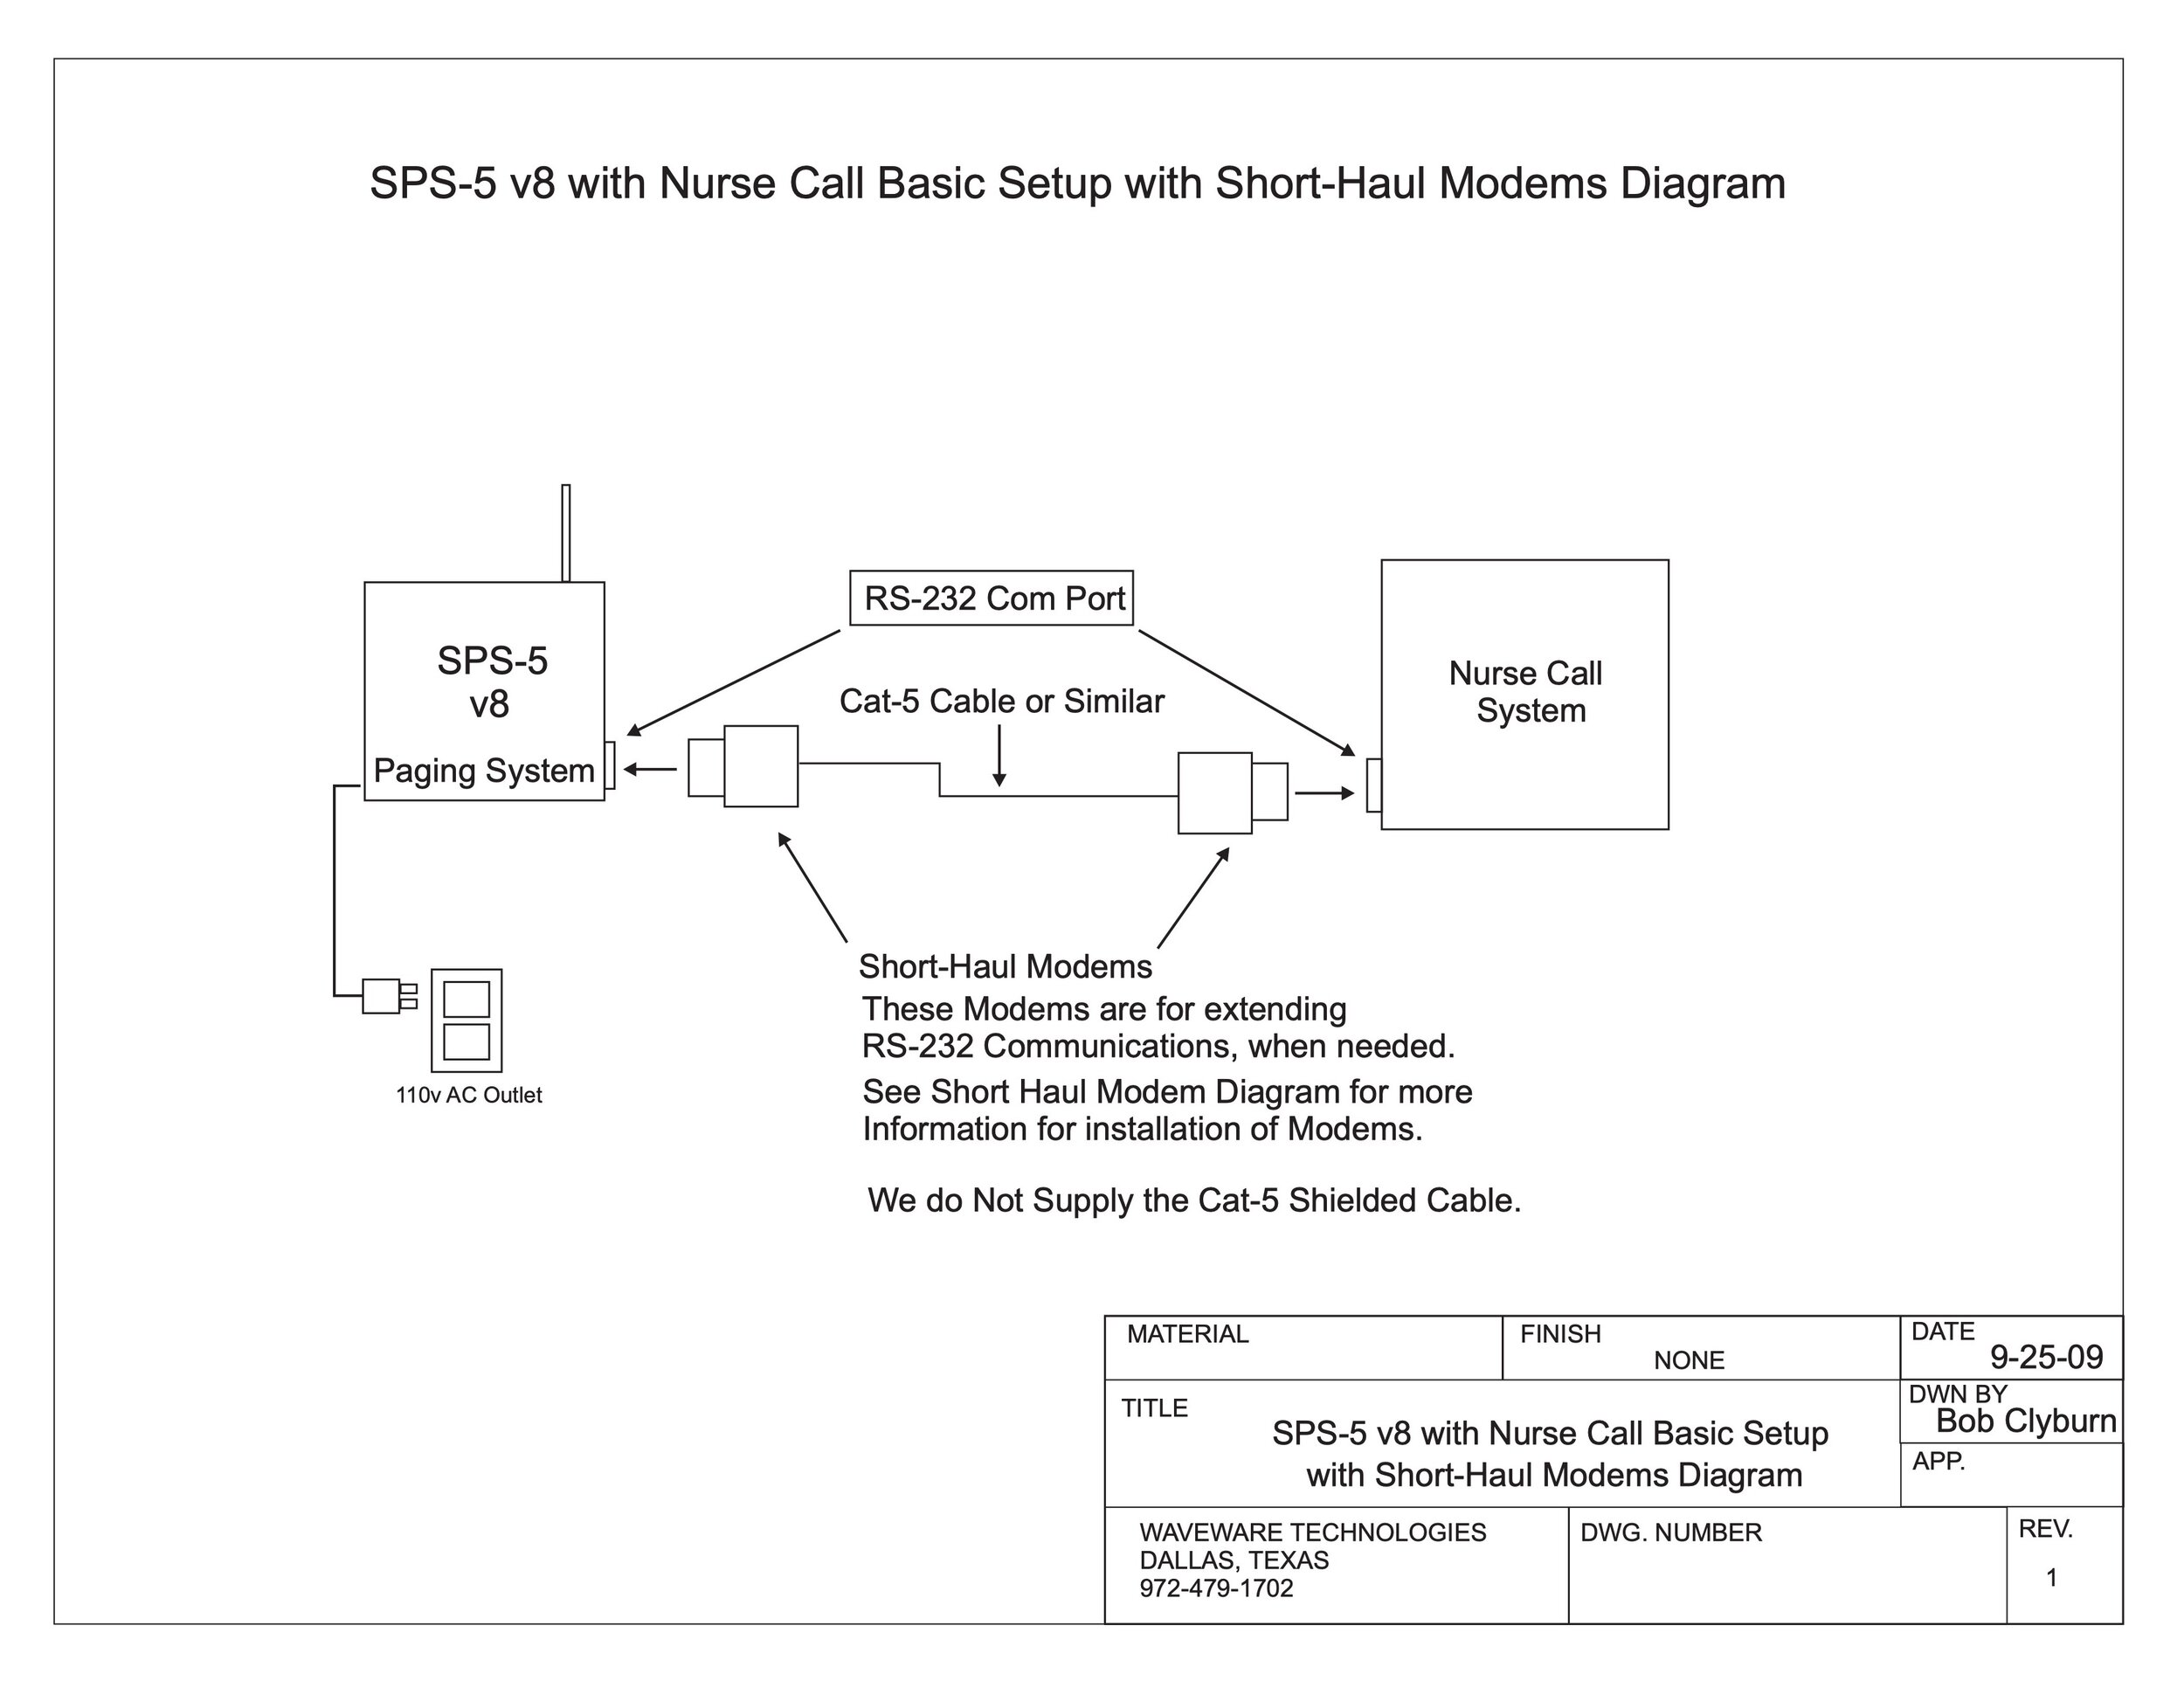
SPS-5v8 with Nurse Call Basic Setup with Short-Haul Modems Diagram
View fullsize
Diagram of how Repeaters work with a paging system
View fullsize
How an Extender works with a paging system 2
View fullsize
SPS-5 with Repeater Diagram
View fullsize
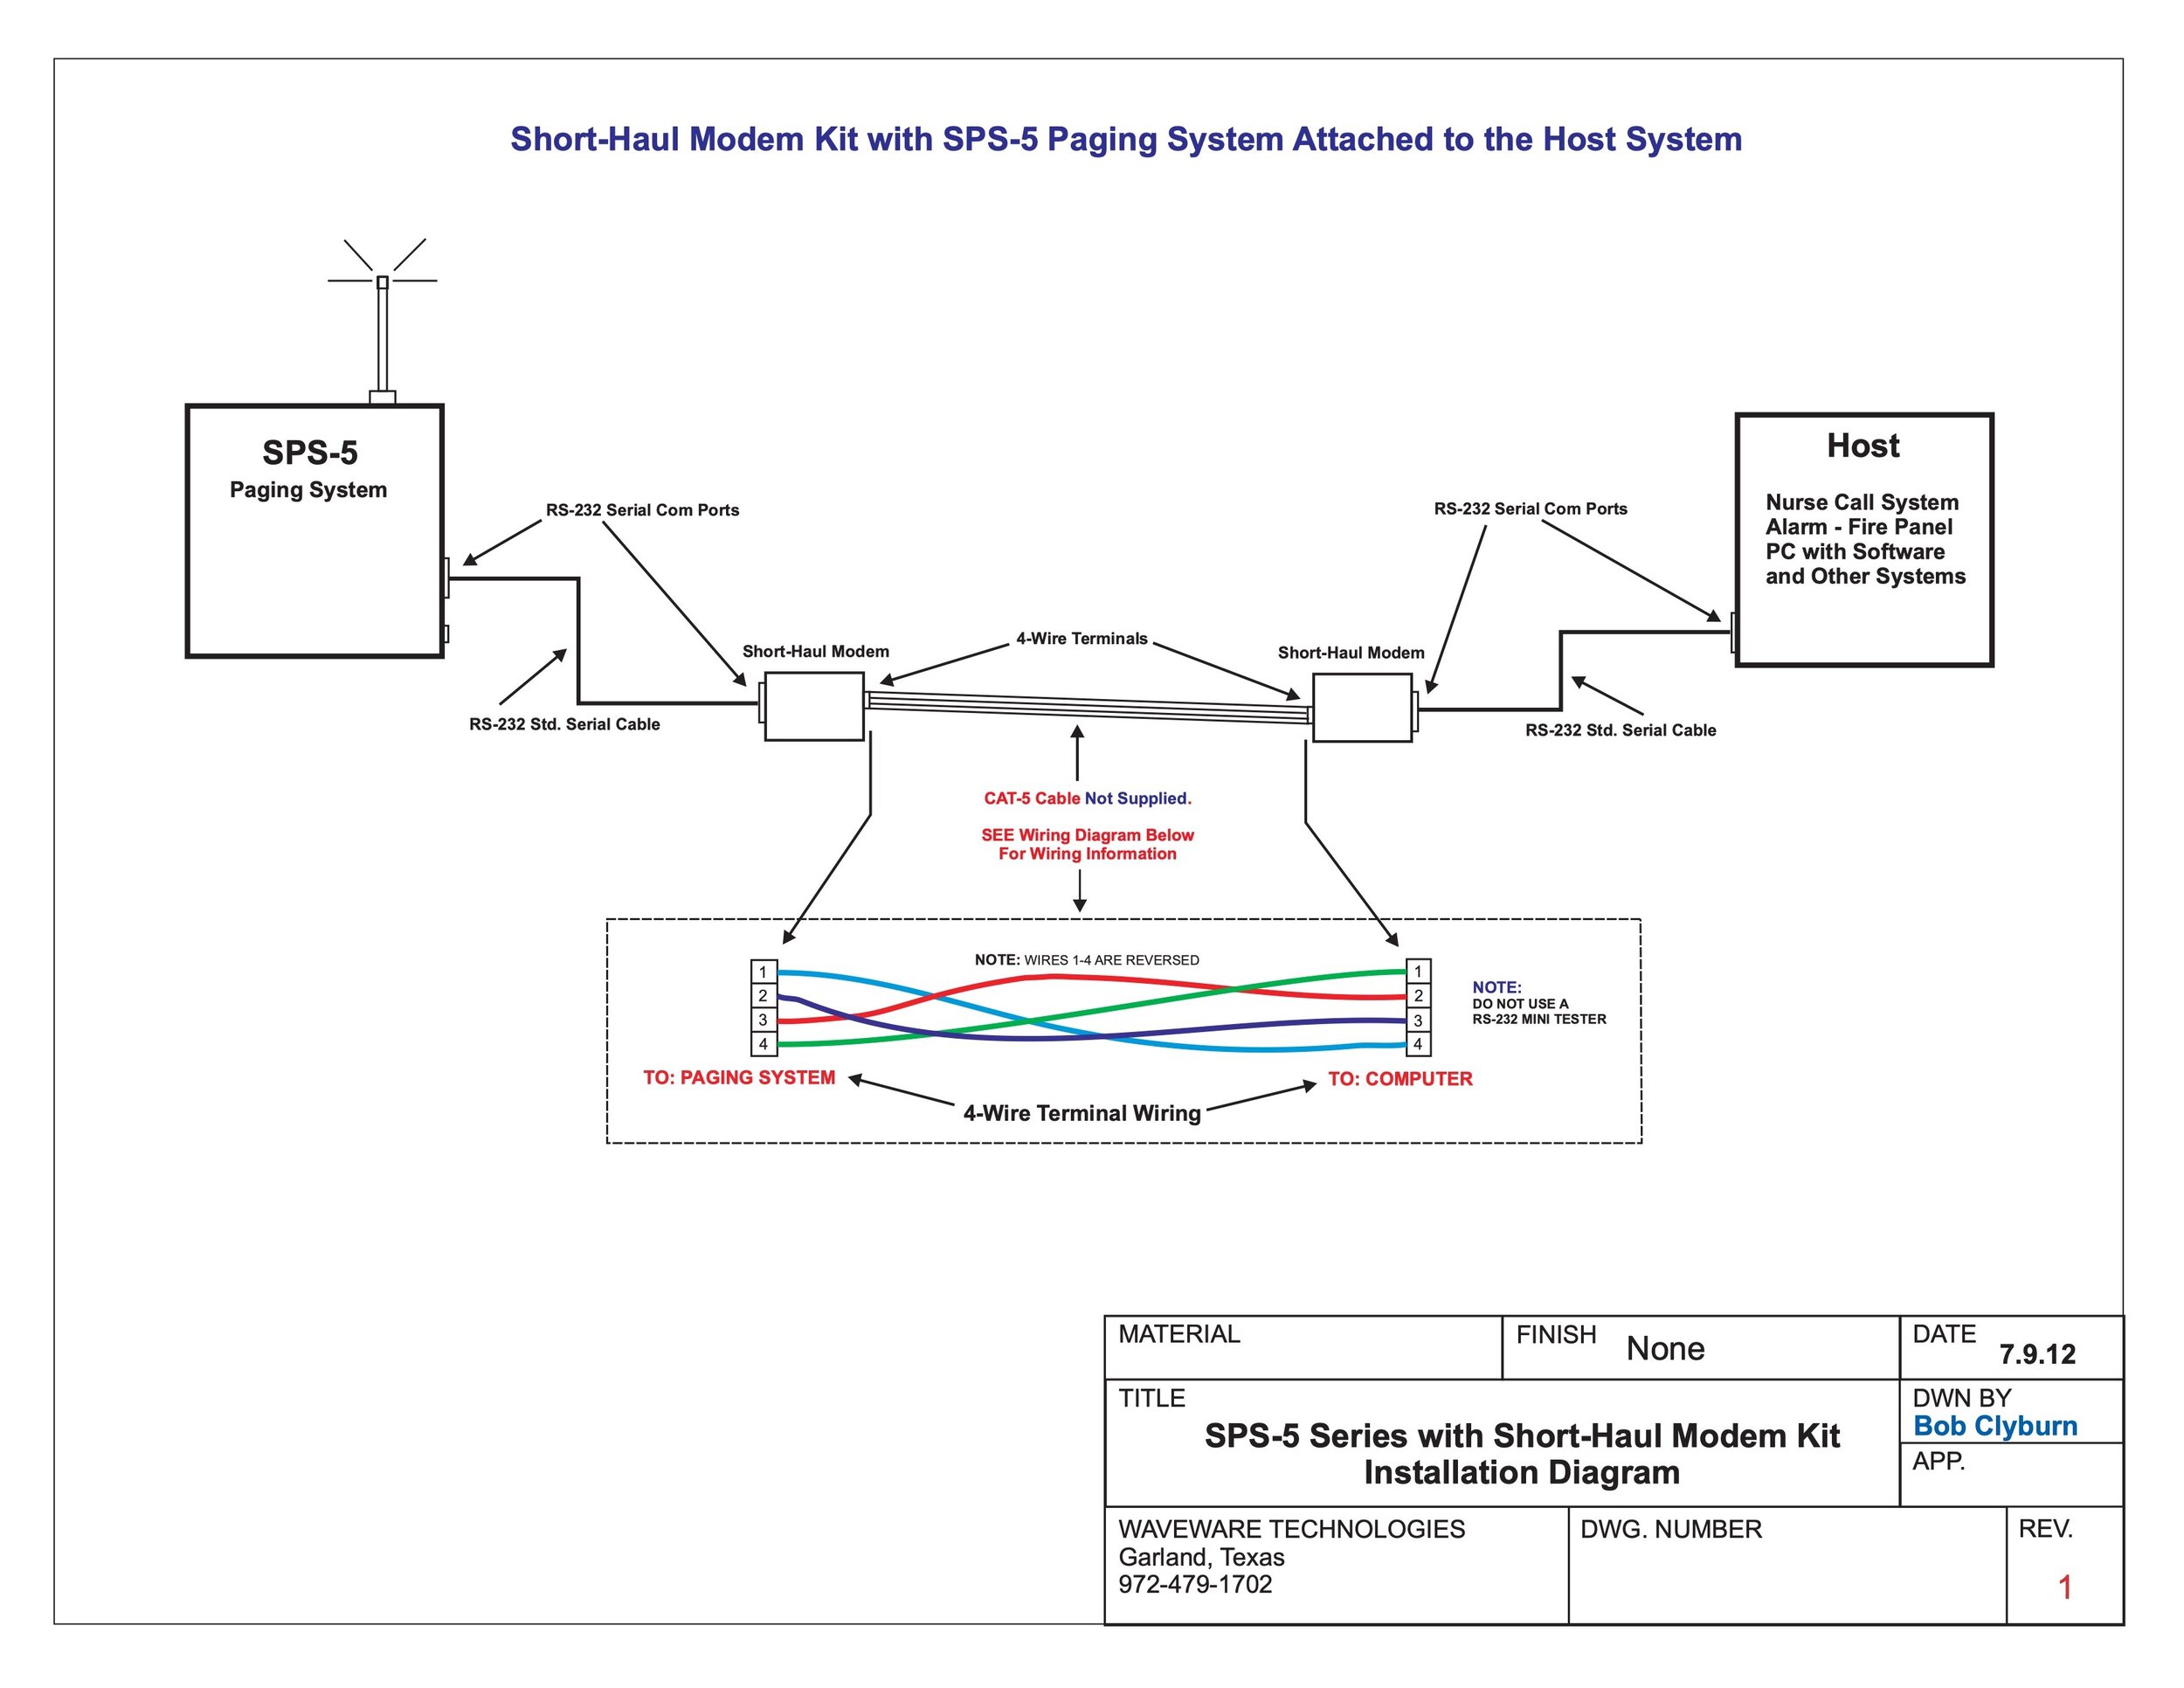
Short Haul Modem Kit with SPS-5
View fullsize
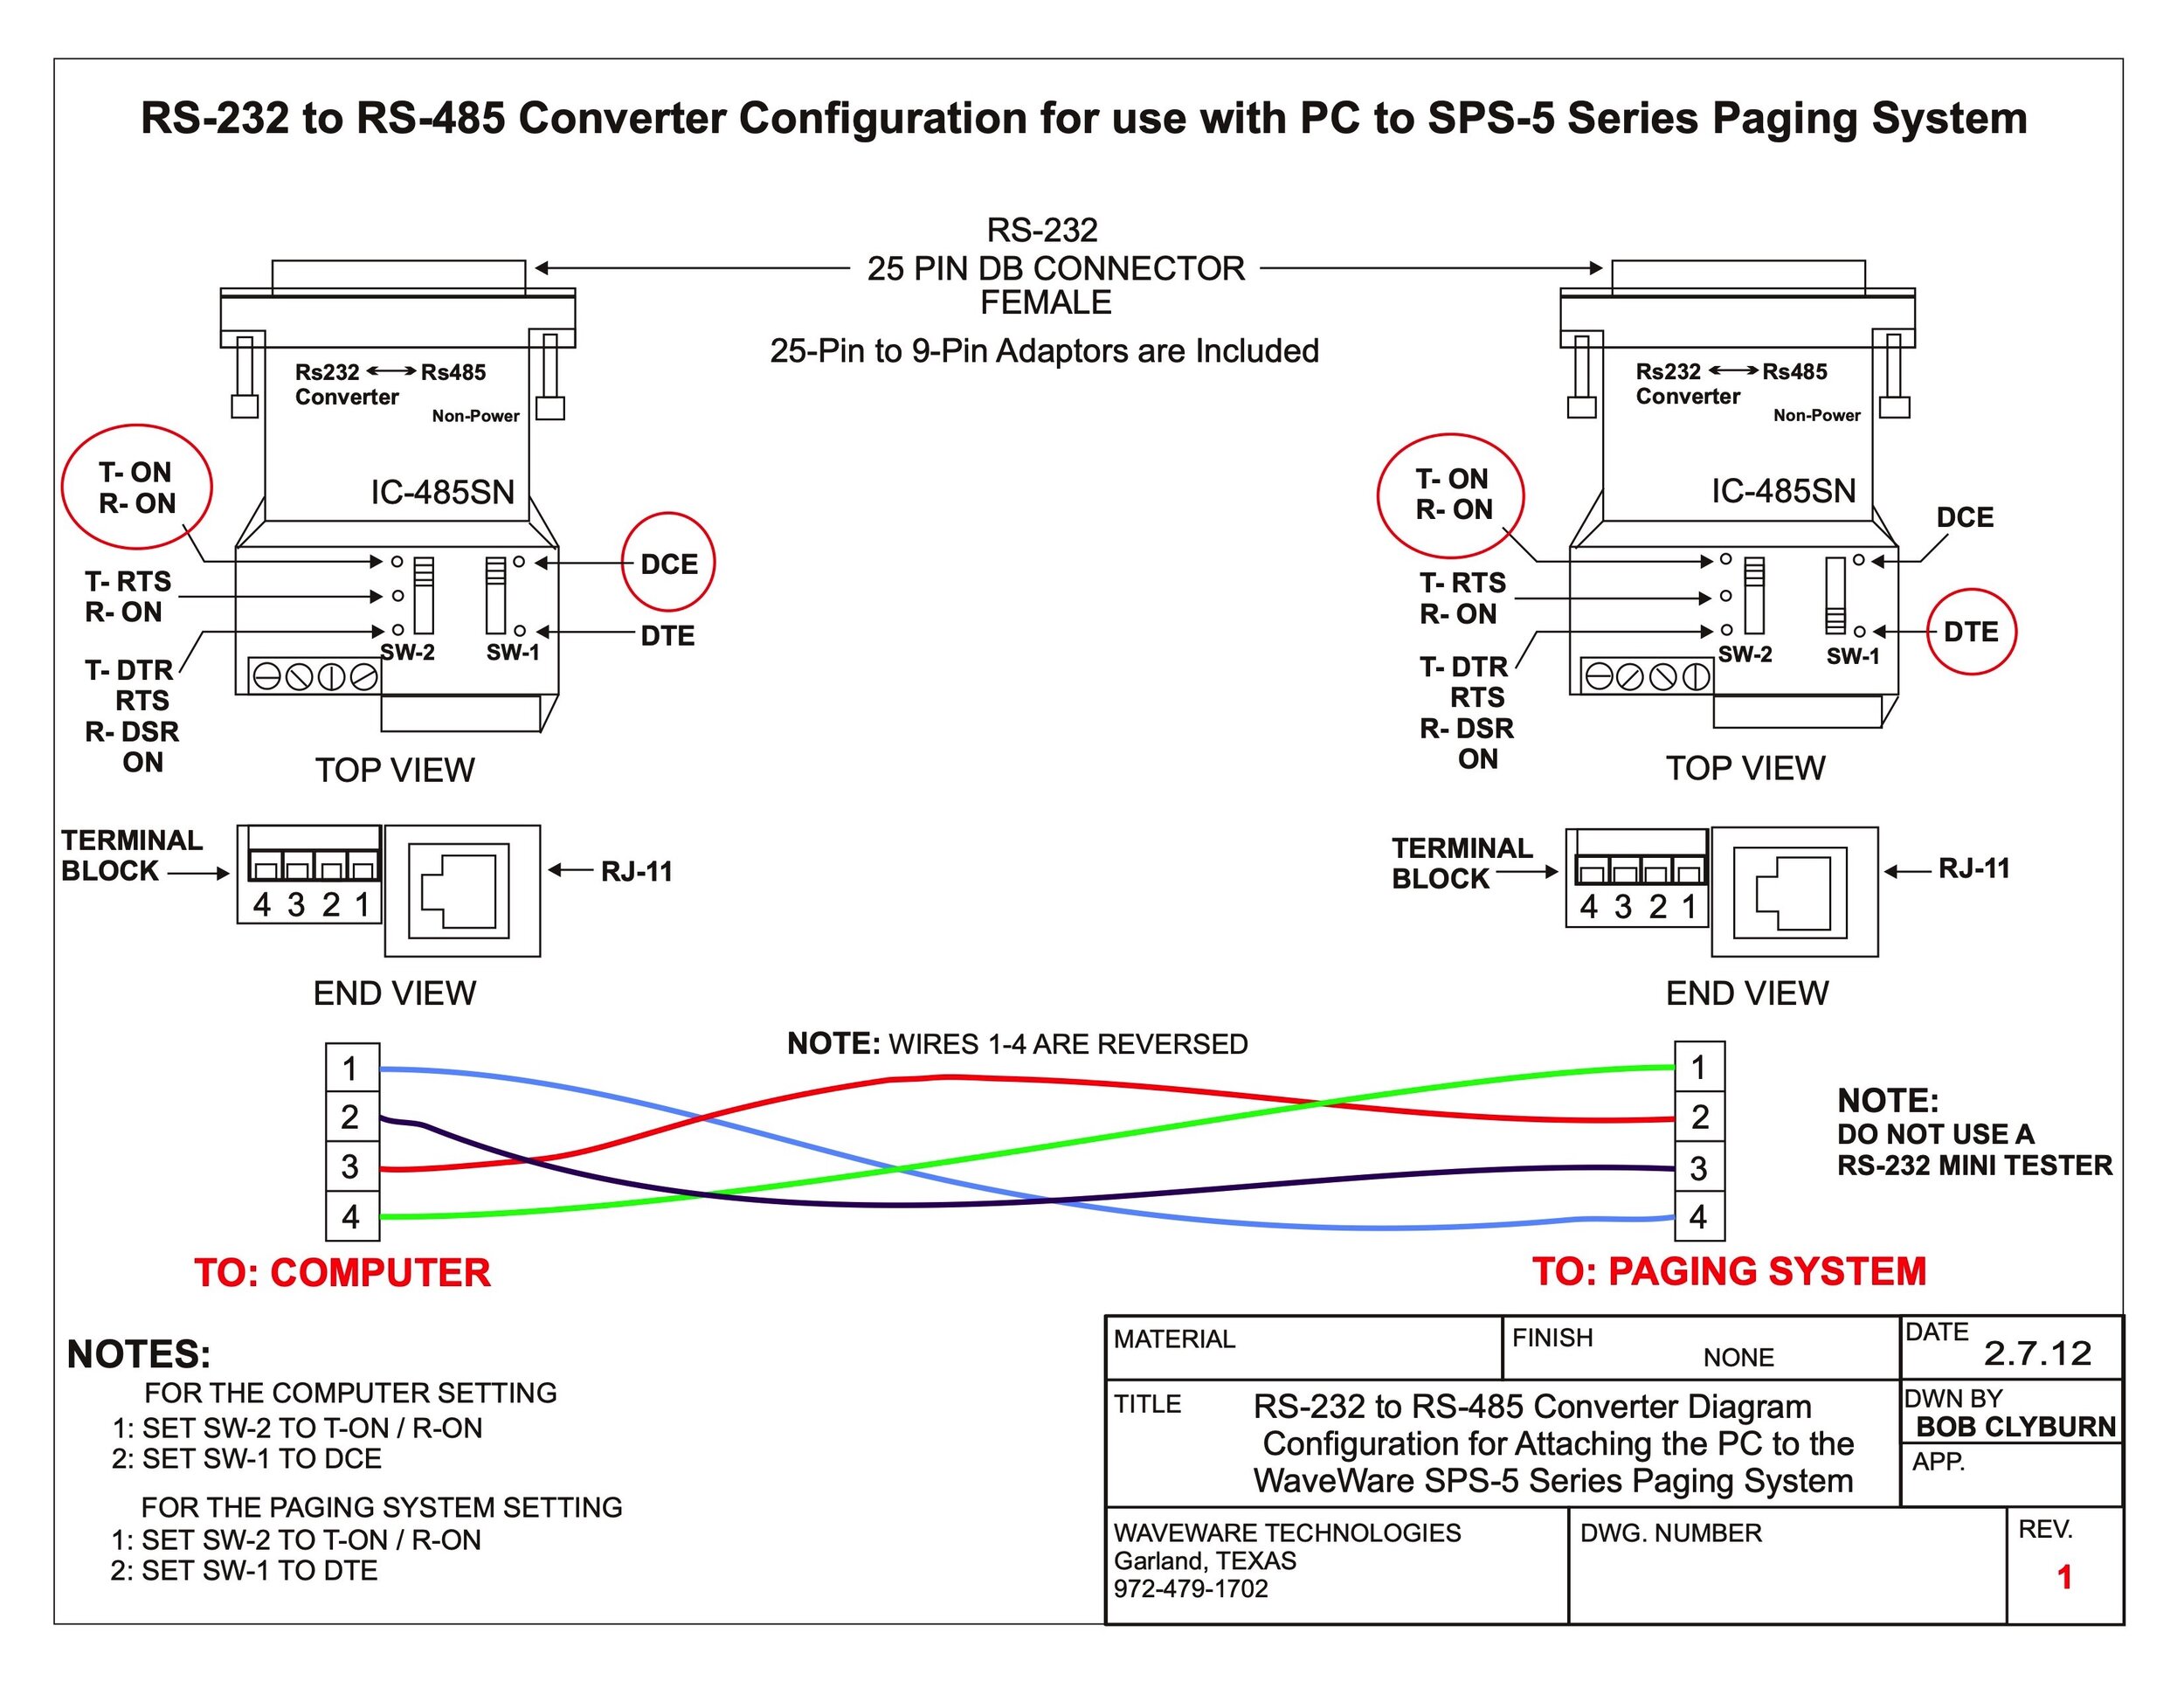
RS-232 to RS-485 Converter Configuration
View fullsize
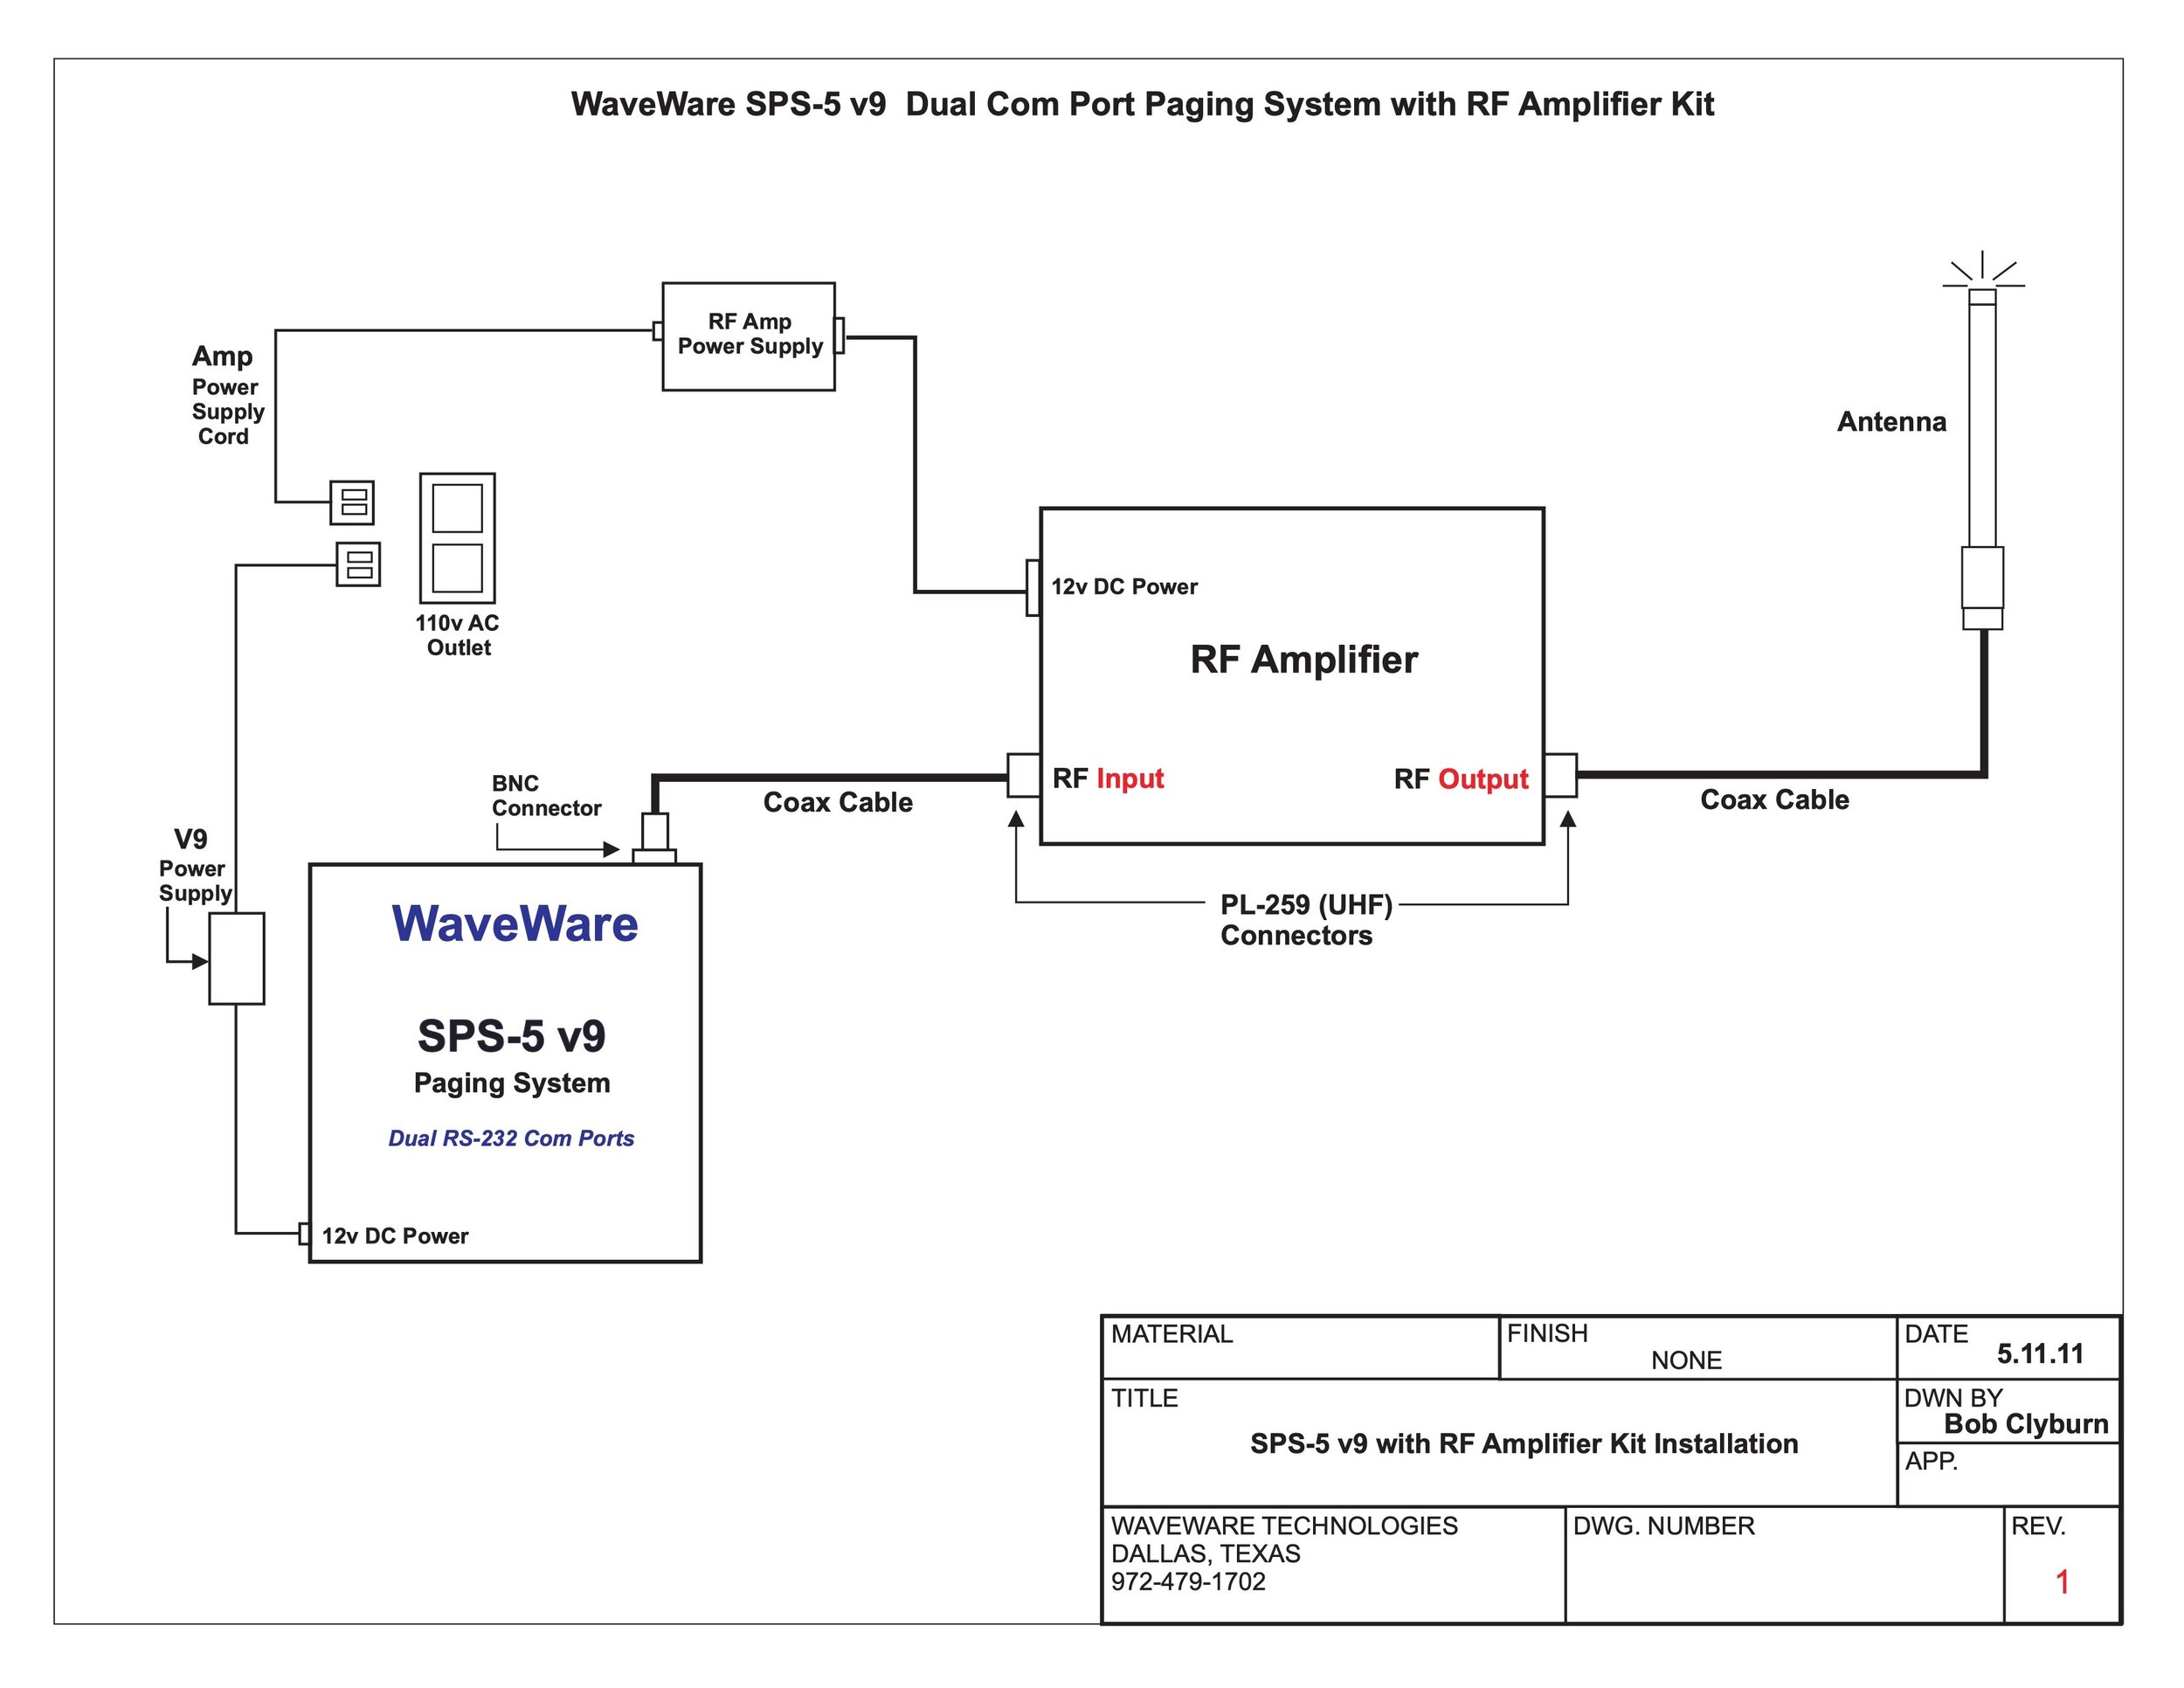
SPS-5v9 Dual COM port paging system with RF amplifier kit
View fullsize
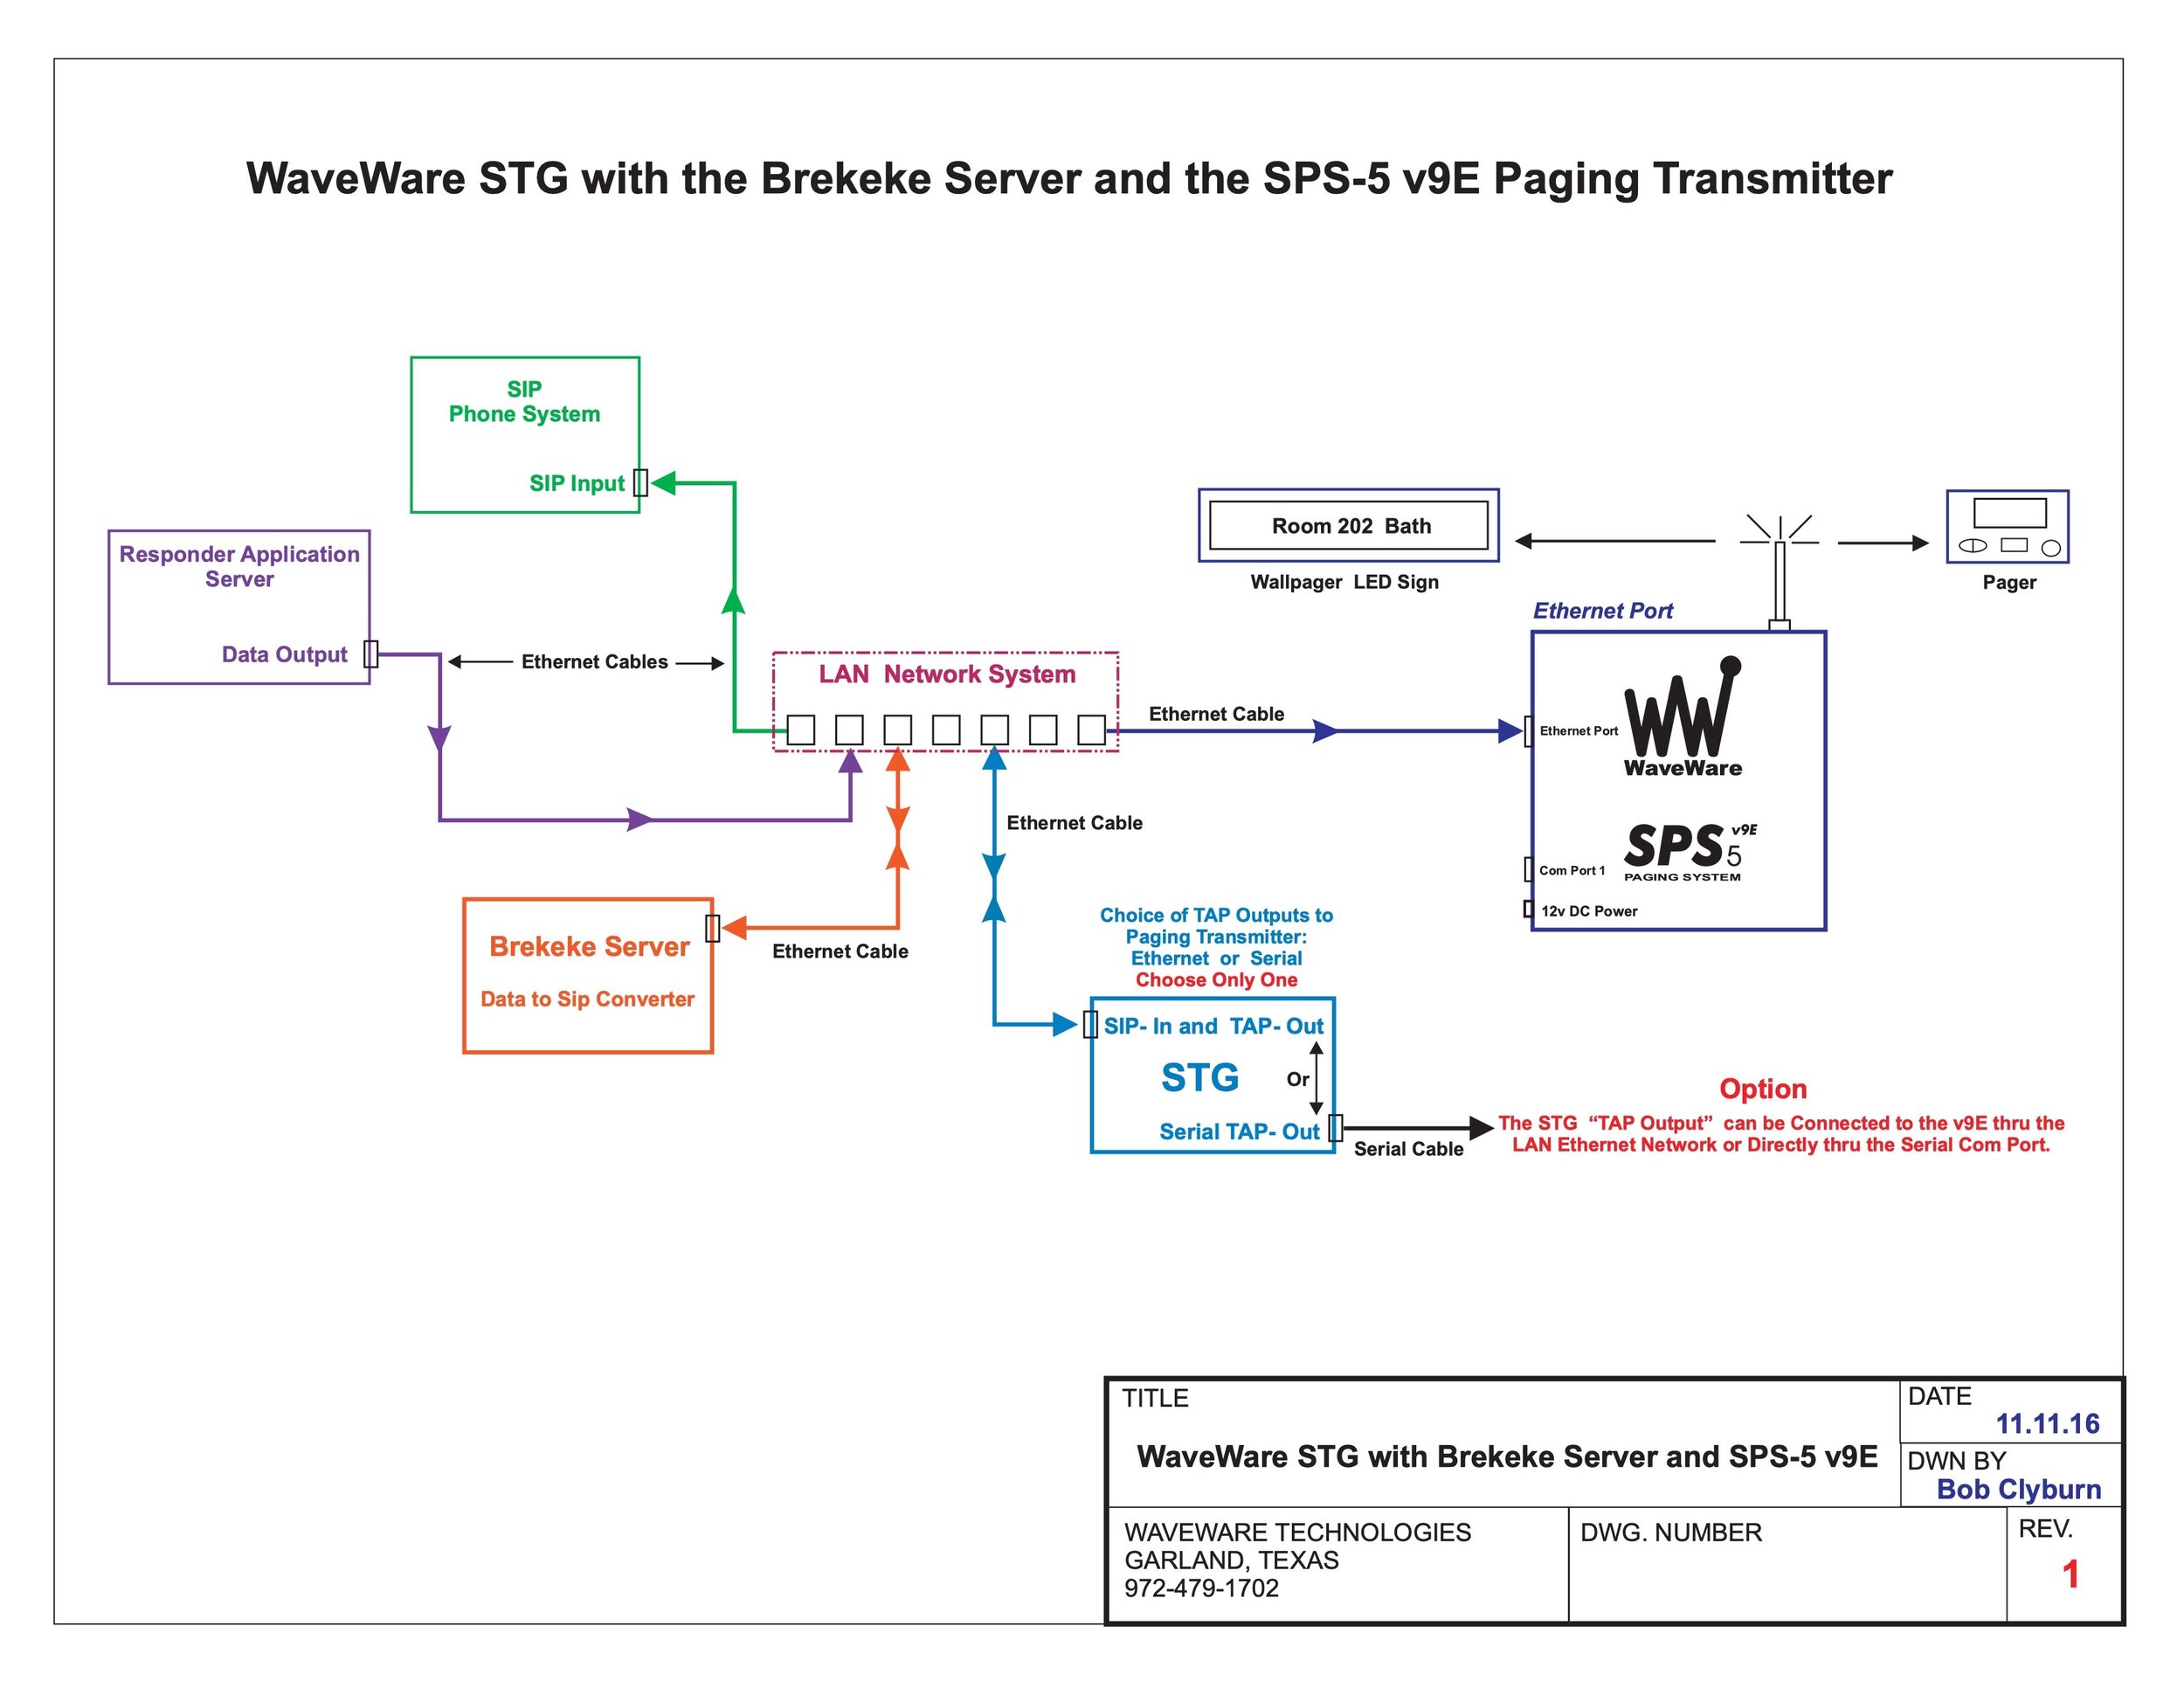
STG with Brekeke Server and SPS-5
View fullsize
AS Wallpager and Strobe Layout Diagram
View fullsize
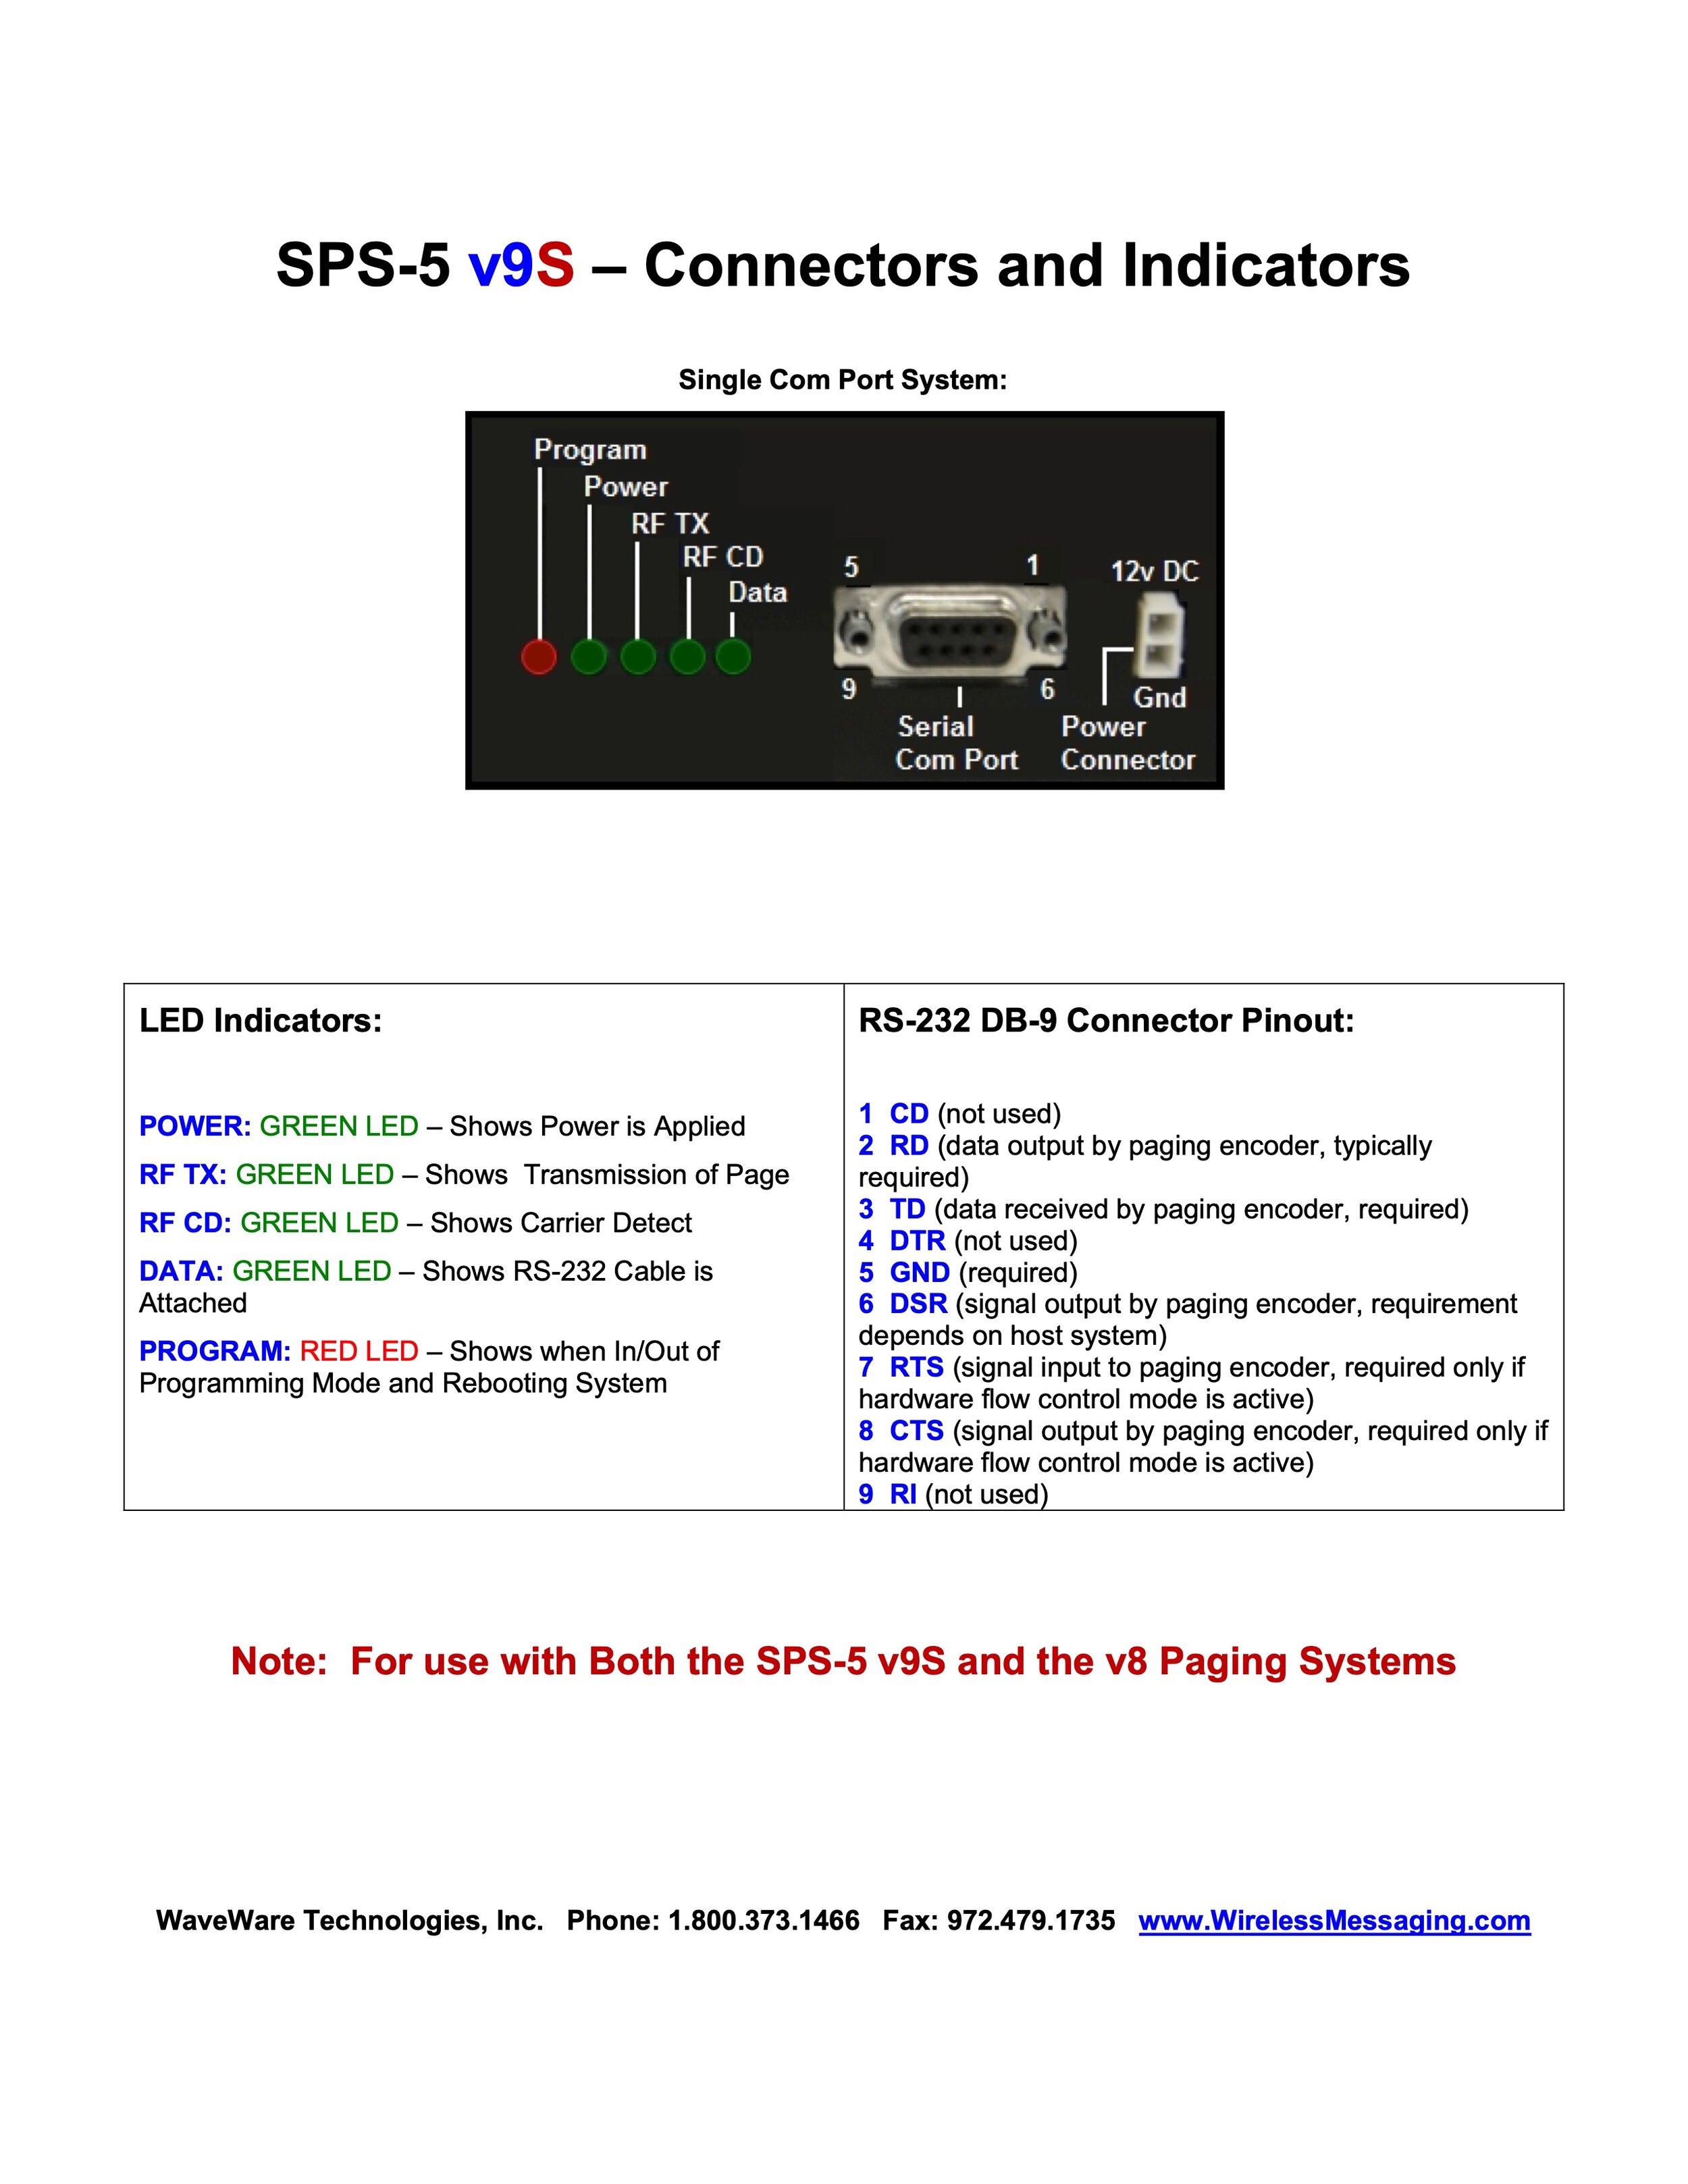
SPS-5 v8 & v9S Pinouts and Indicators
View fullsize
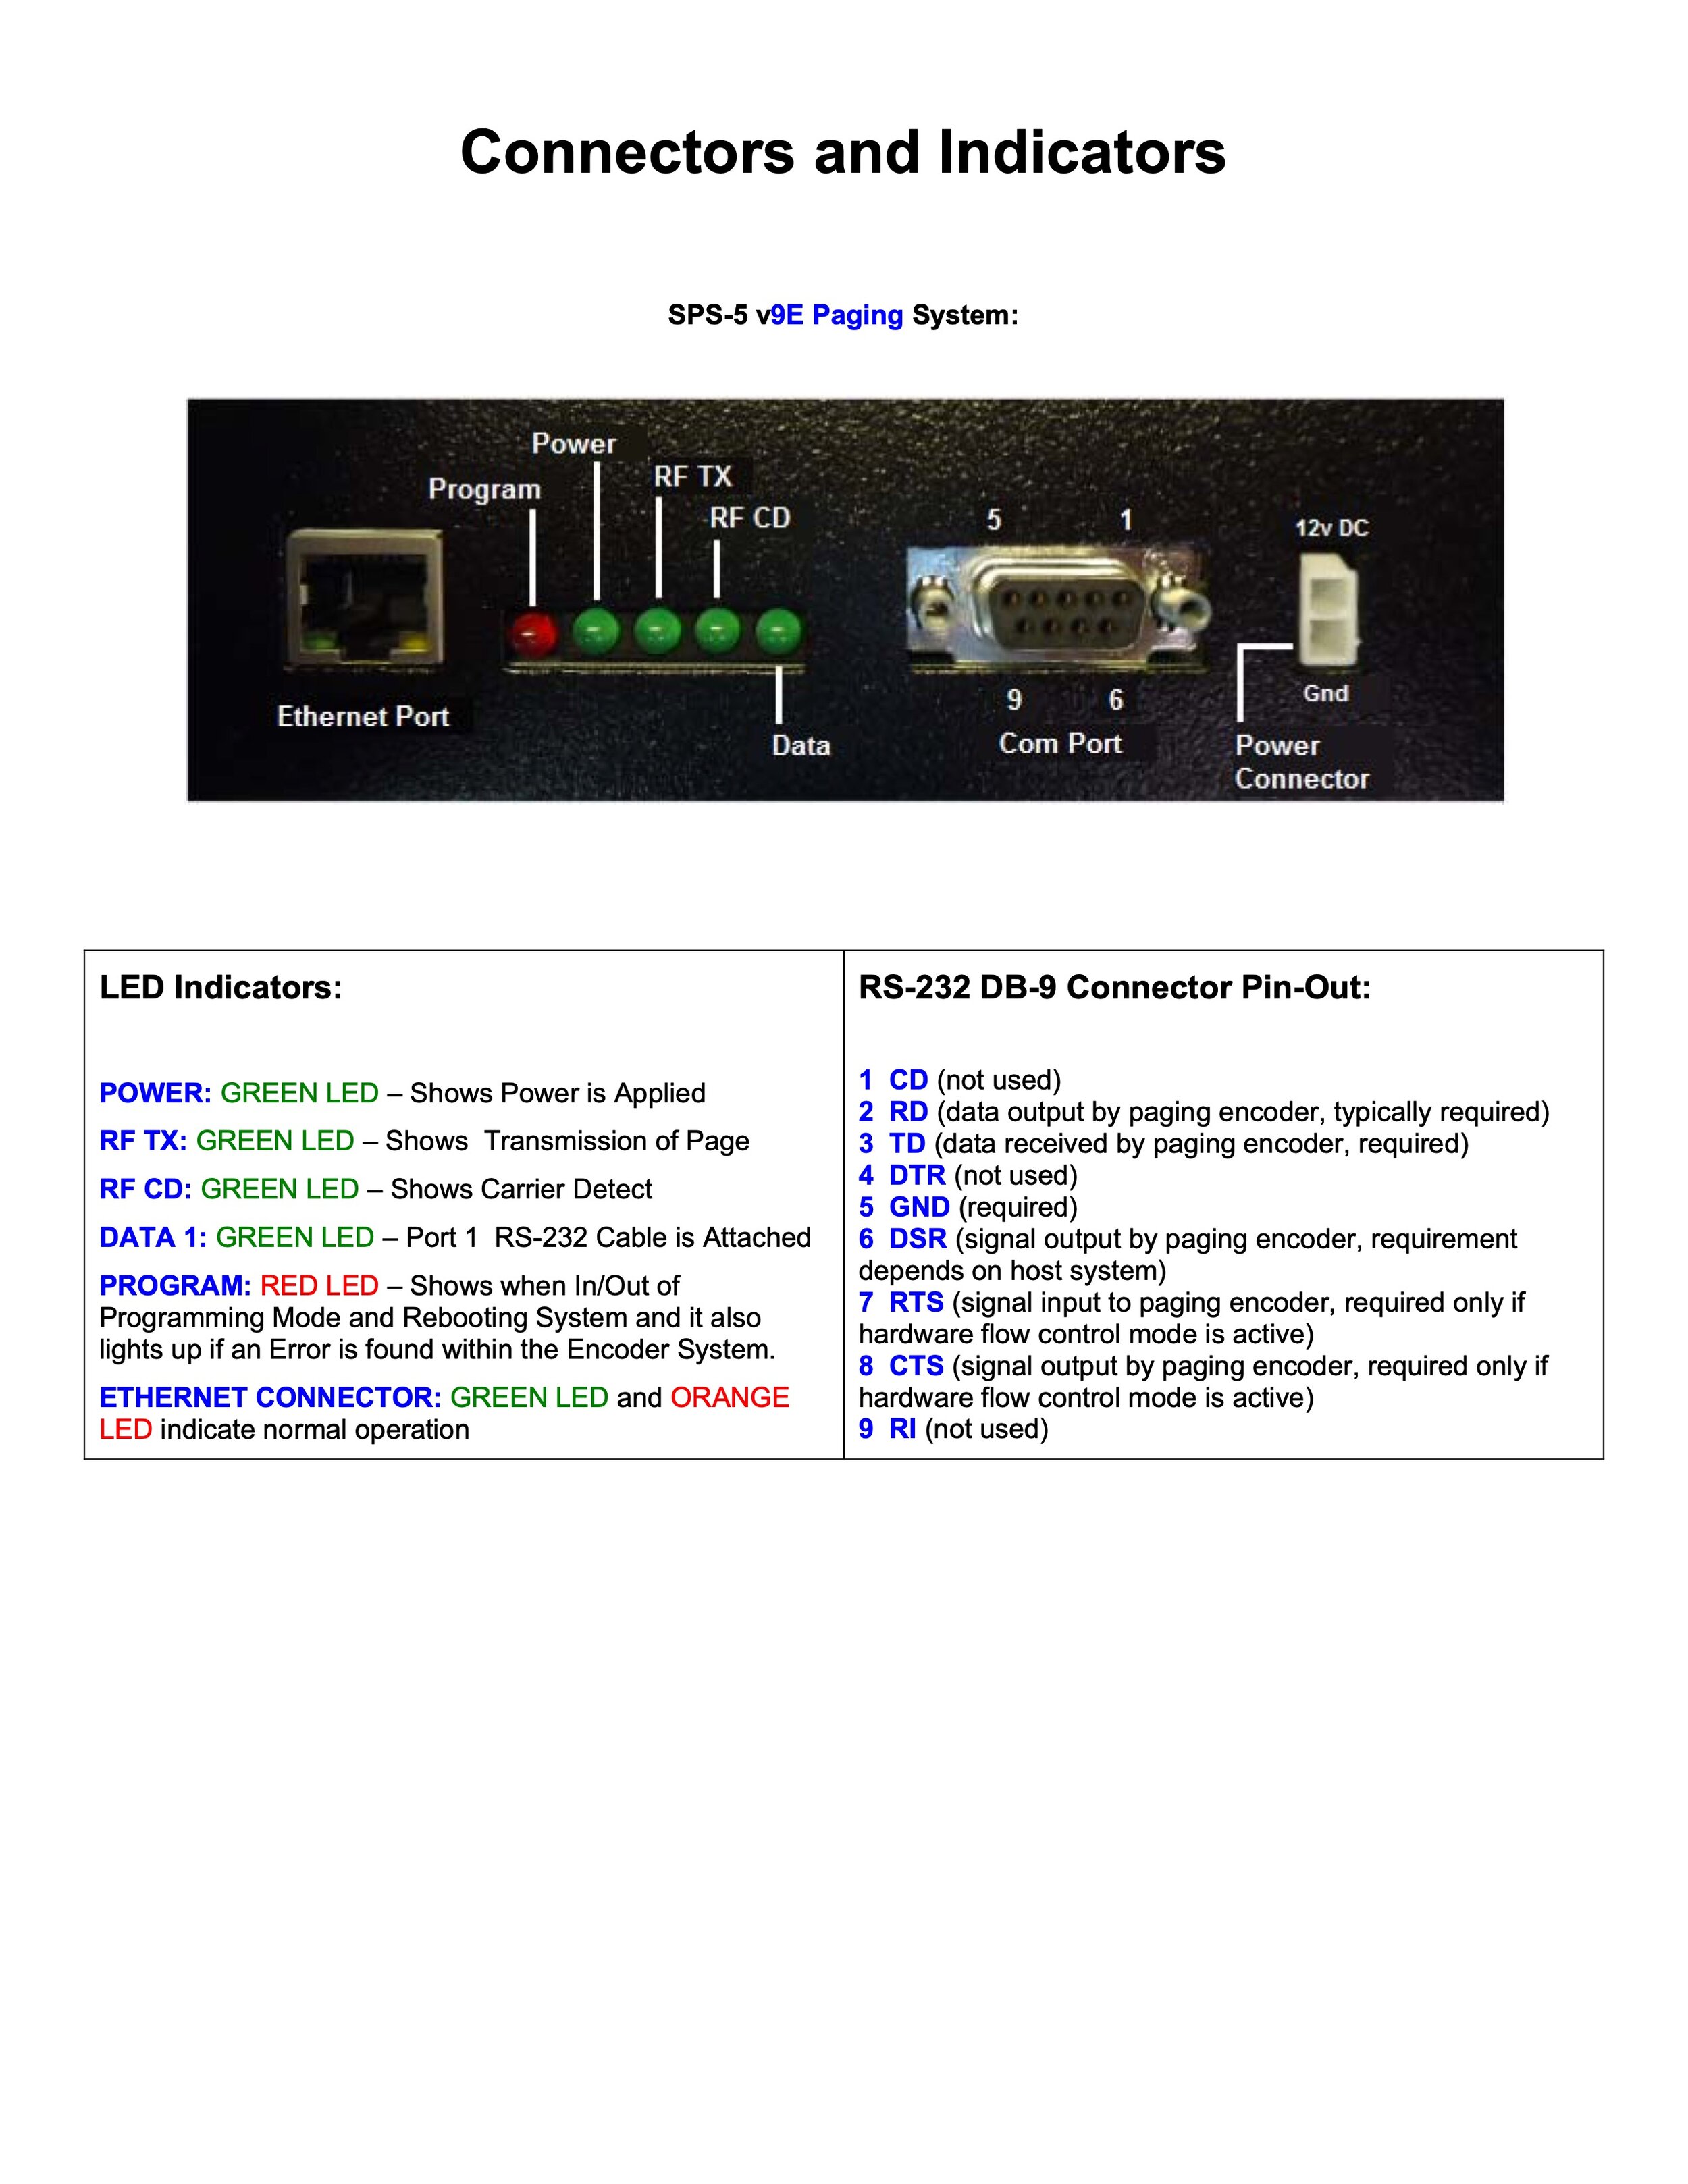
SPS5-v9E Pinouts and Indicators
View fullsize
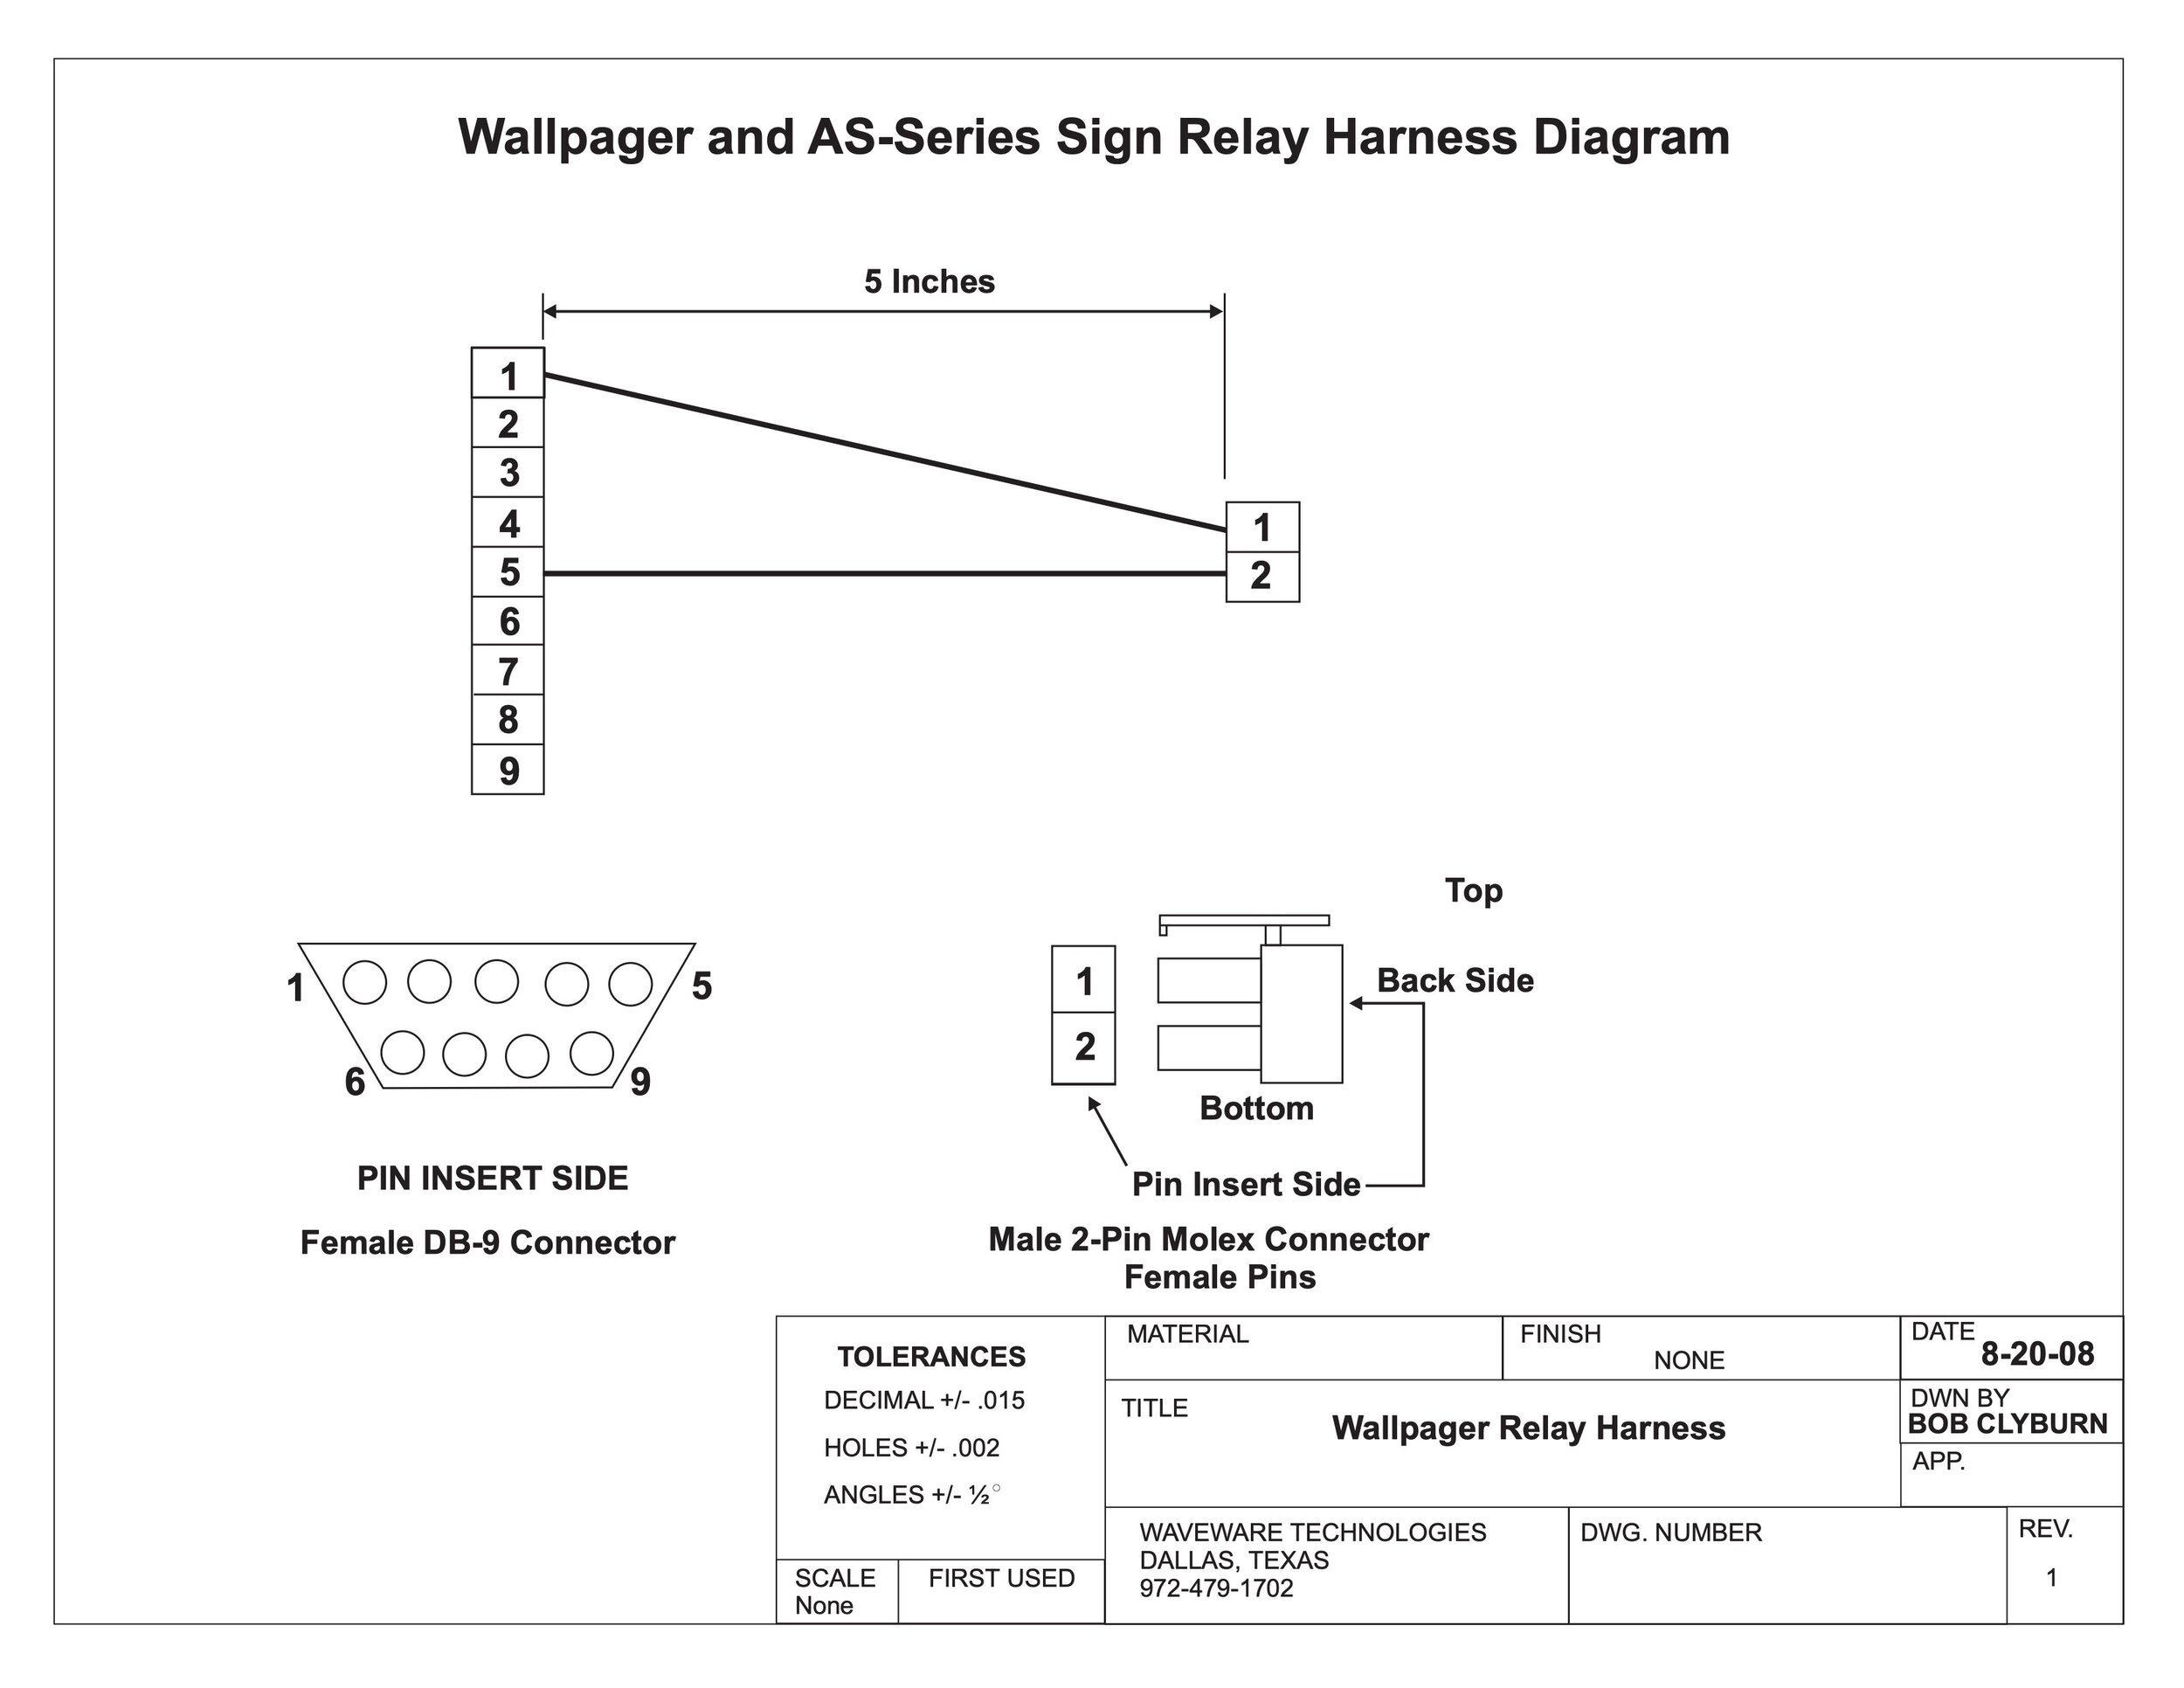
Wallpager Relay Harness Diagram
View fullsize
Wallpager Relay Harness Diagram 2